Michael H While getting in shape you may take before and after photos with your phone. Take a photo, exercise for 1 week. Then take another photo. Did you lose fat or build muscle? One week is enough time to change your body but your transformation could be hard to spot. A person may give up because they don’t notice that their diet and exercise routine is working. People spend a lot of time comparing images. Sometimes you want to spot the difference. Other times you want to show how different the two pictures are.
Image Transitions
On a phone or computer you usually scroll through your photos, seeing one image at a time. You could also start a slideshow. It is a good way to go through all of your photos but you might want to find a better way to compare them. Make the differences more obvious so they are easy to spot by displaying them together. Displaying them side by side means the maximum display size is 50% of your screen. If the images are close together then the right edge of the first image is going to be beside the left edge of the second. The size is reduced and you are comparing different areas of the screen. So it only works well when the differences are fairly obvious. Another method is to stack the pictures.
Fade Out Effect
Slowly transition from one photo to another by changing the transparency. The first image fades away to reveal the second. Then it is reversed. During the transition the foreground image is see through. You see just the first image, both pictures merged together and the second image. The parts of the image that are different change. It works best when there is a transformation. For weight loss pictures you could see the subject inside a larger version of the subject when the larger version is see-through like a shadow. Below you will find the HTML code for the page I used to do the fade out effect. You could copy the code and paste it in a word processor like Notepad. Save as FadeOut.htm. Then open it as an offline webpage
Fade Out, HTML Code to Copy
Morph Into Another Image
Gradually get one image to morph into another. I saw this done with a cow and a horse. Then I used the graphics program GIMP and a plugin called G’MIC to morph before and after photos. The plugin does not come with GIMP. So you may need to download it. Michael H Load two images and paste the second on top of the first as a new layer. Select Filters, G’MIC, Deformations, Morph. Then hit Apply and add some points. Press enter to start the animation. Hit Esc when you are done. You end up with a series of images. Export as a GIF. To improve the transition, copy the images and add them to the end in reverse order. Now the 1st image will morph into the 2nd before morphing back into the 1st. Gain a lot of muscle and it is like watching yourself turn into the Hulk or Bain.
Photo Comparison Slider
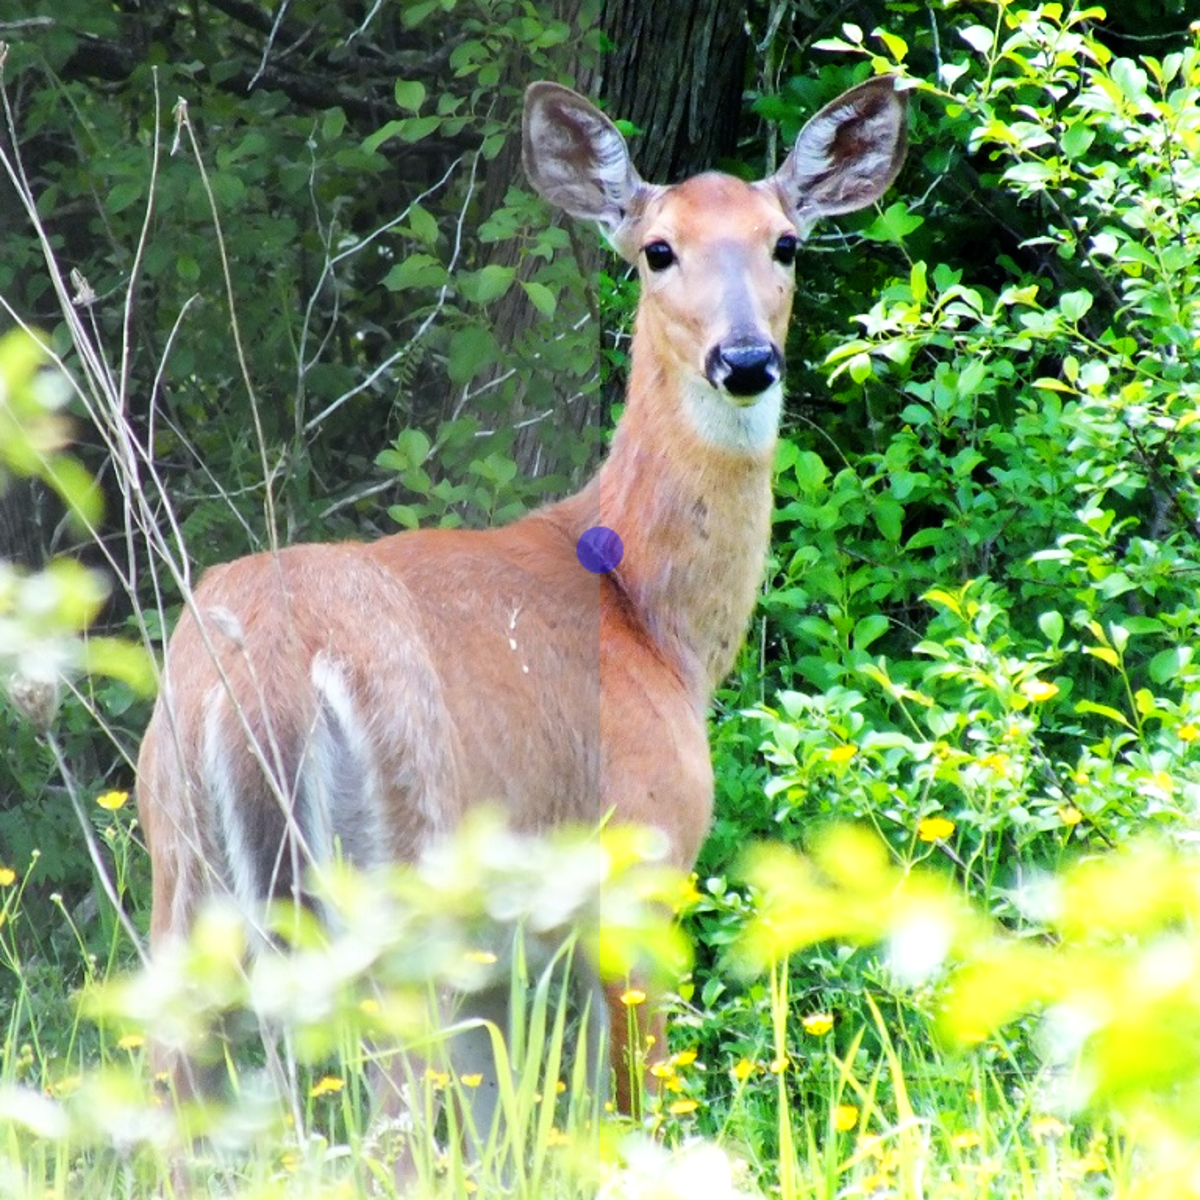
After I started making digital art by pressing a button I wanted a better way to compare the results. So I learned how to make an image slider at W3Schools. Load two images with one on top of the other. Lets call them A and B. You see the left half of A and the right half of B. Slowly move the slider to reveal more or less. The advantage is that you can move the edge to the exact area you want to compare. When looking for differences the pixels are right beside each other. A good example would be moving the slider to the middle of the left eye. Did you notice the blue circle in the first picture? While using a photo comparison slider I did a screen capture. If you were using the slider you would drag the blue circle across the screen. When viewing them separately you might not notice how much better the copy is. Maybe it will inspire you to spend the extra 5 seconds it takes to edit your photos. Check out a working image comparison slider with the option to load your own pictures. It is what I was using when I captured the slider display with the deer photos.
Before and After Images
I made a digital chalk drawing that looks like something a child might make on a school blackboard. It is impressive to me because I wrote a computer program to convert my favorite photos into a drawing or painting. Showing the result does not give you the full story. The after image can be more impressive when it is displayed with the original.
Selfies
You may want to show off or motivate yourself to workout. If the goal is to alter your body then change into something revealing like a pair of short shorts or a bikini. Find a plain background, get into position and take a series of photos. When you are ready, try to copy the before photos. Do the same poses and use the same background. Another option is to erase the background so it is not a distraction.
Filters and Art
When you make an image look better or recreate it in a different style, show the original image and the result. It can be inspiring, educational and more impressive when you see how different they are. Filters and photo effects are designed to alter the original image. Artists and computer programs turn realistic images into art by reducing the realism. Seeing what the picture was based on or how it was made gives you some perspective. One of my favorite images was made by redoing a selfie in the style of my bookshelf. You might think, Wow he made it from that.
GIFs and Videos
On your own webpage you could use CSS or JavaScript to compare the images. If you want to share them in an e-mail or a tweet then you will need to turn it into a GIF or a short video. At the same dimensions and duration videos have a much smaller file size and more colors. Sites like Twitter will loop 60 second videos like a GIF. Michael H You can turn a high quality video into a GIF and a GIF into low quality video. I recommend starting with a video when possible. Another option is to use animated PNGs. They are similar to animated GIFs but they can contain more colors and have a smaller file size. The result looks more like a silent video but you may only be able to play them in a browser like Chrome. On this page I used GIFs to display the animations. The downside is that it reduced the number of colors and increased the file size. A 10 MB video became a 45 MB GIF. I had to reduce the dimensions and number of frames so it was closer to 8 MB. If you quickly scroll through the pictures you might miss the animations. There are two of them. You see the original image transforming into the result.
Highlighting the Difference Between Pictures.
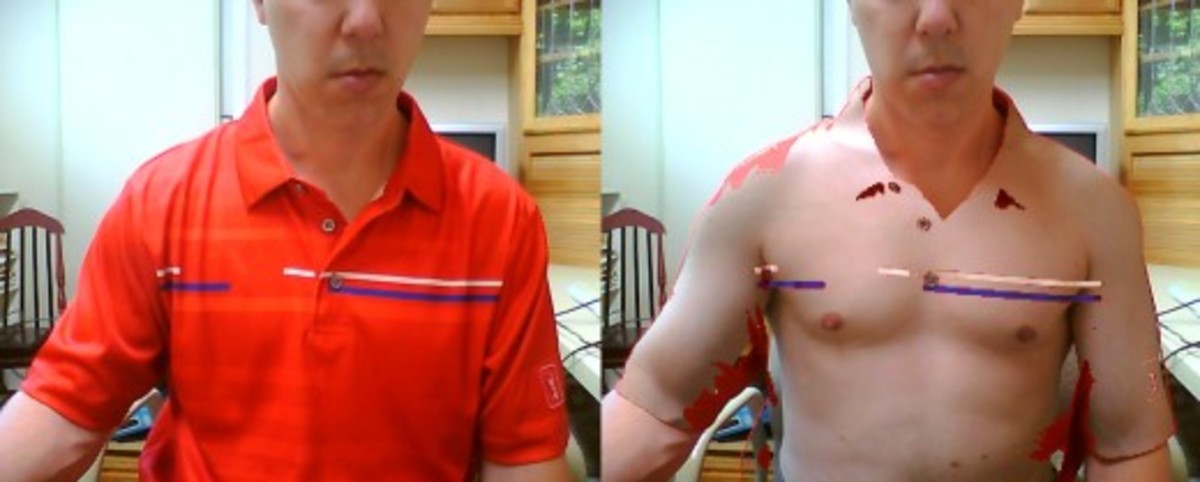
Displaying a single photo at a time is usually the best way to display images. Sometimes you want to compare two pictures or show how different they are. A good way to do that is to display two image at the same time without reducing the size. Slowly transition from one picture to another or use an image comparison slider. Use it to help you notice the difference or to show other people. Save time, use it to educate people or create animated GIFs and videos. I like taking photos, creating image filters, making digital art and doing exercise challenges. Judging the pictures by scrolling through the individual images was difficult. Now I have an easier way to compare them and highlight the differences. Showing side by side images is still the easiest and quickest way to show obvious differences. The photos below show an x-ray effect I made using my invisible filter. Since you see both at the same time there is no waiting. It is also easier to make. The photo comparison slider is my favorite way to compare large images. I like using the fade out effect to create an interesting transition. For small pictures I just do a side by side comparison.
How to Screen Record: Take a Screenshot or Video on …Don’t use words to describe what you see when you can take a picture or video. Using images is faster and easier for you and for the people that will see it. Learn how to record your screen.How to Make GIFs From Videos and PhotosI started making animations while I was learning how to make 3D images. Learn how to make animated GIFs from your videos and photos.How to Make Digital Art From Photos Without DrawingConvert photos to digital art at the touch of a button. You don’t need to manually draw, paint, or type to create the artwork—a computer program can do the hard work for you.How to Become Invisible on Camera Using Invisibility…Would you like to become invisible? I experimented to see if I could see through objects on my webcam by making colors transparent. Learn how invisibility works and how to easily become invisible using an invisibility effect.
This content is accurate and true to the best of the author’s knowledge and is not meant to substitute for formal and individualized advice from a qualified professional. Michael H © 2022 Michael H