Github actions allows you to automate, customize, and execute your software development workflows right in your repository. It is the best way to create and maintain a Continuous Integration/Continuous Deployment (CI/CD) lifecyle for your application. We assume you already have pushed your application to Github repository. Let’s start with the configuration of Github actions.
Step 1 – Create Github Action
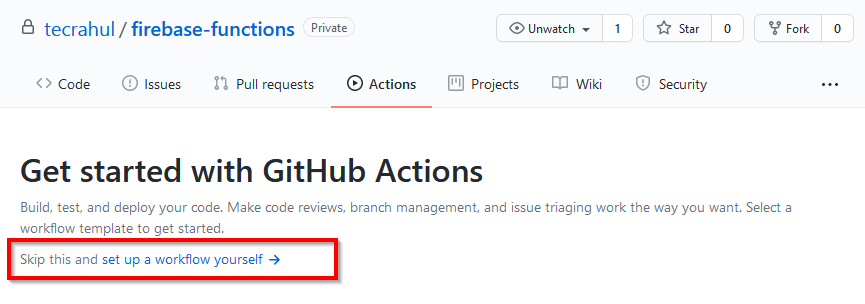
Login to your Github account and access your repository. In your repository click on Actions tab, then click “set up a workflow yourself” link. See below screenshot for reference:
Step 2 – Create a Workflow
Once you click on setp workflow link, this will edit a new file “.github/workflows/main.yml” under the repository. Which contains some default configuration for the Workflow. You will see the newly crated file, something like this:
Step 3 – Customize Your Workflow
Now, we will customize the workflow configuration file based on our requirements. In this step we have breakdown the configuration step by step to make you understand. Even you can skip this step, as the full configuration file is provided in next steps. Now click on Start commit on the right side to commit your new workflow.
Step 4 – Setup Firebase Token
Github actions deploy job need a FIREBASE_TOKEN for the authentication to deploy code on firebase. You can generate a token using firebase cli tools on your system. First, install firebase-tools using npm. Then run the firebase login:ci command on terminal: This will show you link on on your terminal, Open this link in web browser and complete authorization. This will show you a token to use for CI tasks. Example: firebase deploy –token “$FIREBASE_TOKEN” As it is not safe to keep this token in configuration file. Add this token to Github secrets. In your Github repository, Go to Settings > Secrets > New repository secret: Use FIREBASE_TOKEN as name and enter the secret code in value section. Then click on Add secret button.
Step 5 – Final Workflow Configuration
Your final workflow configuration file should look something like this in the text editor: file: .github/workflow/main.yml Now you can commit the workflow configuration file to your repository. This workflow is added to .github/workflows/main.yml. You can change main.yml fielname of your choice with .yml extension. Next, Go ahead and push some changes to your Github repository. This will tirgger the Github action and perform the steps defined in workflow.
Conclusion
In this tutorial, you have learned to build an Angular project using Github actions and deploy to firebase hosting. You can also visit Github actions documentation for more details.