For the longest time, I was confined to a one-monitor setup. Sure, I could split the screen with two windows if I really wanted to but that’s simply not the same as having two monitors. Having two monitors in a home or office environment is quite straightforward: purchase the monitor, route the cables, configure your display settings. It’s a bit trickier when you’re constantly on the move or even if you’re just working out of a local Starbucks. Instead of constantly alternating windows, wouldn’t it be nice to have a second monitor at your disposal? This is where portable monitors come in. Let’s take a closer look into their form factor and why exactly they make for a great travel companion. Today, we will be reviewing the Dragon Touch S1. For the longest time, I’ve only ever seen ads for one portable monitor company. Originally backed on Kickstarter, the DeskLab monitor was the only brand I had ever known. Why didn’t I get one of these units? A quick internet search will yield quite a few fraudulent and delivery concerns surrounding this brand. I won’t go into details as that’ll be outside the scope of this review, but that’s essentially the gist as to why I didn’t go through with that route. Instead, the more economically priced Dragon Touch S1 has a few key features that make it quite the attractive contender.
Key Technical Specifications
For the most part, the technical specification across portable monitor brands do not vary by much. They are all equipped with quite an extensive set of ports. The only exception is 4K monitors, which will carry a higher price tag. For the average user, I highly do not think a 4K portable monitor is necessary. The battery will be a trade-off if your laptop is going to be used as a power source. With that in mind, let’s get into the unboxing.
Receiving the Box
Very minimalistic packaging, but you’ll notice that they advertise a one-year screen guarantee plan. I won’t be able to test out the warranty procedure as that would require long-term usage. However, it’s good to know that this isn’t concealed in some fine print. It’s readily visible for your reference. My personal advice would be to use a permanent marker and write the date of purchase next to this warranty. In the event that you do experience any issues, you won’t have to worry about checking whether you qualify for the warranty. The box is just slightly bigger than the monitor itself, which you’ll be able to see for yourself in just a minute.
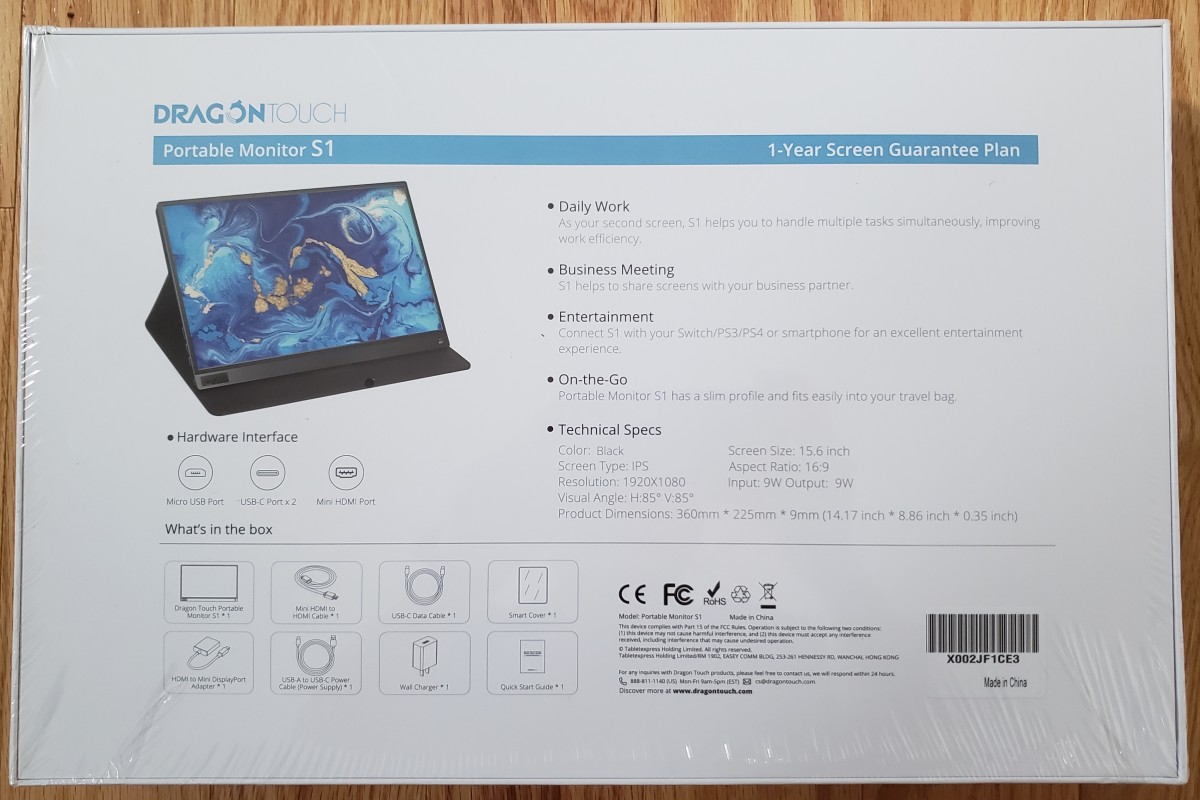
Flipping the Box Over
Over on the back of the box, we’re presented with another set of key specifications, contents, and features. Instead of just talking about them, we’ll take a look shortly.
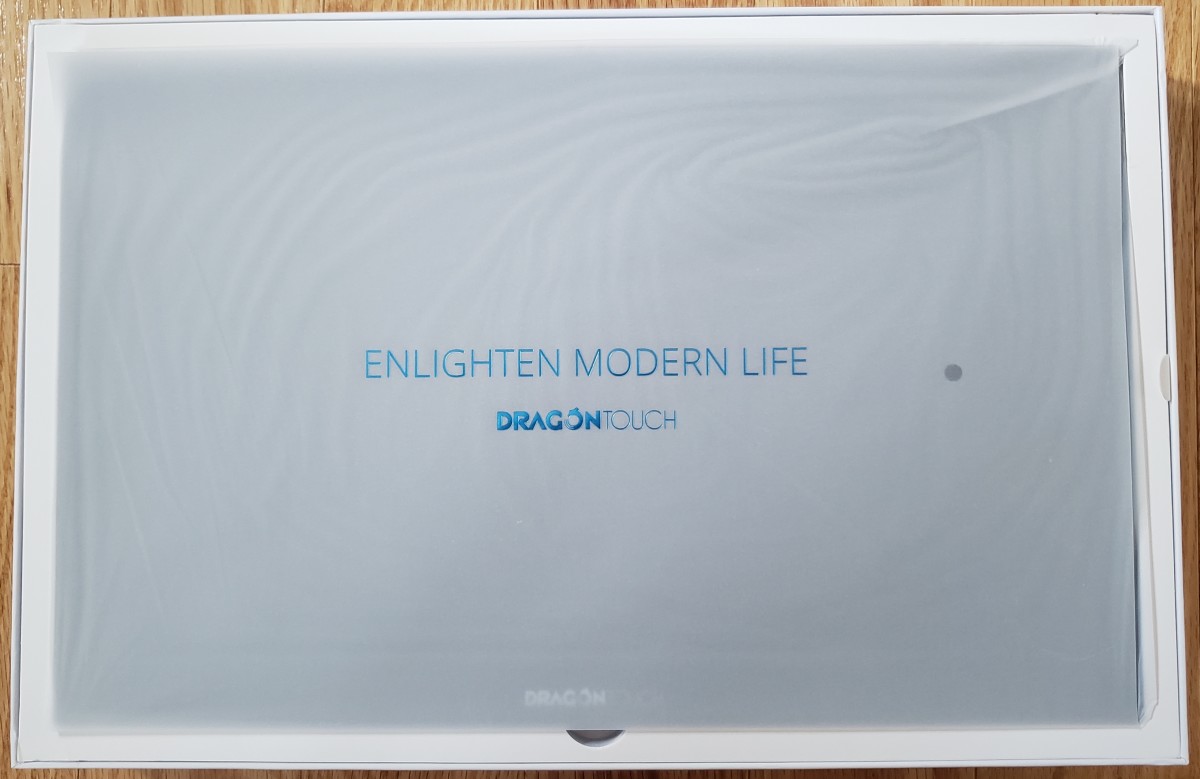
Opening the Box
I like this efficient use of space. As soon as I lifted the cover off, I’m greeted with the monitor. All of the other contents are safely and efficiently packed underneath.
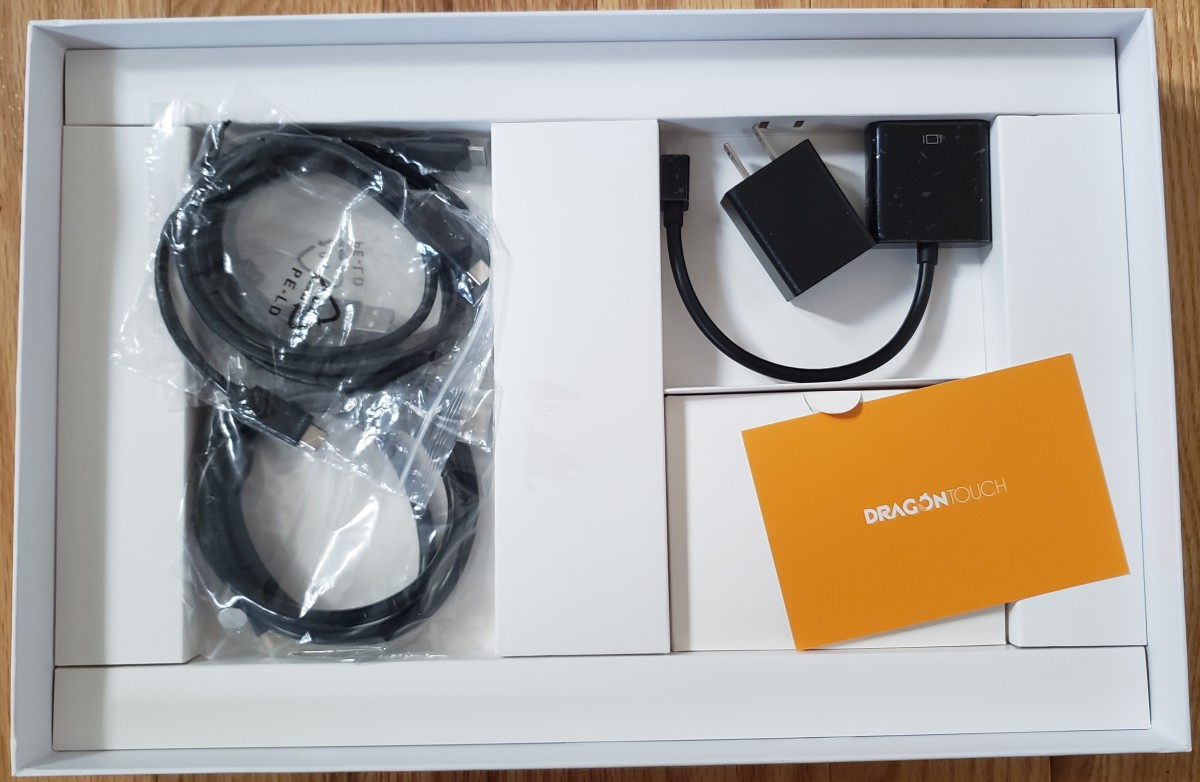
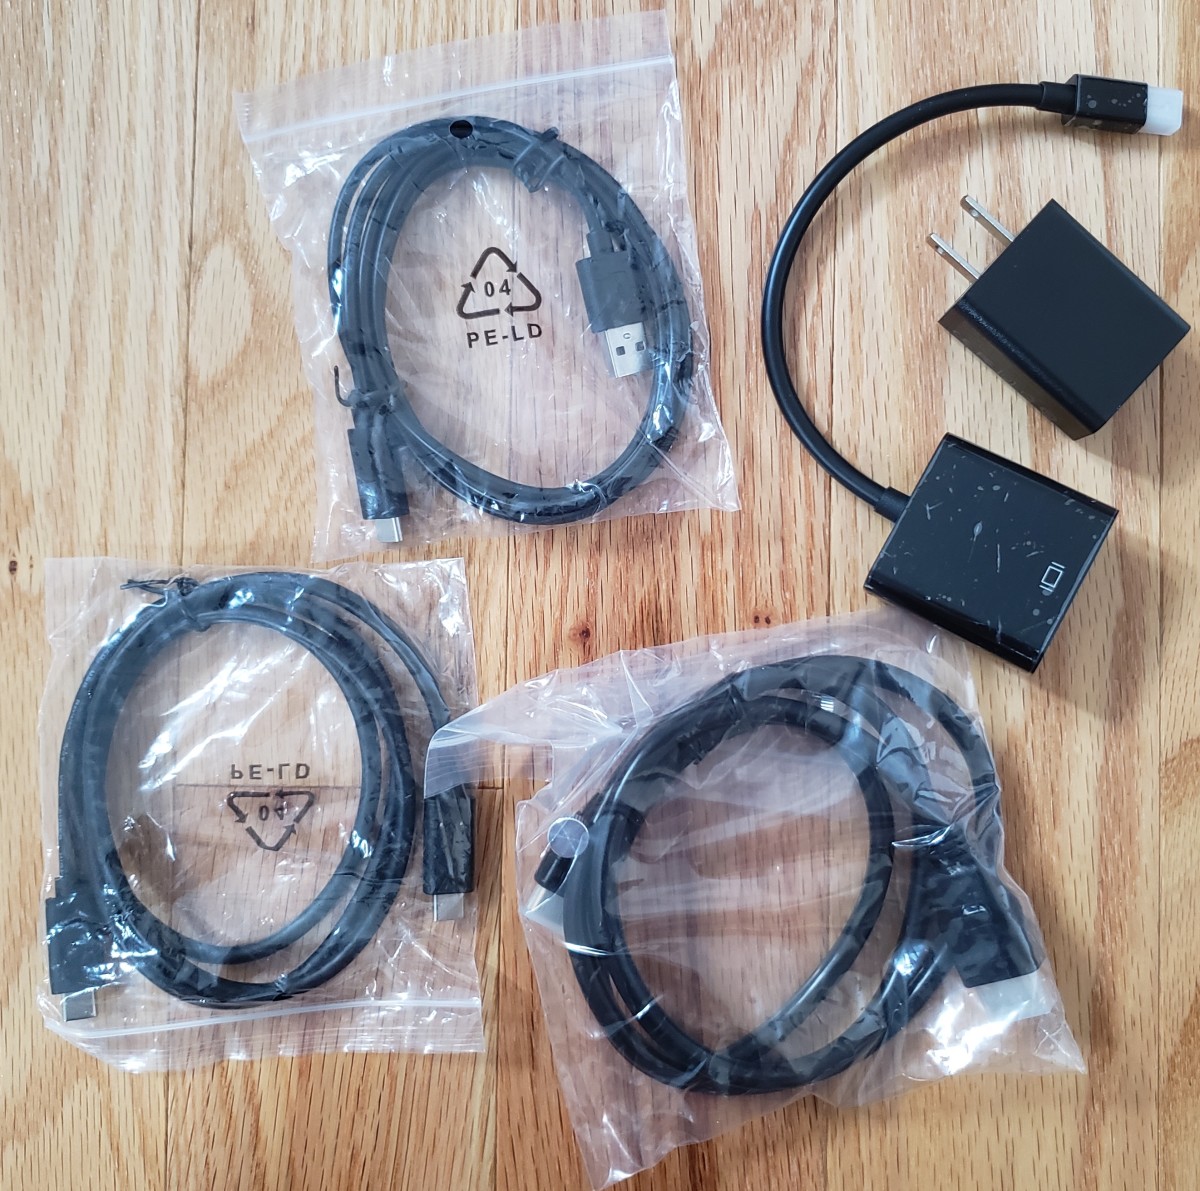
Accessories
I’m loving this already. One of my main concerns was the need to purchase additional cords for connectivity. I’m glad to see that Dragon Touch didn’t cut any corners. They didn’t include just one cord, but several to ensure that any device can be hooked up to this portable monitor without any issues. This is especially great if you own one of the newer MacBook Pro’s. We’re talking about the 2016 and later models where they only feature USB Type-C Thunderbolt ports. Specifically, Dragon Touch included the following:
HDMI to mini-HDMI USB-C to USB-C HDMI to mini-Display Port USB-A to USB-C
I’d like to think that the choice of these cords were not included by random. In fact, I believe that they were specifically tailored for the 2013 and later MacBook models. For example, the HDMI to mini-HDMI cable is used for the 2013 to 2015 models where a standard sized HDMI port is present. If this is occupied due to another monitor, then the cord for the mini-Display Port can be used. For the newer models, you’ll rely on the USB-C to USB-C cable. Since these newer models feature either two or four Thunderbolt 3 ports, only one cable is necessary. Upon a closer analysis of this, I dare say the inclusion of these particular cables were really well thought out. If another power source is required, Dragon Touch has provided a courtesy power brick. Naturally, this wouldn’t be necessary if your device is capable of delivering power via one of the USB-C ports.
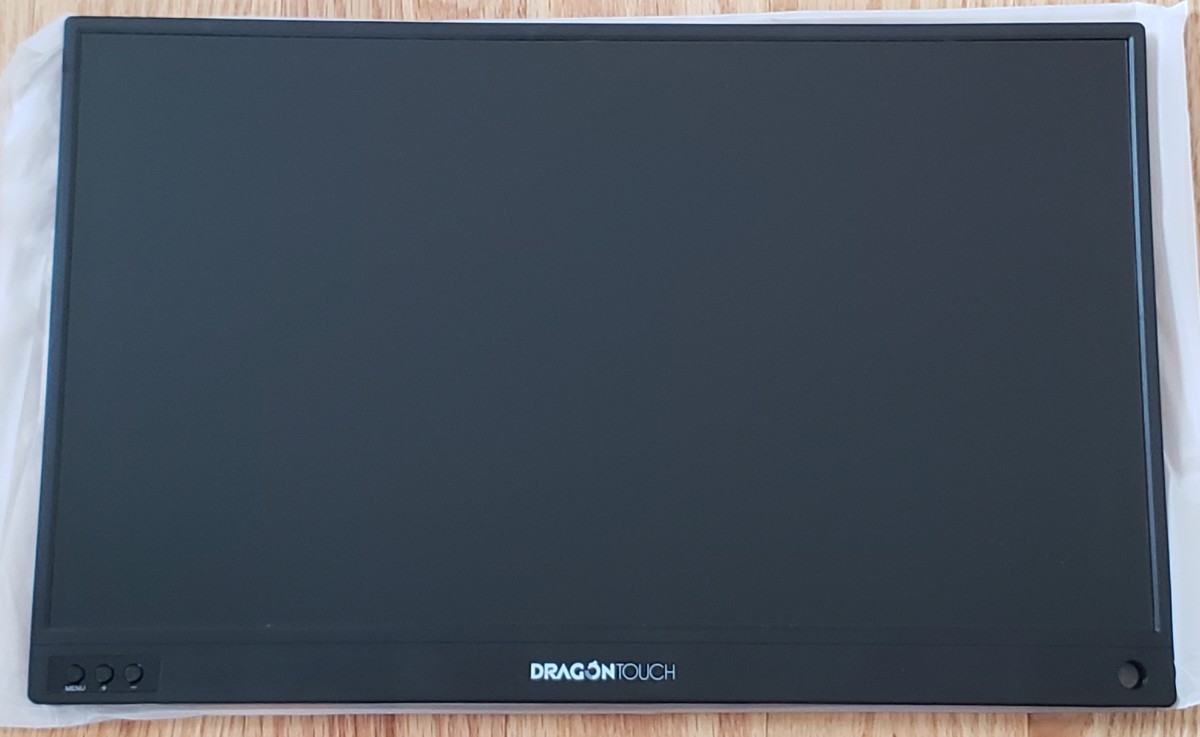
Monitor: Front View
There’s not too much that catches my eye here. Overall, the bezels are quite thin on three of the sides. The bottom bezel is a bit thicker, which I consider normal. This is simply because the controls and wiring for the ports have to fit somewhere. While the bezels are plastic, this gets a little more interesting over on the back of the portable monitor.
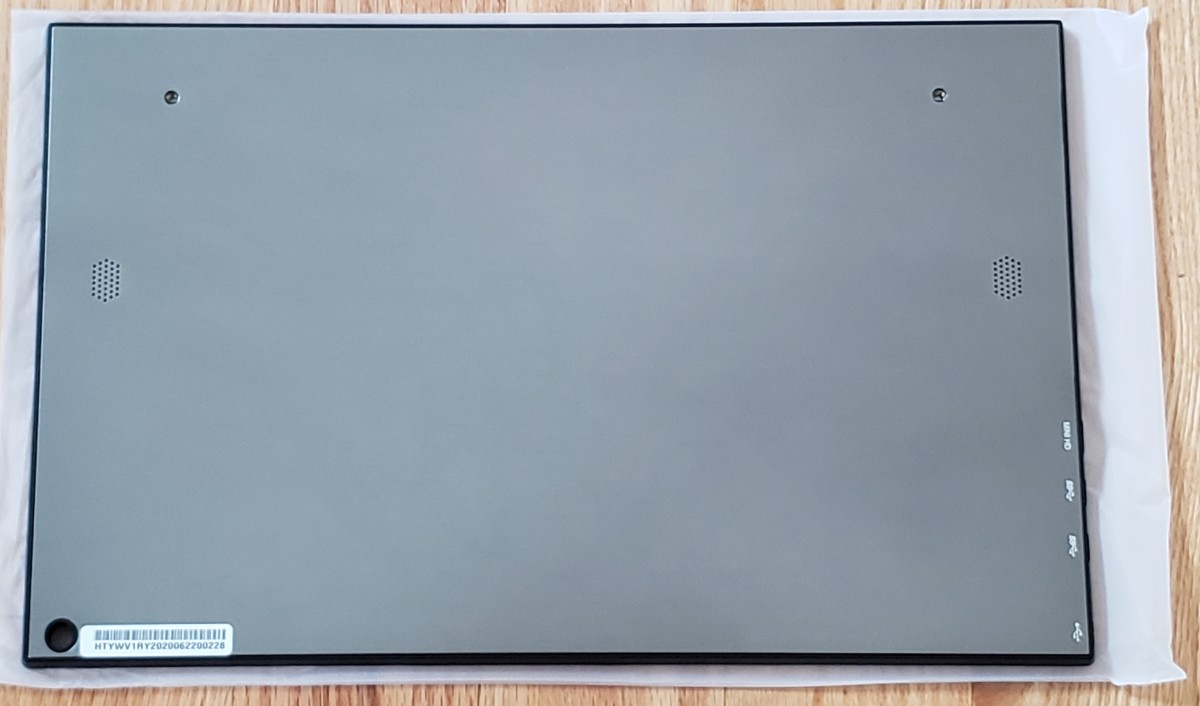
Monitor: Back View
Unlike the front, the back is an aluminum panel. There are a few key points of interest here. The first is the set of screw holes near the top. These are designed to secure the faux leather folio case in place. I thought this was rather interesting since this isn’t a clip design. The monitor isn’t being clipped into the case. Rather, it’s secured in place by two sets of screws. We’ll look into this after a shown a photo of the case attached. Just below the screw holes are the left and right speakers. These are probably by far the worst speakers I have ever used. I would avoid using them at all costs. The reason is two-fold. The first is that the speakers are positioned rather high over on the back of the monitor. When you prop the monitor up with the leather case, this muffles the sound. Not only are the speakers facing away from you, but they are also covered up. It would’ve been nice if the speakers were embedded in the bottom of the front bezels. I would say the direction of the speakers alone will provide a boost in sound quality. The second reason as to why I would avoid using these speakers is simply the poor overall sound quality. The sound feels really compressed. If you watch a movie, the background music and foreground voices will be quite jumbled. I simply did not have a good experience using these speakers. If Dragon Touch ever releases an upgraded version of this monitor, I would like to see the speakers removed completely. The value added simply isn’t worth it. Over on the bottom right side, you’ll find the labels for the ports. In case you are not that familiar with the ports, this will provide a good reference. Finally, the bottom left corner consists of a hole. Admittedly, I was a bit confused by this until I realized that it’s designed for a cable lock to snake through it. This was pretty well thought out in my opinion. If you’re ever out in public such as a library or study room, this would provide an additional safeguard.
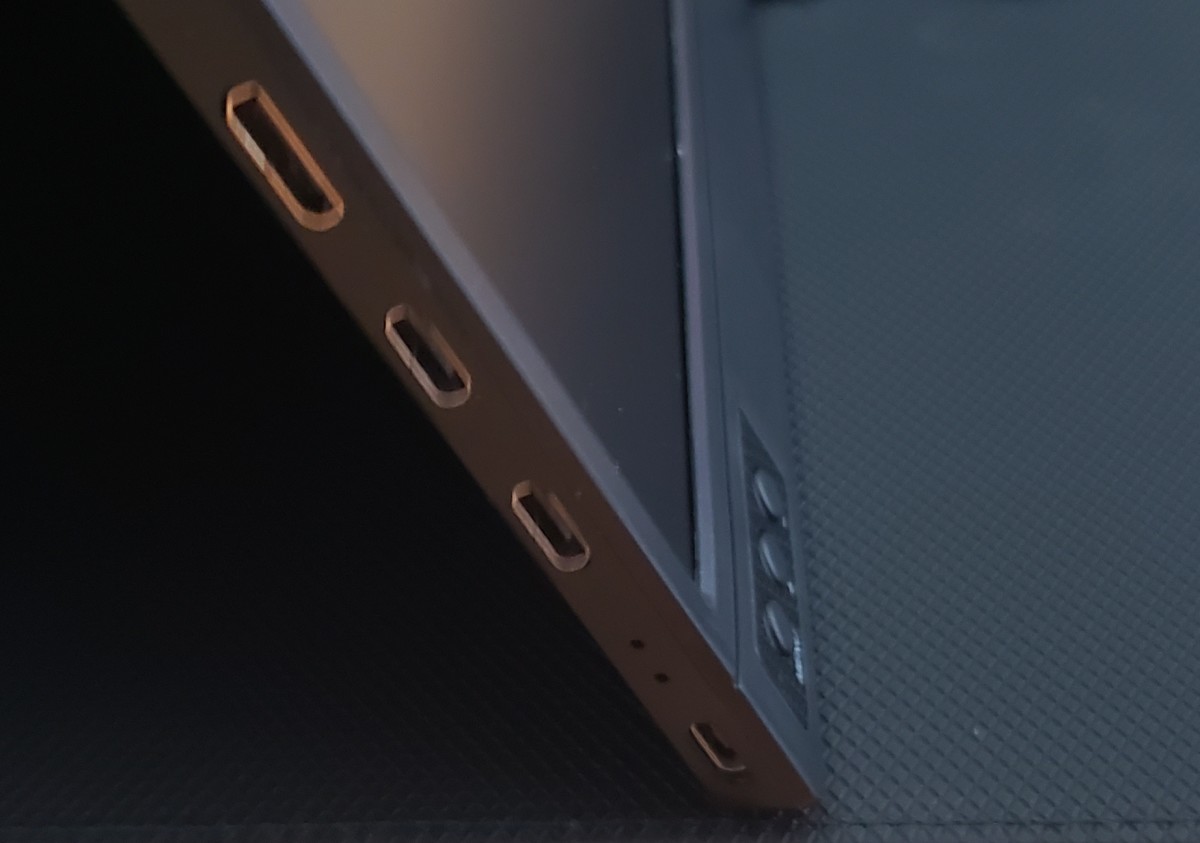
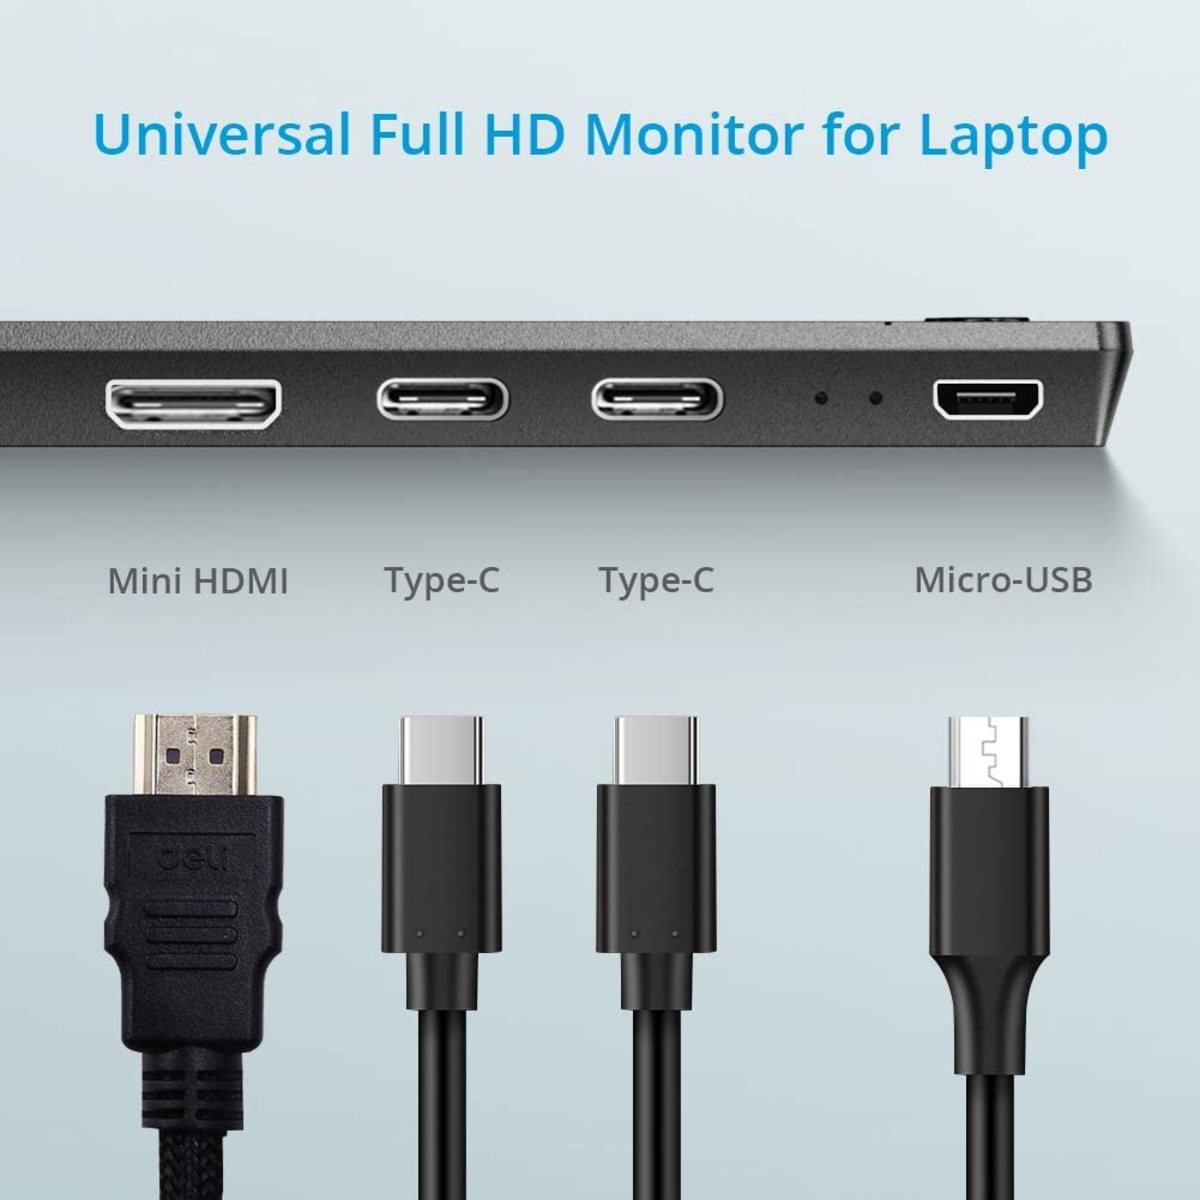
Monitor: Side View
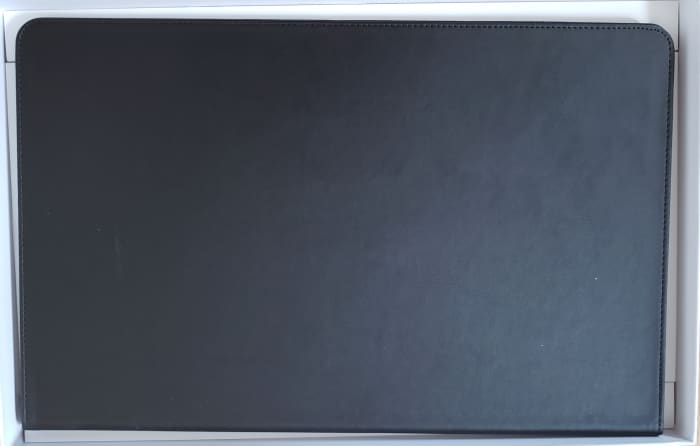
It was a bit difficult for me to capture a close up so I included a follow-up photo legend showing the placement of the ports. Taking one look can immediately show you what makes this monitor so great. For the mini-HDMI port, Dragon Touch included a dongle so that you can use the standard size HDMI cord. Rather than having to find your own dongle, I’m really glad to see that this was included. Unfortunately, using the mini-HDMI port would require you to use the micro-USB port as a power source. The downside here is essentially the use of two ports. However, this can be easily solved with the USB Type-C ports. If your computer’s USB-C port is capable of power delivery, then you only need one cord. I highly recommend going this route whenever possible simply for the convenience of carrying one less cord when working outside or in a public setting. I am not entirely sure why Dragon Touch included two USB Type-C ports. The only thing I can think of would be to connect a smartphone along with a laptop. This way, you would toggle between the inputs rather than constantly changing cords. In any case, I’m glad that they included more ports rather than less. My photo shows a sneak preview of the leather case that doubles as a stand. Let’s take a closer look to see how this works. This cover feels nice. The outside has a leather feel with a rubberized inner lining. This design does make sense. The rubber helps to prevent the actual monitor from skidding. It also helps cushion out the delicate screen. For the outside, I highly doubt the leather is real. However, the real stitching is a nice touch for faux leather. Looking at the opened-up view, you’ll notice two holes on the right. This cover comes with two screws to secure the monitor in place. I’m quite surprised that screws are being used rather than some other mechanism. I expected to see some kind of sliding mechanism with plastic teeth to click lock the monitor in place. This would also provide a quick release in order to remove the monitor from the cover. This doesn’t appear to be the case here. What I liked was actually what I didn’t see. I’m so glad to see that this cover didn’t rely on corner elastics to secure the monitor in place. I personally dislike any form of elastic straps as they tend to weaken and deteriorate over time. This design with the screw holes is definitely a unique concept. It’s actually quite simple as it doesn’t require adding any holder or attachments to the leather cover itself. Over on the left side, you’ll notice three small flaps. These are designed to secure monitor in an upright position. Sadly, this design only allows for three tilting angles. The workaround would be to find an angle that works for you and put down a paperweight at the base of the monitor. I wish more than three tilt angles were offered, but I guess this is a minor constraint.
Performance
The video quality was quite difficult to capture, but let’s take a look with a video of one of my favorite YouTubers, Mark Wiens. I love watching his channel so naturally, I have his latest video playing on one of my secondary monitors. The first thing to note is that you’ll observe a yellow tint. This isn’t a defect with the monitor. This is actually produced by Night Shift, which is a blue light filtering feature. If I were to turn off Night Shift, this monitor will appear to be much brighter. With that in mind, there are a few key points I’d like to discuss.
- Pixelation When working with documents, this isn’t really noticeable. If you’re reading PDF files or composing documents, this monitor will get the job done. However, the pixels will be more noticeable when you watch videos. This typically occurs for high contrast and bright scenes. I wouldn’t really say that this is a dealbreaker. It’s highly unlikely that you’ll be focused on identifying the pixels throughout a movie.
- Sharpness This was great. If you focus on the leeks in the dish or the subtitles, you’ll notice that the corners and edges are quite sharp. I haven’t detected any distortions. I was quite impressed with the overall clarity and picture quality.
- Brightness This monitor also gets quite bright. Unfortunately, I do not have a light sensor at the moment so I’m going to try and be as objective as possible. Visually comparing the brightness of the Dragon Touch S1 against my Samsung monitor and MacBook Pro 15", I dare say you’re not going to notice a huge difference. In terms of the absolute brightness, the portable monitor feels brighter than my MacBook Pro. Since I do have light sensitivity, I can immediately feel the strain on my eyes with brighter monitors. If I were to crank up the brightness on both the portable monitor and my MacBook Pro, the former is brighter. For most, you’ll likely be using settings in a comfortable range. In the event that you do need to crank up the brightness, at least the portable monitor can be pushed to its limits.
- Color Accuracy This is definitely assessed by eye. For me, I tend to look at how vibrant or muted the colors are. For the most part, the colors are vibrant only if you do not use Night Shift or some other kind of blue light filter. When I turn Night Shift on, the colors immediately felt as if they were muted. These differences seemed more noticeable on the portable monitor as opposed to my MacBook Pro or Samsung 27" monitor. Aside from these four considerations, I didn’t encounter any other issues or major flaws.
Verdict?
Priced at a fraction of DeskLab and other major brands, the Dragon Touch S1 delivers (both physically and in performance). When you make a purchase, you can expect to actually receive the product. This monitor is also about half the price as compared to other brands such as ASUS while delivering equal or similar specifications. This is definitely difficult to beat. If you’re always trying to stay productive on the move, then a portable monitor would be recommended. Given the extensiveness of their accessories, you can rest easy that this is a single-step solution. After purchasing this monitor, you won’t have to worry about making additional purchases for required cords, dongles, or power supply. © 2020 Theo