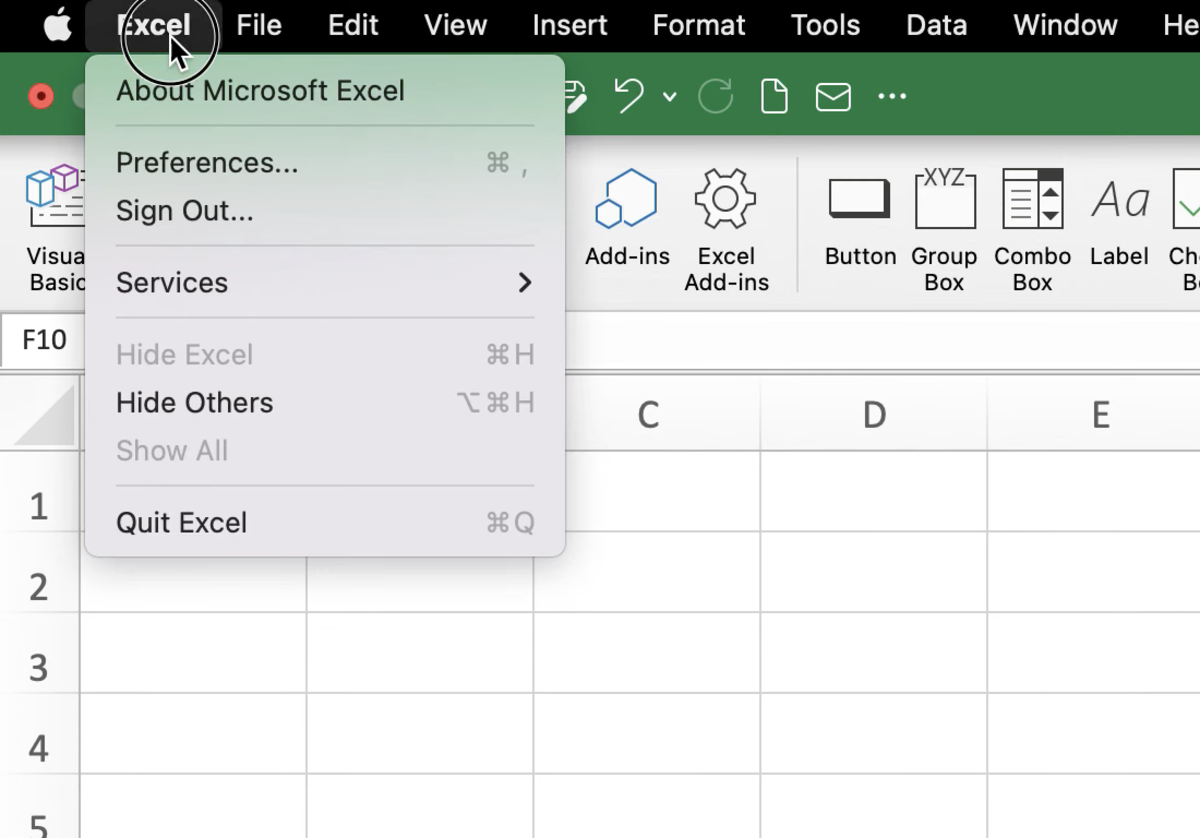
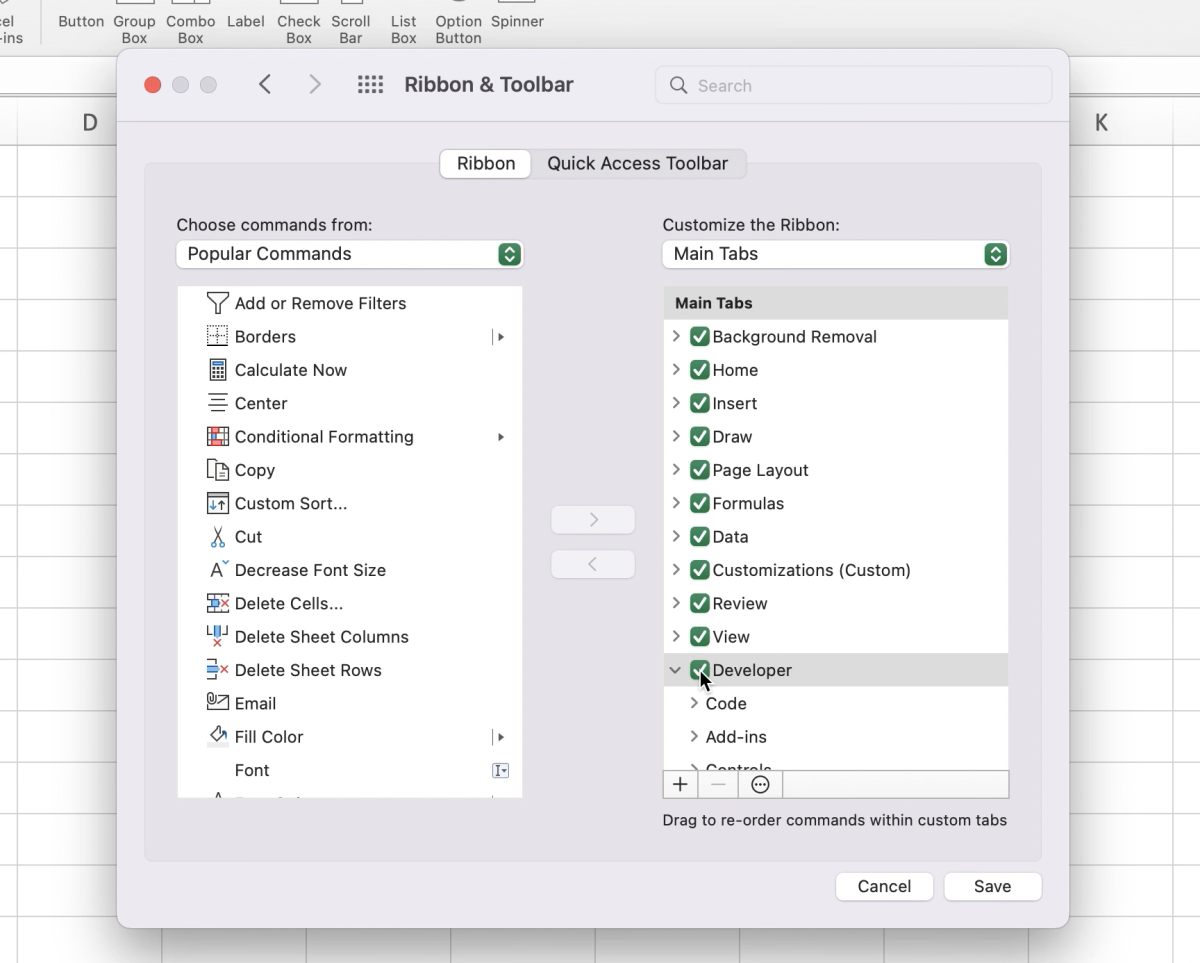
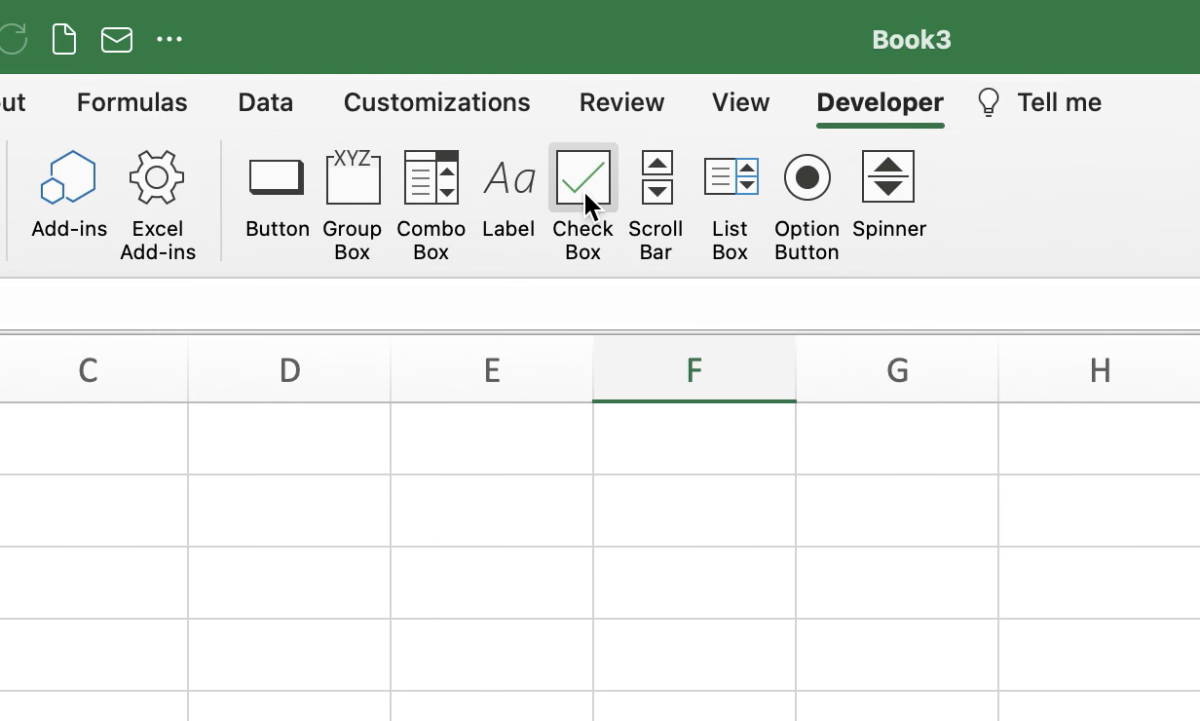
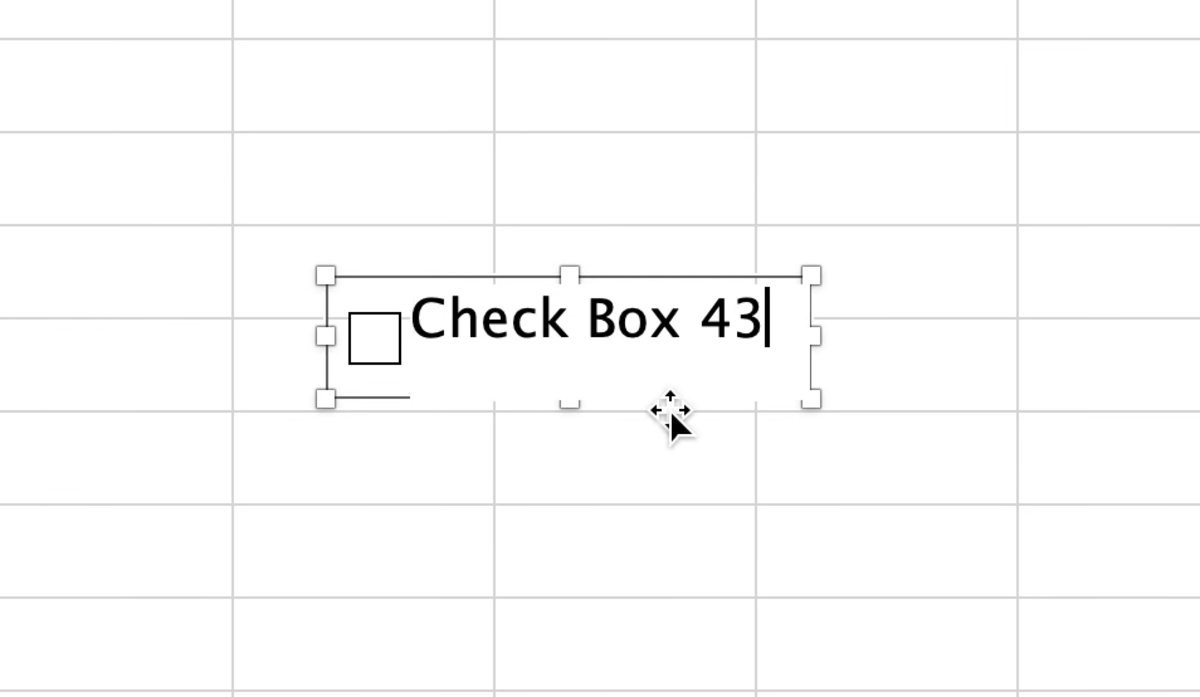
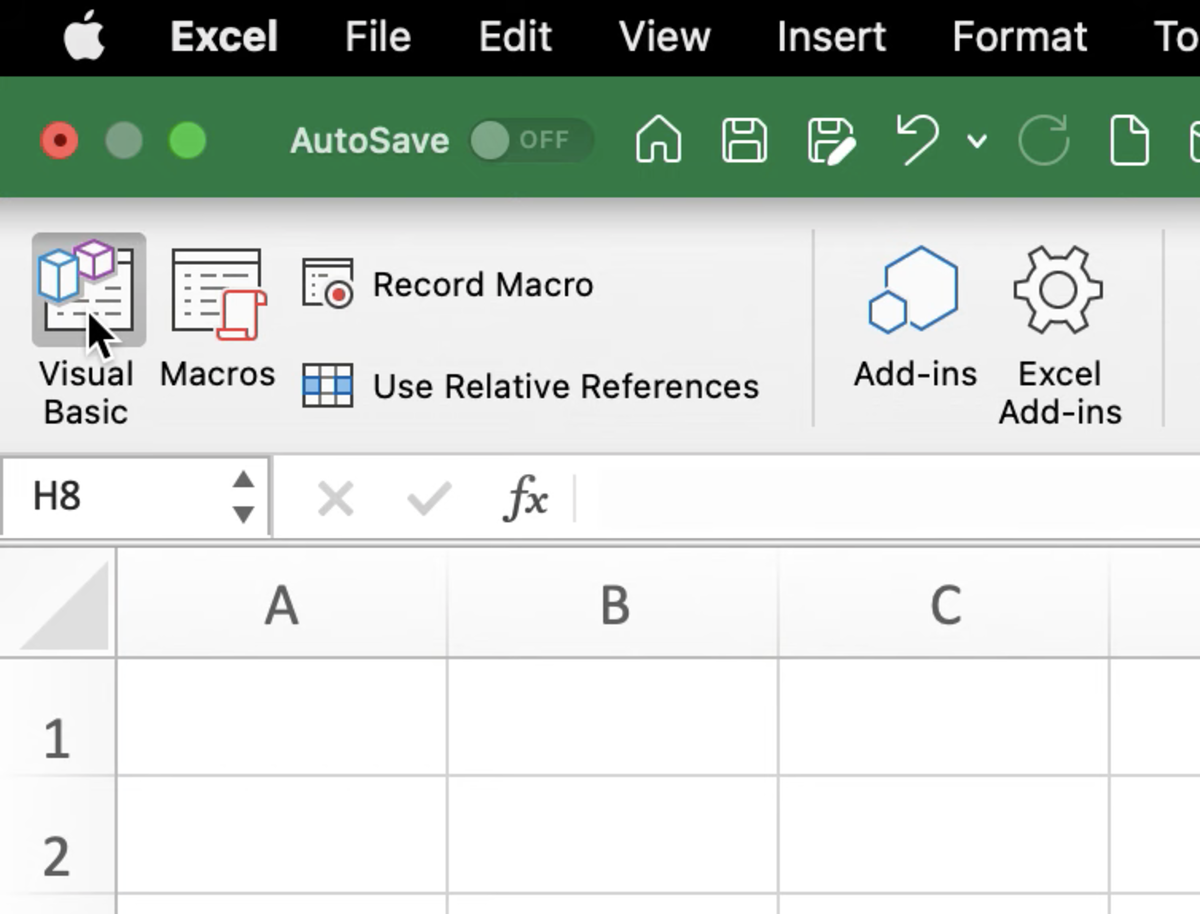
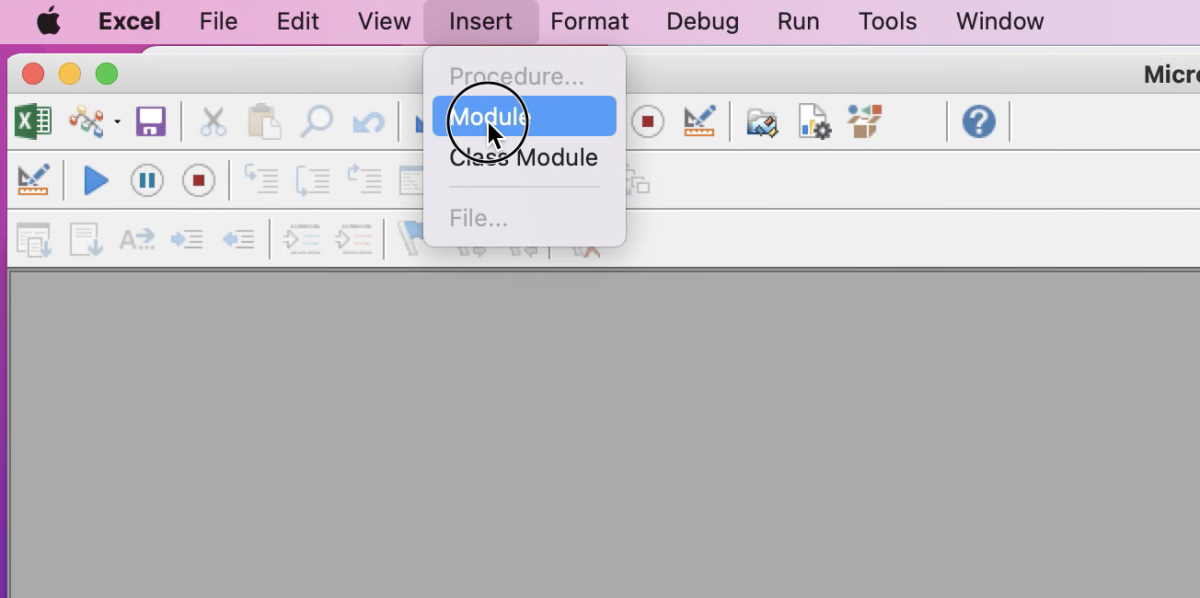
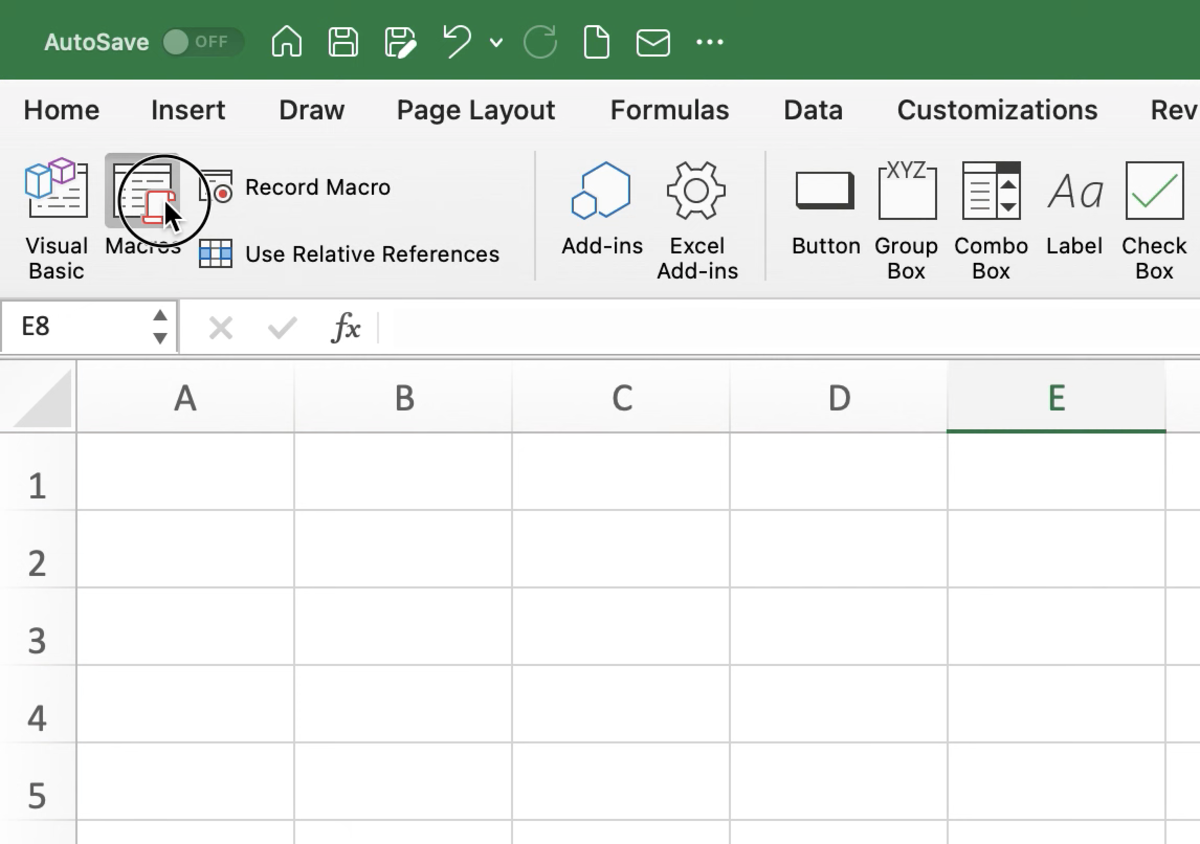
So, instead of assigning the checkboxes myself, I found a macro to do it for me. I will go through all of the steps that were taken to assign checkboxes to cells. If that’s not good enough, I have a video posted at the end of the article as well. The first step in the process is making sure you have the developer tab activated. Since I’m using a Mac I will go through enabling the developer tab in that system. If you are running a Windows system, you can figure out how to get the developer tab to display here. Click on the Excel tab in the menu area and select preferences. Select the ribbon and toolbar options. Find the empty checkbox in the main tabs section and check that box before clicking the save button. Now that the developer tab is available, click on and select the checkbox option to insert it into the worksheet. Checkboxes come with text, but my preference is usually to have a blank checkbox. So. I usually delete this text. This is the point where I would normally assign the checkbox to a cell and be on my way. I would normally go to the formatting option and have the cell attached to the cell that it is in or the cell that needs to be affected for a process. This time I’m adding VBA code and running that code so the checkbox will auto-assign after the macro is run. To get the code in we need to select the Visual Basic editor button under the developer tab. Select the insert new module option. After the new module appears, copy and paste the code below inside that module.
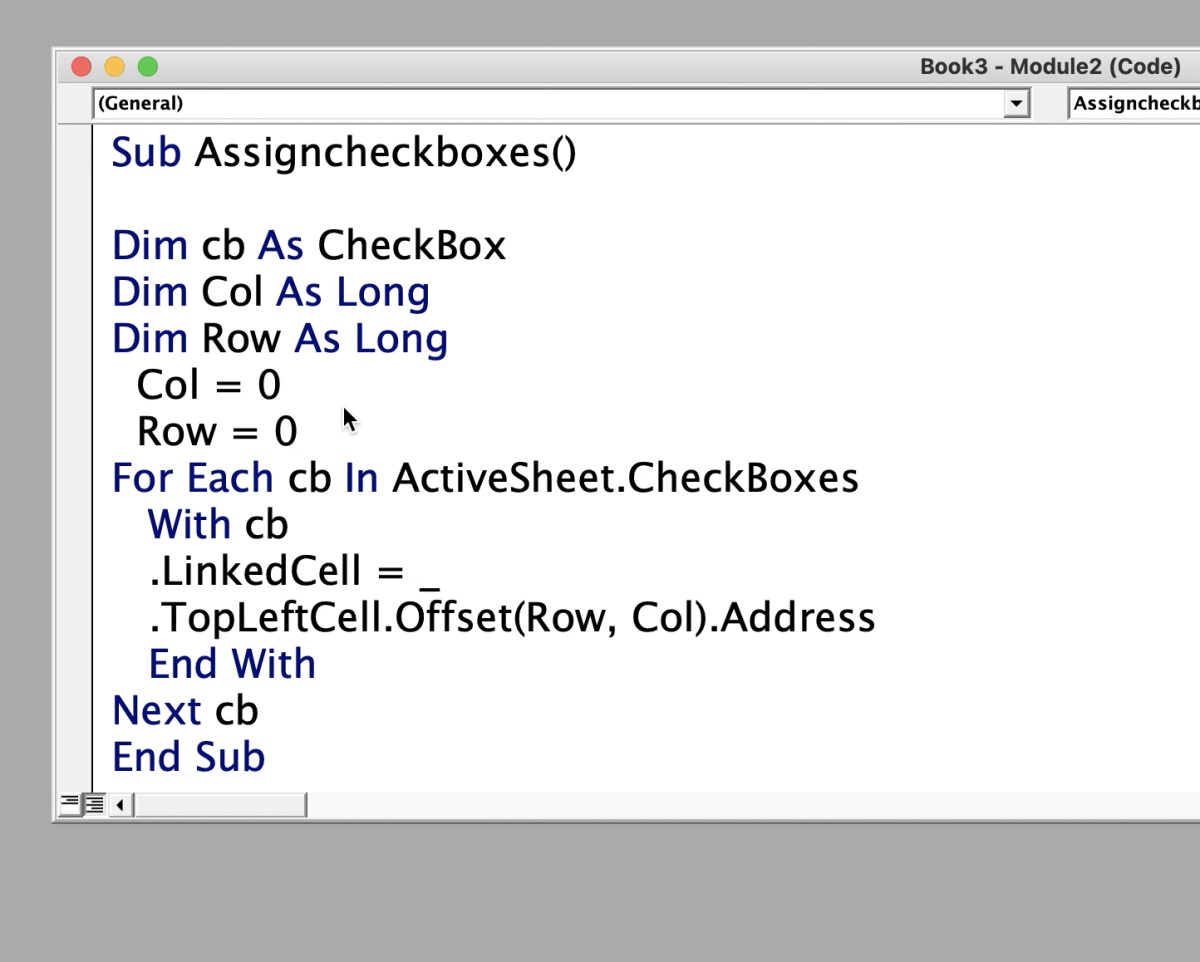
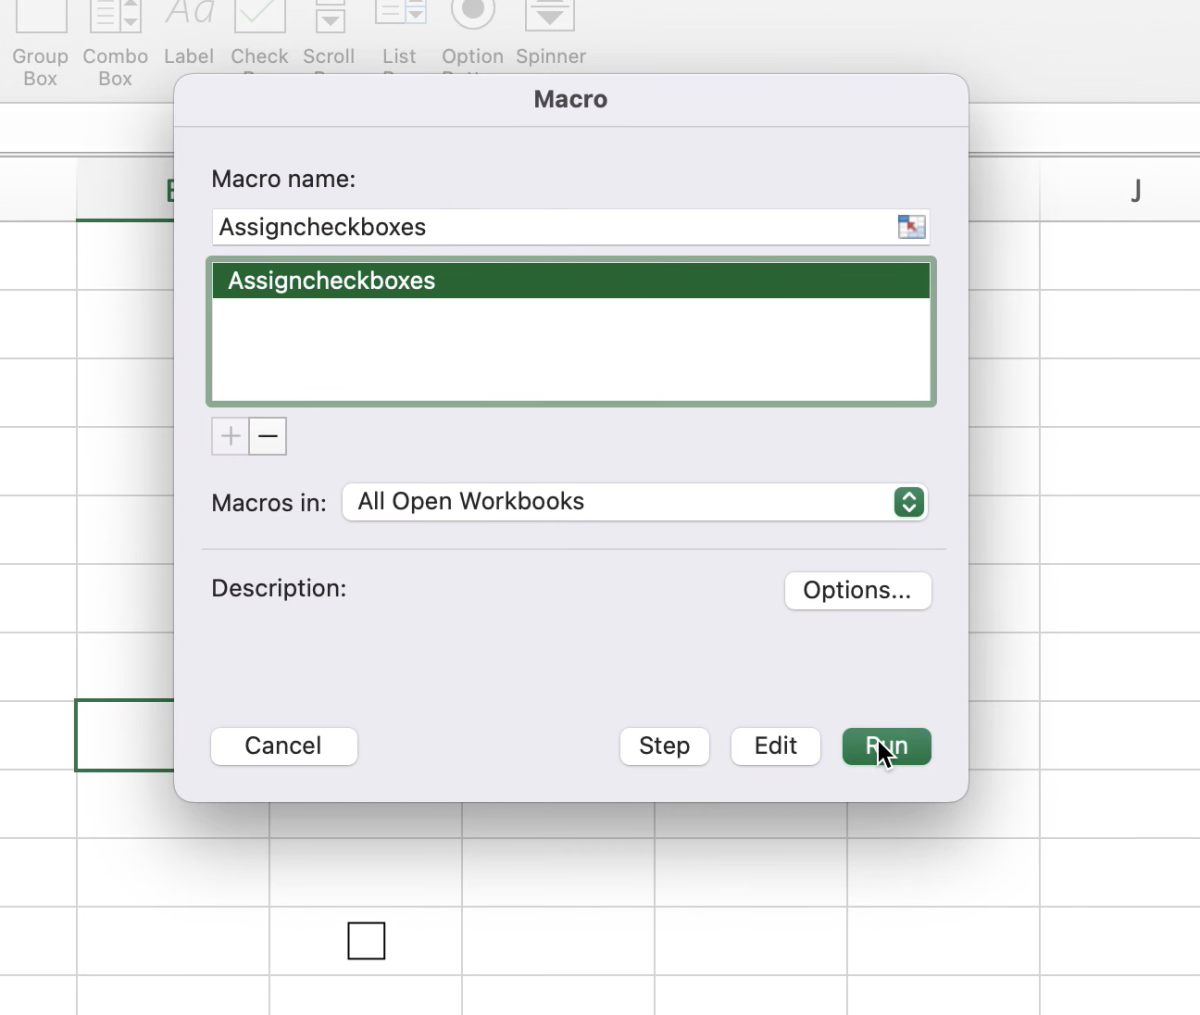
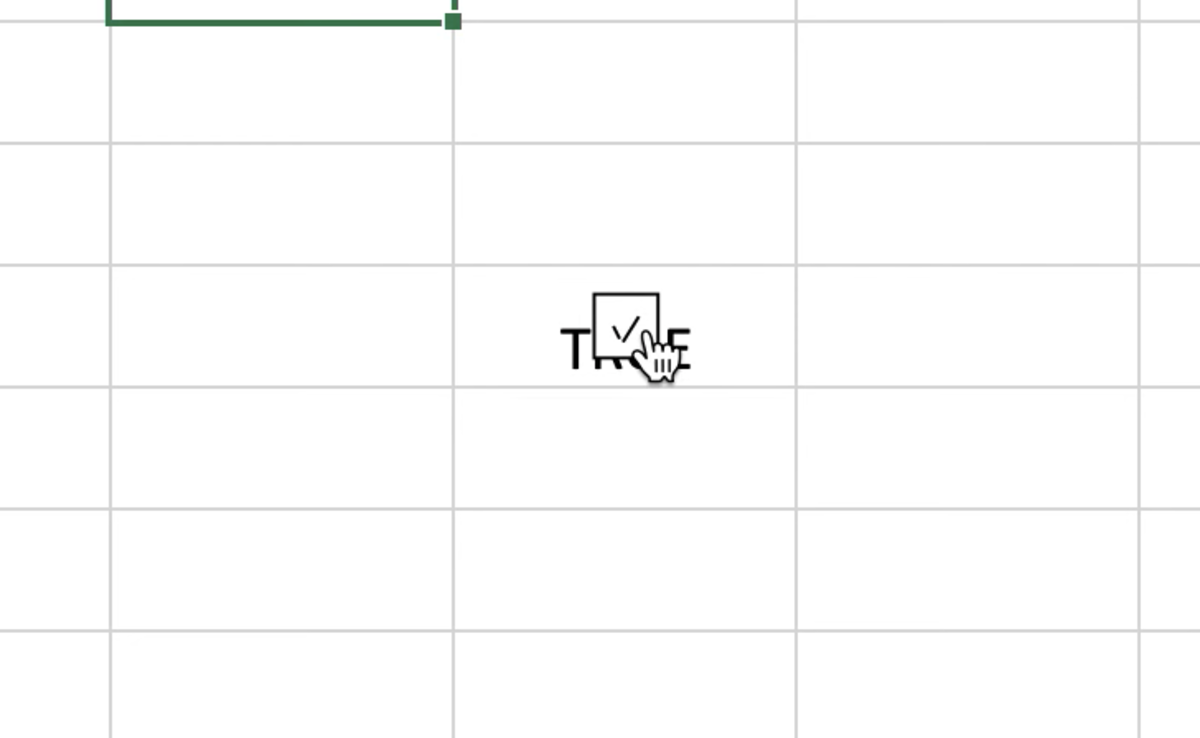
Sub Assigncheckboxes() Dim cb As CheckBox Dim Col As Long Dim Row As Long Col = 0 Row = 0 For Each cb In ActiveSheet.CheckBoxes With cb .LinkedCell = _ .TopLeftCell.Offset(Row, Col).Address End With Next cb End Sub The most important part of the above code that you may need to change to your preferences is the row and column lines. Think of the checkbox as the origin and the row and column variables as the X and Y axes respectively. Change the position of the cell where you want the checkbox results (True/False) to appear. For example, if you needed the cell with the result to be one column to the left but on the same row, you replace Col = 0 with Col = -1. Currently, these settings are marked at zero and can be changed if you would like to create an offset. Select the run button from the Visual Basic editor to run the program or run it from the workbook with the next few steps. Navigate back to the workbook and click on the macros button. Select the macro that was just created followed by clicking the run button. After clicking on and off of the checkbox a few times I found the maco worked properly. Be sure to save the Workbook as a macro-enabled workbook so that the macro can be run again in the future. If celled are deleted by accident the code can be rerun to reset the cell result positions.
Assign Checkboxes to Cells Video Tutorial
This content is accurate and true to the best of the author’s knowledge and is not meant to substitute for formal and individualized advice from a qualified professional. © 2022 Joshua Crowder