Set Up Auto-Login for Windows 7
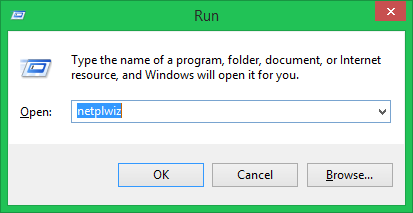
Here are the steps to enable auto login for the Windows 7. Step 1 – Open run window (WINDOW + R) and type netplwiz and hit the Enter key. This will open the user accounts window.
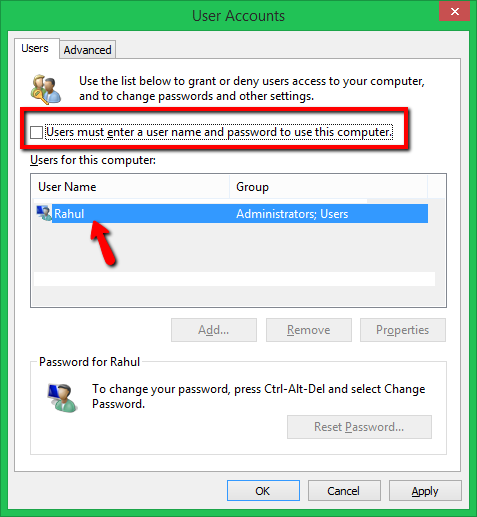
Step 2 – You will see the list of account. Select the account you want to enable auto-login and then uncheck the box before “Users must enter a username and password to use this computer” and click OK. See the below screenshot:
Step 3 – Now this will prompt username and password of the account you’d like to automatically log in. Click OK to apply changes.
All done. Reboot your Window system and check if the account is auto logged in on start.