Activate the Developer Tab
To have access to the tools that allow you to create a button, you must enable the developer tab on the Excel ribbon. If you will need to do this if you want to follow along and complete each step. To learn how to add the developer tab, open this link in another browser tab or view the video below.
How to Add the Developer Tab in Excel
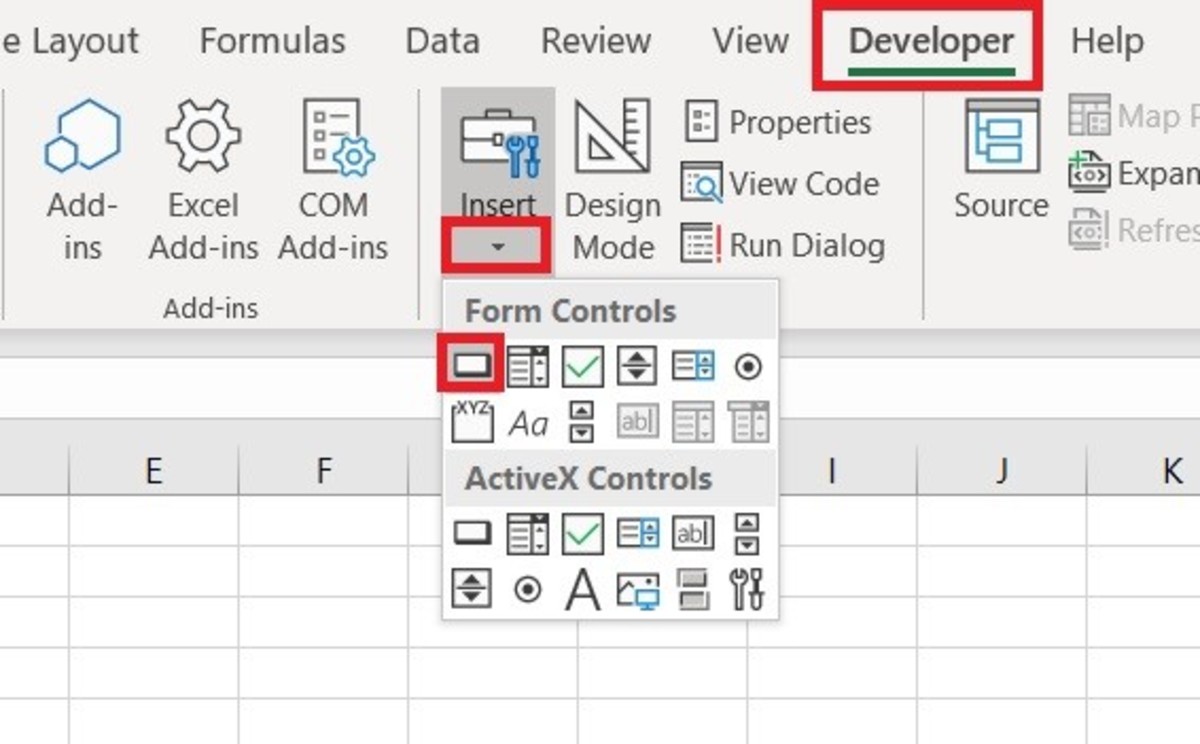
Select a Button a to Add to the Spreadsheet
To add a button to the spreadsheet, click on the developer tab in the ribbon. Navigate to the controls section and select the insert button. Choose the button in the upper left-hand corner of the form controls section, as shown in the illustration below.
Trace the Button Size
Immediately after the button is clicked, you need to outline a square of a rectangle with your cursor to complete the creation of the button. This will determine the size and location of the button. To do so, left-click on your mouse and hold the button while you draw your shape. Once this is complete, a new window will appear.
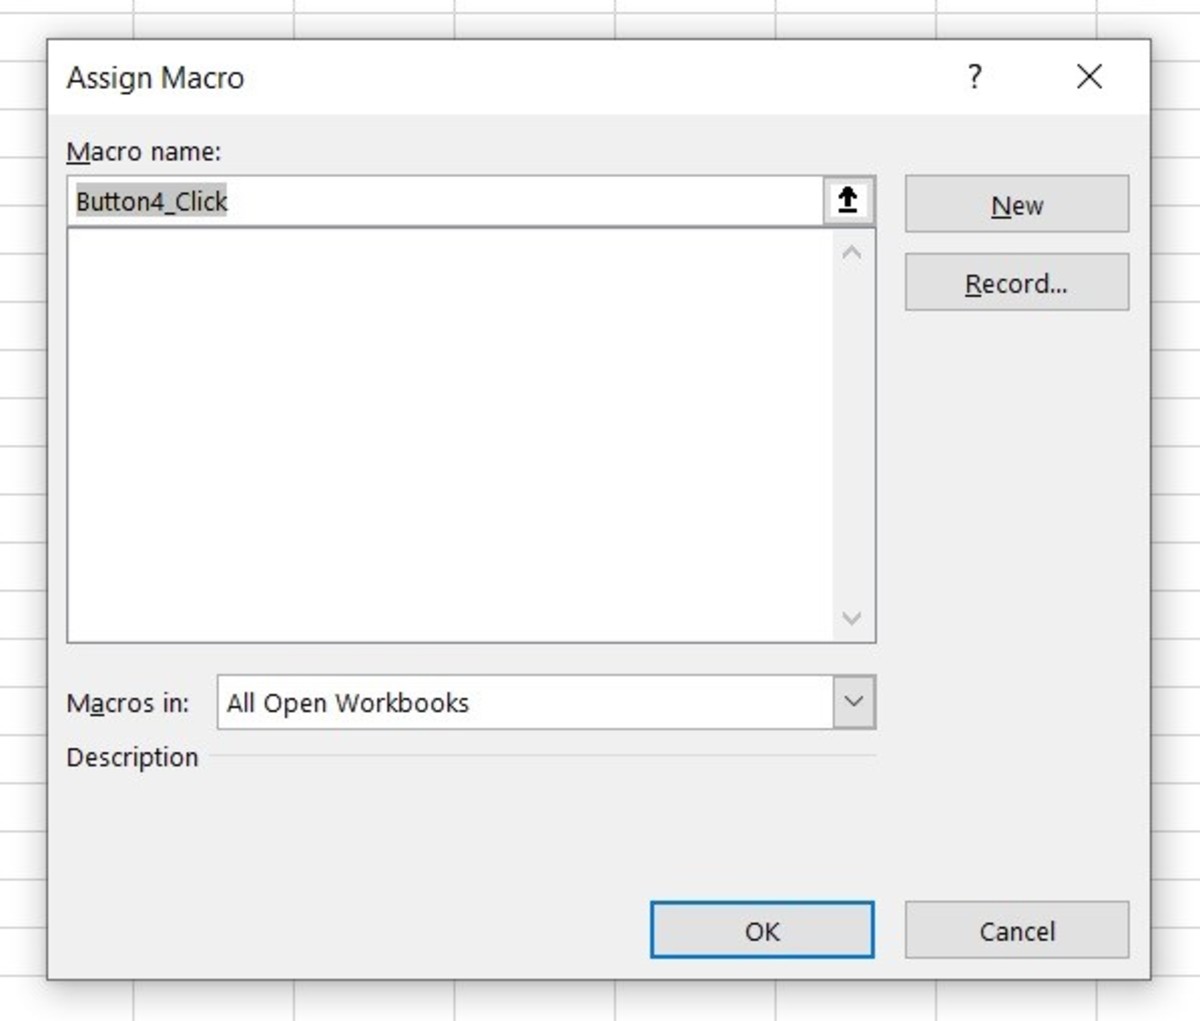
Assign Macro Code to the Button
After the assign macro window appears, choose a name for your macro and select the new button. Doing so will open the Microsoft Visual Basic for Applications window. Here you can add the code located below that will activate the windows calculator application. Make sure that you keep the first line of code where your button name appears and disregard the first line of code below. Sub OpenCalculator() Application.ActivateMicrosoftApp Index:=0 End Sub After the code is inserted into the Visual Basic application, the Visual Basic window can be closed.
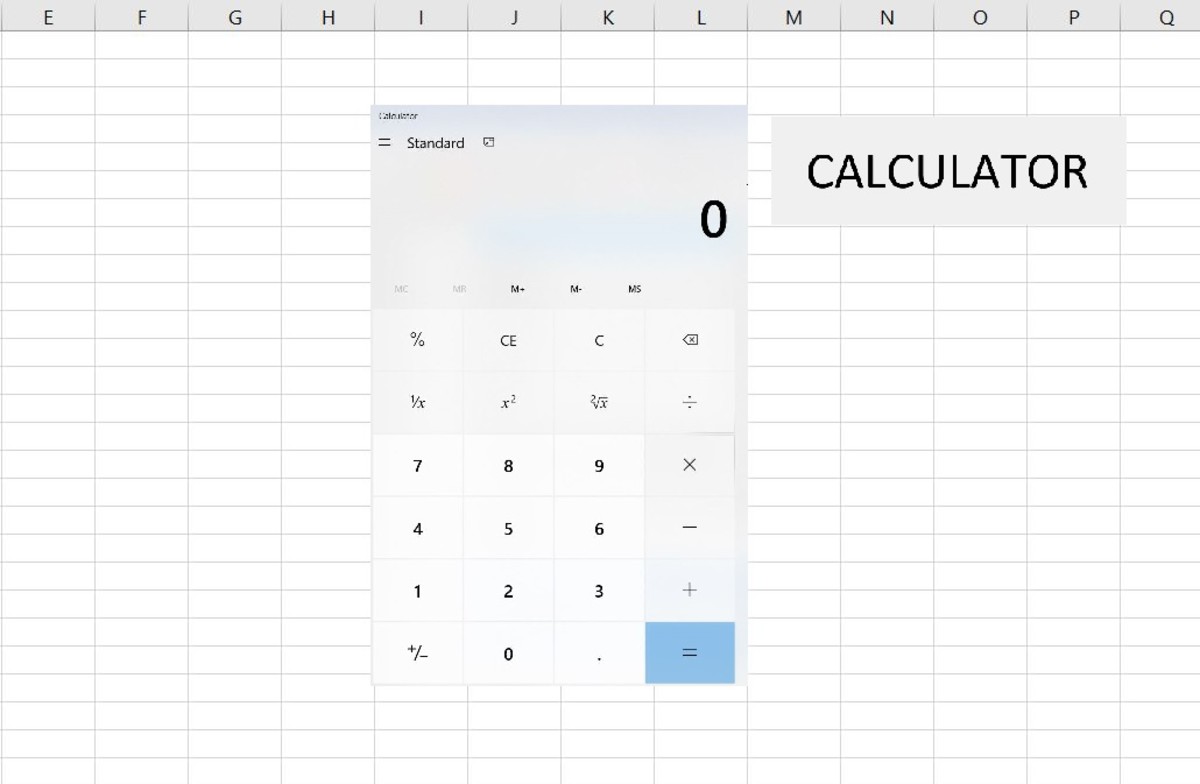
Changing the Label of the Button
To change the label on your button left click on the default text in the button, and your cursor will appear in the button, allowing you to edit. For this example, I’d like to change the name of my button label to Calculator so people know that it will call up a calculator. To change other properties of the button, right-click on it and choose format control. This will give you all of the design tools available to change the text design of the button and make other property changes.
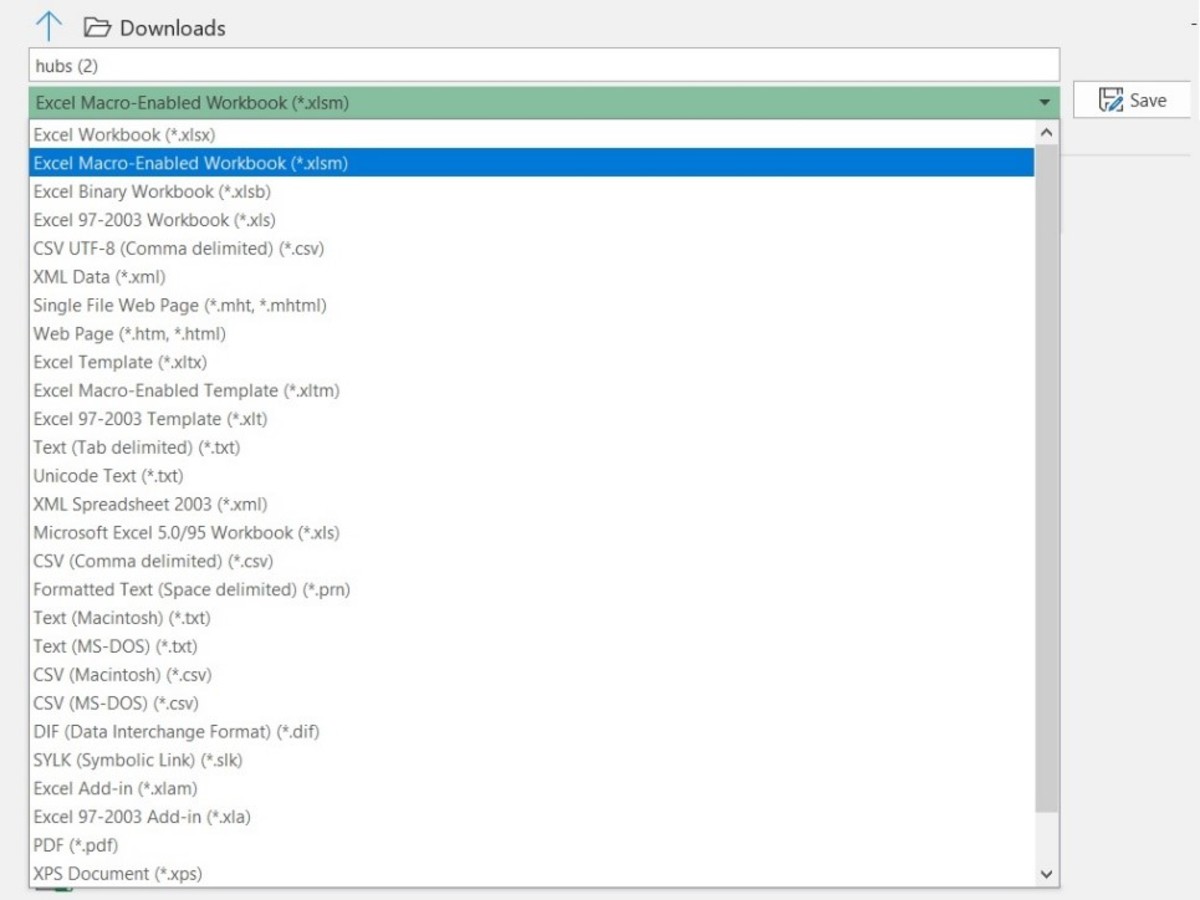
Saving the Excel Workbook as a Macro-Enabled Workbook
In order for the assigned macro to function, the workbook must be saved as a macro-Enabled Excel workbook. To do so, click on the file tab and select save as. You can see an example of this selected highlighted in the illustration below. When saving, make sure you save the workbook with the selection outlined in red in the illustration below. This content is accurate and true to the best of the author’s knowledge and is not meant to substitute for formal and individualized advice from a qualified professional. © 2019 Joshua Crowder