So, in this article, we will discuss the installation of the Apache web server and how to secure it after installation on Debian 11.
Requirements
Before installation, you must be logged into the Debian System with access to all sudo privileges. We also recommend completing the initial server setup on newly install Debian 11 systems.
Step 1 – Installing Apache on Debian
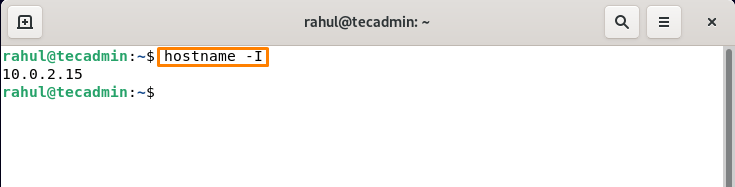
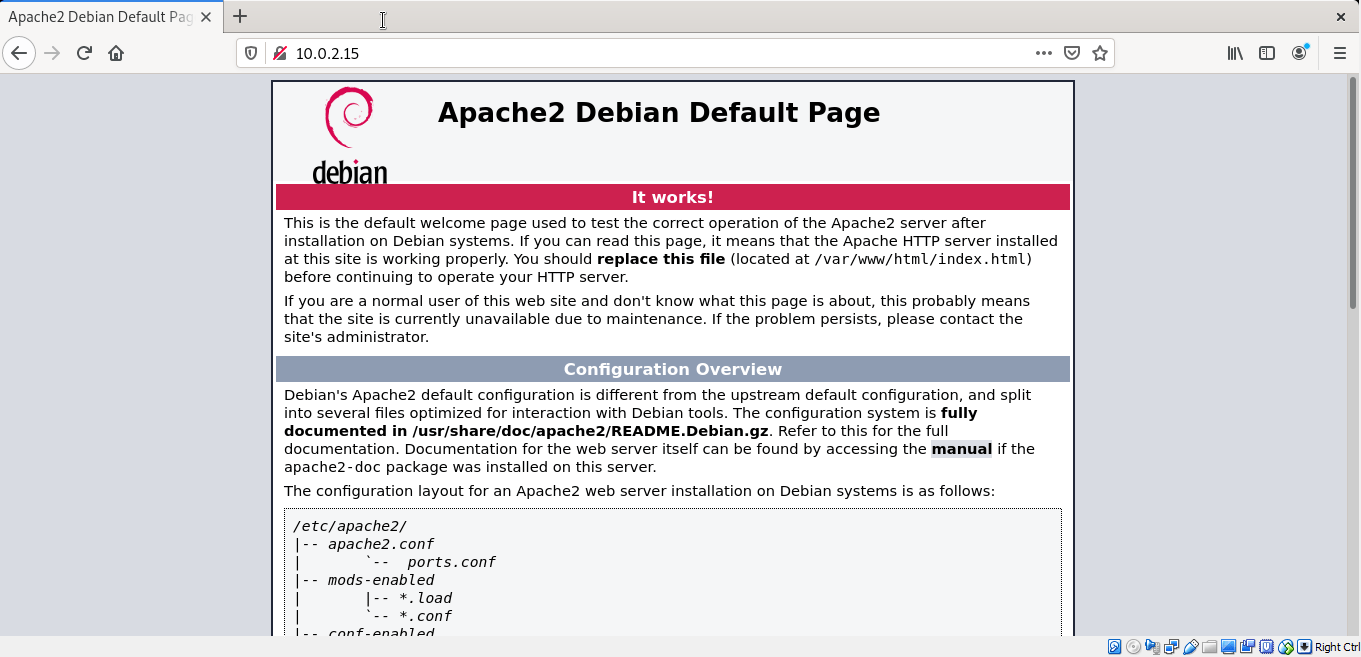
The latest version of Apache packages is available under the default Debian 11 repository. So we can directly install it using the packages manager. After login, open the terminal and update apt cache by below mentioned command: After updating of apt cache, now install the Apache2 on your Debian 11 Bullseye by the command: Press “y” for any confirmation prompted by the installer. Once the installation process completed. Verify the installed Apache version by running the following command: Another way to verify the installation of Apache is by accessing the Apache2 default page using your Server’s IP Address or hostname. If you don’t know your hostname then run the below-mentioned command first: Enter your Server’s hostname or IP address in the URL bar of the browser and press Enter, Apache2 Debian Default page will open as shown below:
Step 2 – Managing the Apache Service
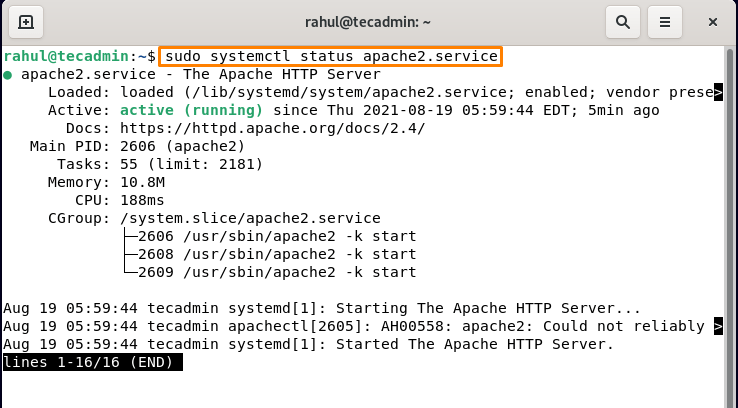
After successful installation, Apache service can be managed using “systemctl” commands, run the below-mentioned command to check the status of the server: Press “q” to quit. Few commands to manage Apache Service in Debian 11 are: To start the server use the command: Similarly, to stop service, replace start with a stop in the above command: The service can be restarted using:
Step 3 – Configuring Firewall Settings
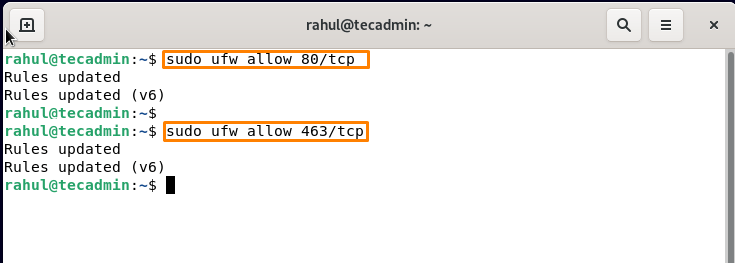
If your system has a firewall, you’ll need to authorize access to certain web ports so that external users can utilize them. Run the below-mentioneds command to allow port 80 (HTTP) and 443 (HTTPS) in the Debian terminal: Now verify by checking the status: if it is not active, to enable its to use:
Step 4 – Creating Virtual Host in Apache
In Apache, virtual hosts allow you to operate numerous websites on a single server. In the Apache web server, we’ll create a virtual host. To accomplish it, we’ll first create a website called sample.com with the server block that comes standard with Apache. Let’s start by setting up your Apache server’s first virtual host. We’ll use the sample domain as “sample.com”, but you can name it according to your preference: Now change the permissions and owner by below-mentioned command: Running below-mentioned command, to test our testdomain.info site, we’ll now construct an example index page. To accomplish so, we’ll use the nano editor to generate an HTML file that looks like this: Insert the below mentioned content into index page and press Ctrl+O to save the file an Ctrl+X to exit the file and return to terminal:
Running the below-mentioned command in a terminal, we’ll build a virtual host file, which will serve the content of server: A text file will be open, insert the following content:
Press Ctrl+O to save the file and Ctrl+X to exit the file and return to the terminal.
Step 5 – Enabling the Domain Configuration
Run the following command to turn on the virtual host file: Disable the default Apache Configuration by running below mentioned command: New changes to Apache are made applicable by running below mentioned command:
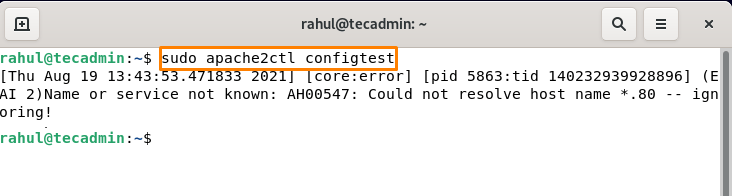
Step 6 – Resolve Hostname Error
Now, we have to check our configuration for any syntax error, for testing configuration run the below-mentioned command: This will cause an error but don’t worry we will resolve this. Create a new configuration “servername.conf” and edit in a text editor: Now insert the following content into the file: Press Ctrl+O to save the file and Ctrl+X to exit the file. Make sure to change “sample.com” with your actual domain name. Now to enable the conf server name run the below-mentioned command: Now again run the above command to test configuration: You will see that the hostname error is resolved now.
Step 7 – How to secure Apache2 on Debian 11
To secure the Apache server, edit the “security.conf” file, run the below-mentioned command to open the file: Insert or update the below content into the file:
Save the file and close it. Set the server-wide SSLCipherSuite and SSL protocol to use secure ciphers to serve the website by editing ssl.conf file: Now insert the below-written content into the file and press Ctrl+O to save the file and Ctrl+X to exit the file:
Now run the reload command of Apache to save configuration: That’s it. You have successfully installed and secured the Apache server.
Conclusion
Apache Web Server is an open-source server used by many websites on the internet and allows developers to publish their work on the internet. This server is available on all OS but in this article, we discuss its installation on the latest version of Debian (Linux OS) and also tell how to test and secure it after its successful installation. You will be able to successfully install Apache2 on Debian 11 Bullseye and configure the server after going through this guide.