In this blog post, we will see how you can install the latest version of Jenkins on your Ubuntu system and explore its various functionalities.
Step 1 – Installing Java
Jenkins required Java to run on any operating system. The latest version of Jenkins is tested with Java 8 & 11 versions. To fulfill the requirements, you can install OpenJDK on your system. To install OpenJDK Java on your Ubuntu system, type: Once the installation is finished, Type java on terminal to verify it.
Step 2 – Installing Jenkins on Ubuntu
Jenkin’s official team provides the Debian packages for the installation on Ubuntu systems. You just need to configure the official PPA to your system and install Jenkins on Ubuntu systems. Use the below steps to install Jenkins on Ubuntu: You have successfully installed Jenkins on Ubuntu 20.04 system. Next, initialize the Jenkins installation first and configure it.
Step 3 – Access Jenkins Web Interface
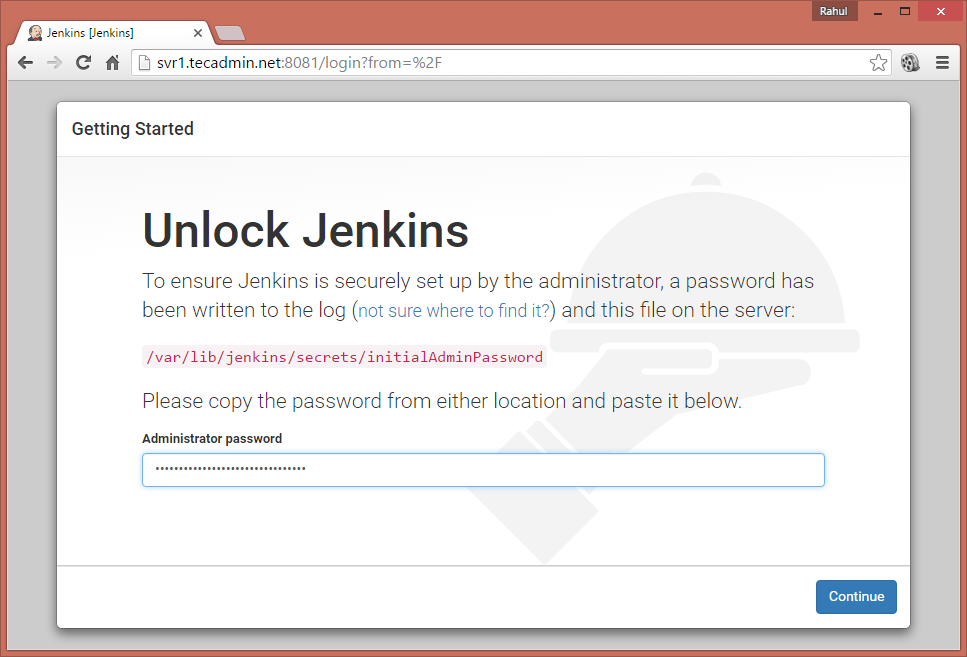
Access your server on port 8080 (Or updated port) in your favorite web browser. The default installation password can be found at /var/lib/jenkins/secrets/initialAdminPassword as showing in the below image.
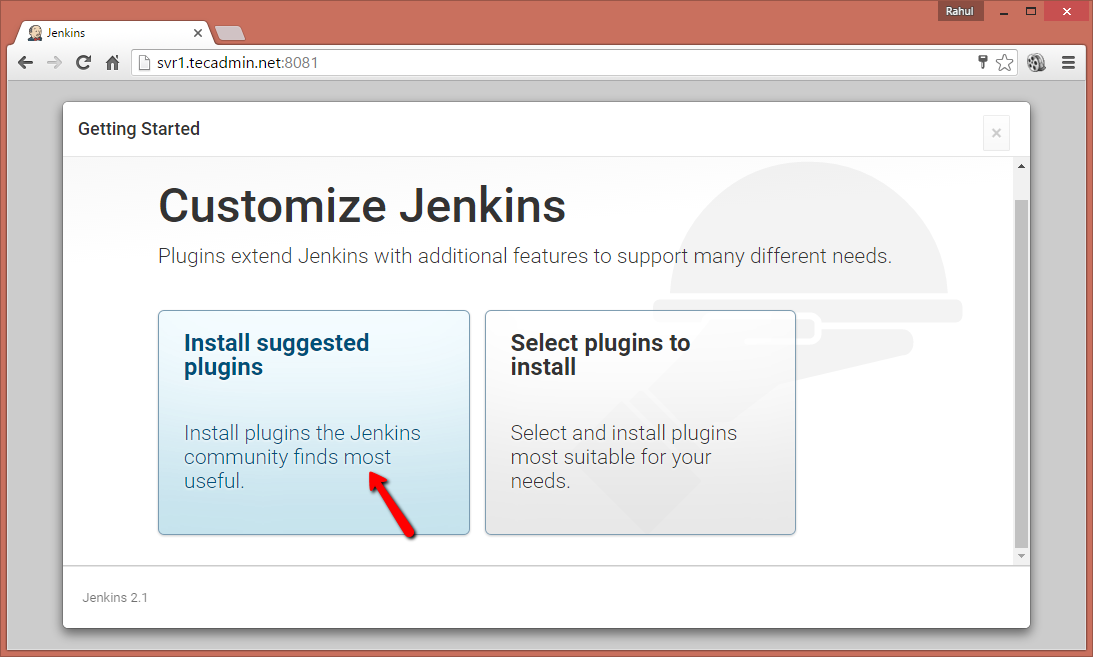
Now select the appropriate option to install the plugin. You can choose to install suggested plugins or select the required plugins options.
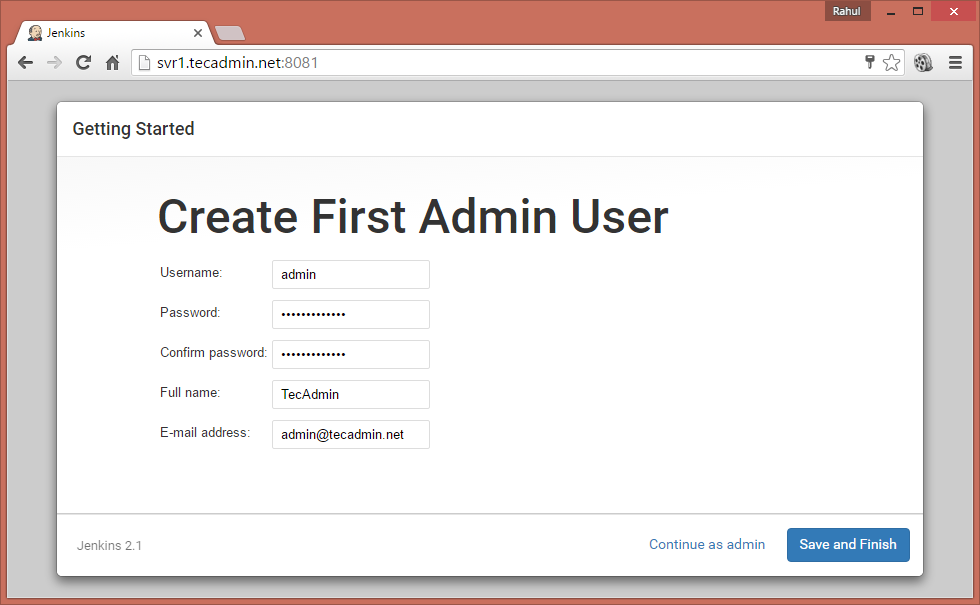
Next, create an admin account for your Jenkins setup. Which is required to log in to Jenkins.
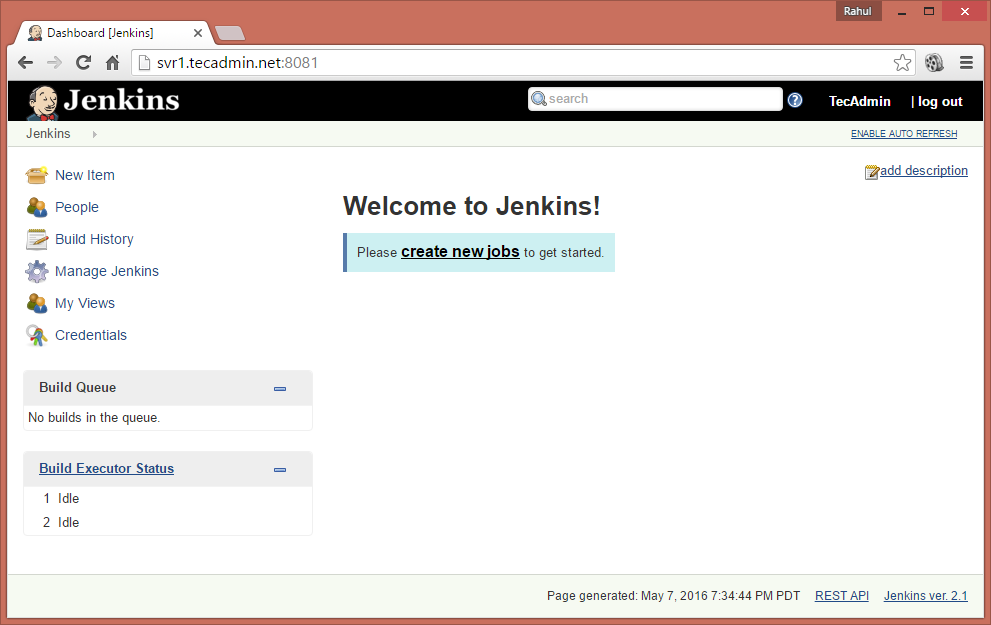
After the successful completion of the Jenkins setup wizard, You will be redirected to the Jenkins dashboard.
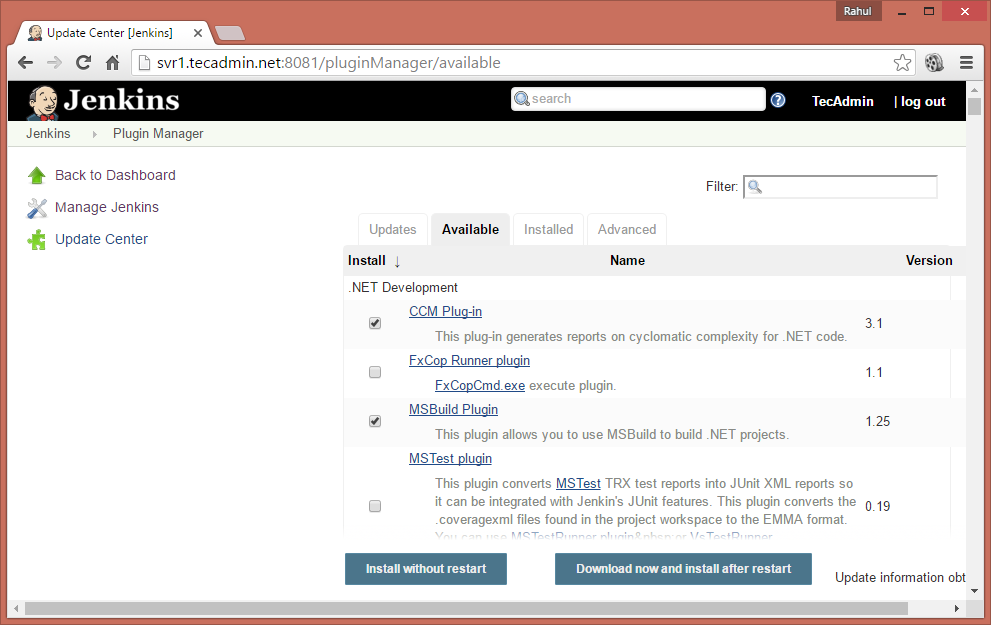
Step 4 – Installing Jenkins Plugin
Login to Jenkins dashboard and navigate to Manage Jenkins » Manage Plugins » Available Tab and select the plugins to install.
To update existing installed plugins in Jenkins Manage Jenkins » Manage Plugins » Update Tab
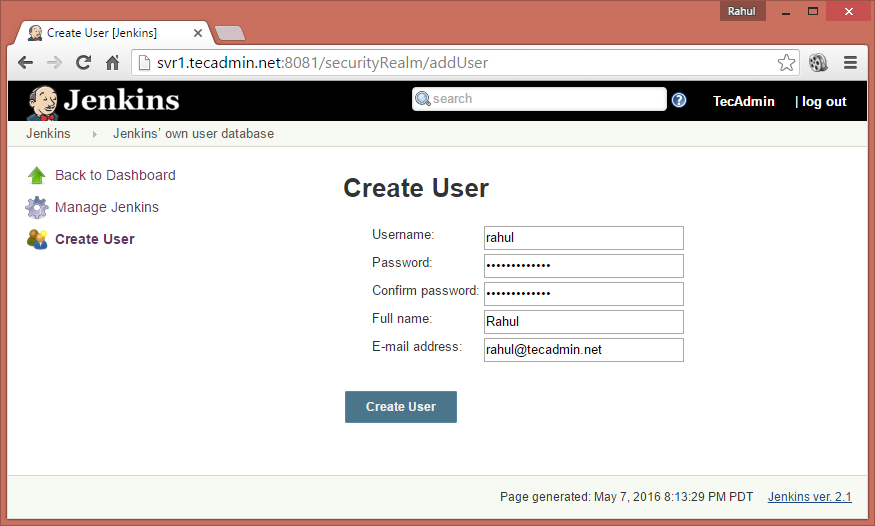
Step 5 – Add More Accounts
To create more accounts, login to the Jenkins admin panel and then navigate to Manage Jenkins » Manage Users » Create User . Enter the required details and click Create User.
Conclusion
This tutorial helps you to install Jenkins on your Ubuntu 20.04 Linux system. You can now configure your application with CI/CD architecture.
title: “How To Install Jenkins On Ubuntu 22 04 20 04 Tecadmin” ShowToc: true date: “2022-12-18” author: “Charles Steadman”
In this blog post, we will see how you can install the latest version of Jenkins on your Ubuntu system and explore its various functionalities.
Step 1 – Installing Java
Jenkins required Java to run on any operating system. The latest version of Jenkins is tested with Java 8 & 11 versions. To fulfill the requirements, you can install OpenJDK on your system. To install OpenJDK Java on your Ubuntu system, type: Once the installation is finished, Type java on terminal to verify it.
Step 2 – Installing Jenkins on Ubuntu
Jenkin’s official team provides the Debian packages for the installation on Ubuntu systems. You just need to configure the official PPA to your system and install Jenkins on Ubuntu systems. Use the below steps to install Jenkins on Ubuntu: You have successfully installed Jenkins on Ubuntu 20.04 system. Next, initialize the Jenkins installation first and configure it.
Step 3 – Access Jenkins Web Interface
Access your server on port 8080 (Or updated port) in your favorite web browser. The default installation password can be found at /var/lib/jenkins/secrets/initialAdminPassword as showing in the below image.
Now select the appropriate option to install the plugin. You can choose to install suggested plugins or select the required plugins options.
Next, create an admin account for your Jenkins setup. Which is required to log in to Jenkins.
After the successful completion of the Jenkins setup wizard, You will be redirected to the Jenkins dashboard.
Step 4 – Installing Jenkins Plugin
Login to Jenkins dashboard and navigate to Manage Jenkins » Manage Plugins » Available Tab and select the plugins to install.
To update existing installed plugins in Jenkins Manage Jenkins » Manage Plugins » Update Tab
Step 5 – Add More Accounts
To create more accounts, login to the Jenkins admin panel and then navigate to Manage Jenkins » Manage Users » Create User . Enter the required details and click Create User.
Conclusion
This tutorial helps you to install Jenkins on your Ubuntu 20.04 Linux system. You can now configure your application with CI/CD architecture.
