In this article, we will cover the following topics:
Installing Homebrew Installing MongoDB with Homebrew Starting and stopping MongoDB Connecting to the MongoDB shell
Step 1: Installing Homebrew
Homebrew is a package manager for Mac that makes it easy to install and manage software packages. To install MongoDB on your Mac, you will need to install Homebrew first. To install Homebrew, follow these steps:
Step 2: Installing MongoDB with Homebrew
After installing Homebrew, you can use it to install MongoDB on your Mac. To install MongoDB with Homebrew, follow these steps:
Step 3: Starting and Stopping MongoDB
After installing MongoDB, you can start and stop the database service as needed.
To start the MongoDB service, run the following command:brew services start mongodb-community To stop the MongoDB service, run the following command:brew services stop mongodb-community
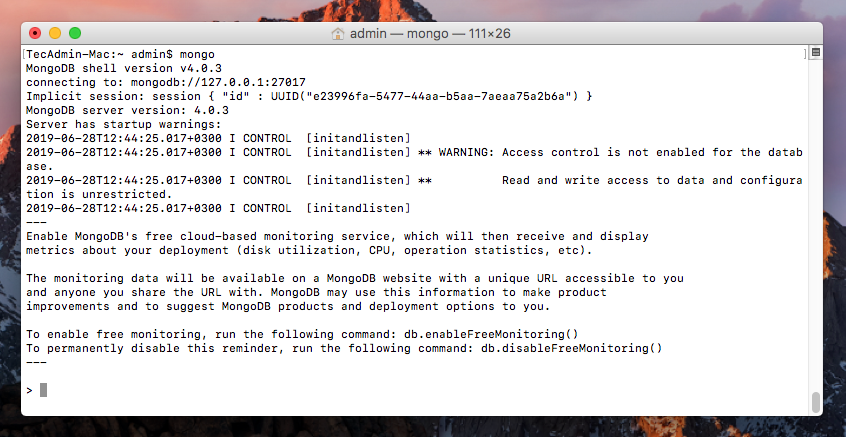
Step 4: Connecting to the MongoDB Shell
After starting the MongoDB service, you can connect to the MongoDB shell to interact with the database. To connect to the MongoDB shell, run the following command: This command will open the MongoDB shell, which is a command-line interface for interacting with the database.
Conclusion:
In this article, we covered how to install MongoDB on a Mac using Homebrew. We covered how to install Homebrew, install MongoDB with Homebrew, start and stop the MongoDB service, and connect to the MongoDB shell. By following these steps, you can easily install and use MongoDB on your Mac. I hope this helps you understand how to install MongoDB on a Mac. If you have any further questions, please don’t hesitate to ask.