Nagios core is freely freely available from the official sites to deploy on your servers. In this tutorial, we will describe you the steps to install and configure Nagios server on a Ubuntu 20.04 LTS system.
Step 1 – Installing Apache
Apache is the popular web server required to serve Nagios web pages. The following commands will help you to install or upgrade Apache web server on your Ubuntu system. Nagios configuration required two Apache modules od_authz_groupfile and mod_auth_digest, which is not enabled by default. Execute the following command to enable reqiored modules. Here mod_authz_groupfile extends the authorization types with group and group-file. And auth_digest is used for user authentication using MD5 Digest Authentication.
Step 2 – Installing Nagios on Ubuntu 20.04
Nagios 4 stable version is available in the default Ubuntu software repositories. At the time of writing, Nagios version 4.3.4 available for Ubuntu 20.04 systems. Run the following commands as sudo privileged account to install Nagios on Ubuntu system. The command above will install a bunch of packages, including Nagios Core, Nagios Plugins, and Apache.
Step 3 – Configure Nagios Authentication
Next follow the below instructions to configure Apache and Nagios authorization. Create nagiosadmin User – Create a Nagios user with name “nagiosadmin” to grant administrative privileges. Make sure to keep username as it is. Use htdigest command to create a new user: Enter password and confirm password: Configure Apache – Edit Nagios4 Apache configuration file and comment / un-comment few lines describes below. This will allow Nagios server to access from public network.
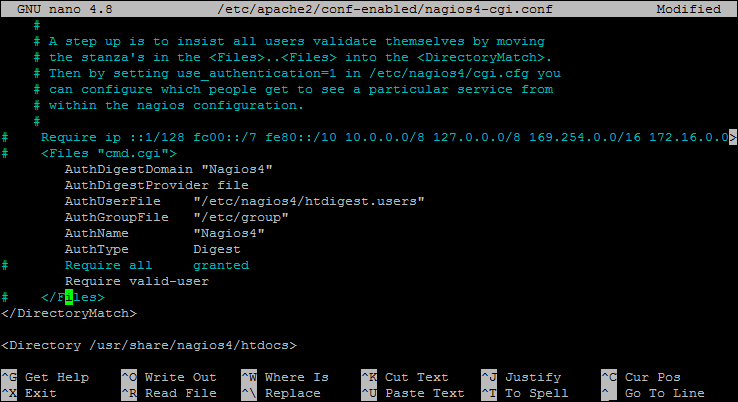
Configure Nagios4 CGI Authentication – Next edit the /etc/nagios4/cgi.cfg configuration file and set use_authentication to 1. This option controls whether or not the CGIs will use any authentication when displaying host and service information, as well as committing commands to Nagios for processing. Once you make all necessary changes, apply them by restarting the Apache and Nagios4 services. That’s it. You have completed all the required settings.
Step 4 – Access Nagios Web Interface
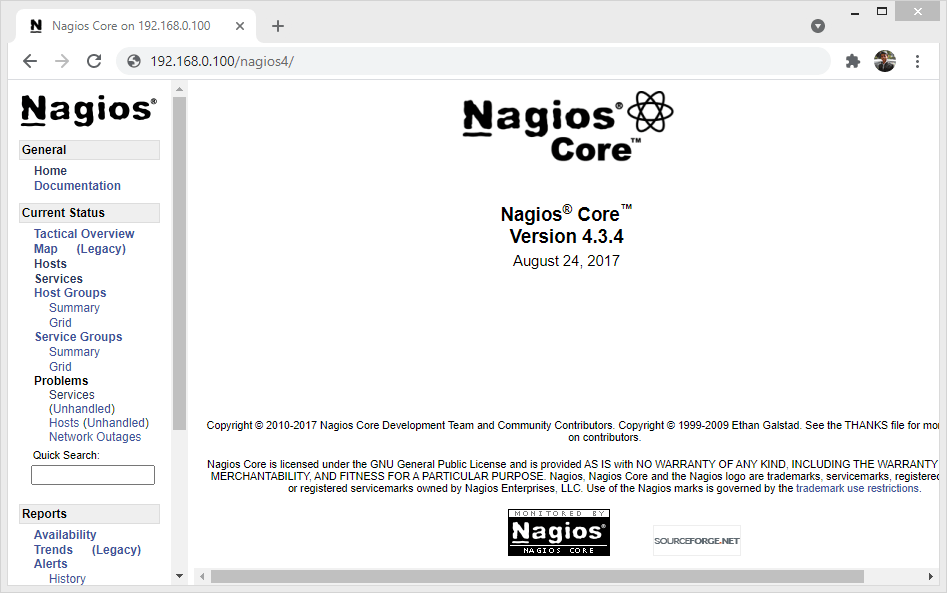
You can access nagios web interface using the server IP address or domain pointed to that server. The installer creates a Apache configuration file for nagios. You can access Nagios at a sub url as “/nagios4”. You will be prompted to inter username and password. Enter the “nagiosadmin” user credentials to access Nagios web page.
Conclusion
This tutorial helped you to install Nagios server on Ubuntu systems. Follow our next tutorial to add host to monitor through Nagios server.