The main advantages of using Odoo ERP include the following:
It allows for a complete view of your business operations, allowing you to identify issues early on and take action quickly. It’s easy to use. You can set up an Odoo ERP account in just a few minutes by simply filling out a few forms. And once you’re set-up, you can start working within minutes. It’s reliable and secure. It’s designed with security in mind from the start – with two-factor authentication for users and several security measures built into the application itself. It also comes with a built-in auditing system that lets you keep track of every transaction that happens with your accounts and assets.
In this blog post, you will learn to install Odoo 16 on Ubuntu 22.04 Jammy Jellyfish Linux system.
Step 1 – Installing Required Packages
There are some steps involved in the installation. Apart from that, there are some files that are necessary to install as a prerequisite. First, update your server and then upgrade it. If it asks for a password, give it: The command will upgrade available updates for the installed packages. Then install all the required packages for the Odoo setup on the Ubuntu system. This will install essential packages for build, Python, and Node.js on your system. Also, install the below node module to enable RTL support.
Step 2 – Installing wkhtmltopdf
Now, you also need to install wkhtmltox Debian package, which provided useful wkhtmltoimage and wkhtmltopdf binary commands. Download the Debian package from Github: Then install it on your system.
Step 3 – Create a New System Account
Running the Odoo service as a separate user is a good practice. Now for the creation of a user for Odoo who can access the Odoo and can make changes to it. This will create a new account to use for Odoo service.
Step 4 – Installing PostgreSQL
As we know that PostgreSQL is required as the database server for Odoo. So we will install it: Now for the creation of an Odoo user in PostgreSQL: This will add a new role odoo in PostgreSQL server.
Step 5 – Installing Odoo 16 on Ubuntu
We can download the Odoo from the Github repository. So clone it on your system. Make sure to clone the correct branch you need to install on your system. As we are installing Odoo 16, so use the branch name “16.0”. Change the file ownership to the odoo user. It’s a good practice to create a Python virtual environment for isolating applications. Create a virtual environment with the following commands: Once the virtual environment is activated, you will see the system prompt as “(venv) $”. Now install the Python dependencies for the Odoo under the virtual environment. After finishing the installation, deactivate the virtual environment with the following command. Now we will create the directory of log and also change its permissions settings
Step 6 – Create Odoo Configuration File
Next, create a configuration for the Odoo server. This is useful for customizing the Odoo application. Edit the configuration file /etc/odoo-server.conf in your favorite text editor: Add the below content to file:
Make sure to change the admin_passwd value with a strong password. Save your file and close it. Next, change the ownership to oddo user for the configuration file. Also, change file permissions
Step 7 – Create Odoo Systemd Unit File
Create a Systemd unit file for the Oddo service management. It will help you manage Odoo’s service easily. Also allowed us to start Odoo on system boot. Create a new file odoo.service and edit in a text editor: Add the following content.
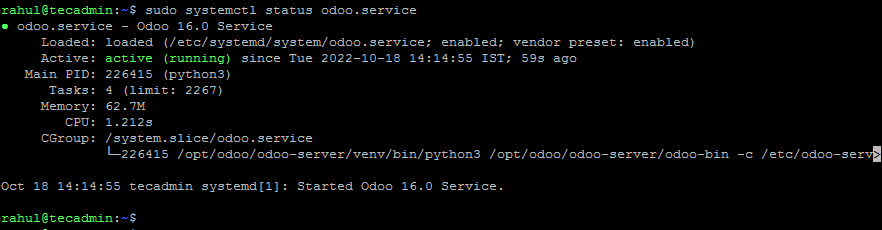
Save the file and close it. Now, reload the systemd daemon to load the newly created file. Start the Odoo service, Also enable it to auto-start on system boot: Verify the service status: You should see that the Odoo service is active and running:
Step 8 – Access Odoo Application
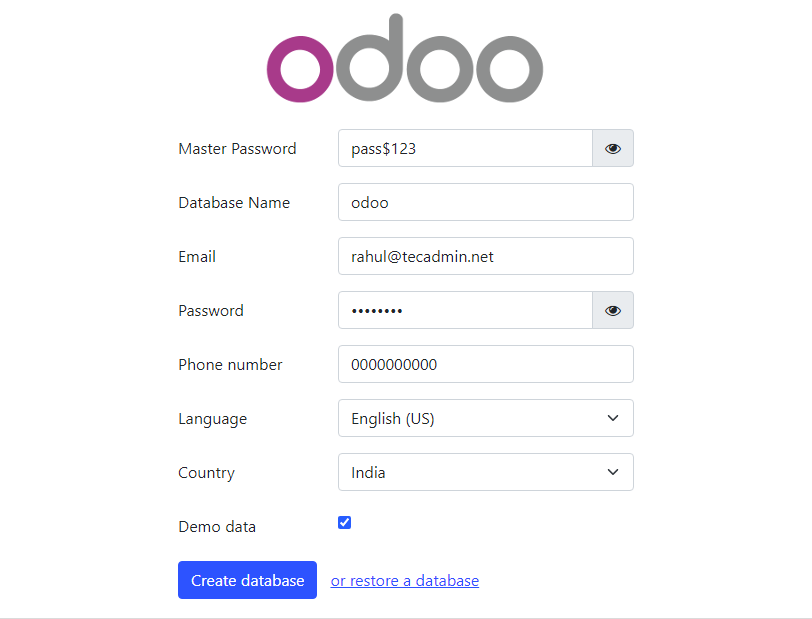
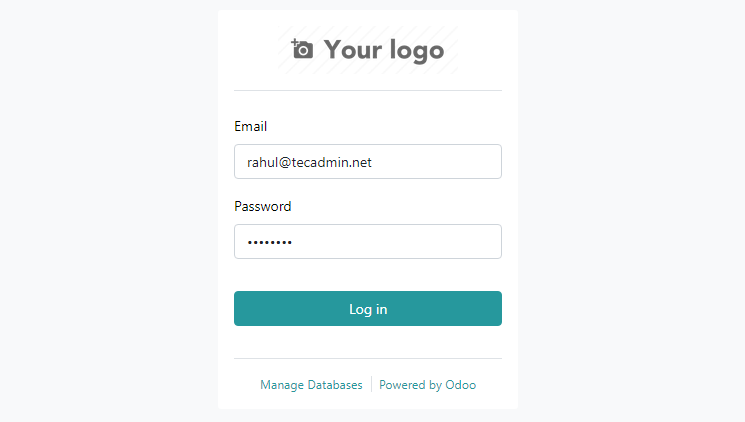
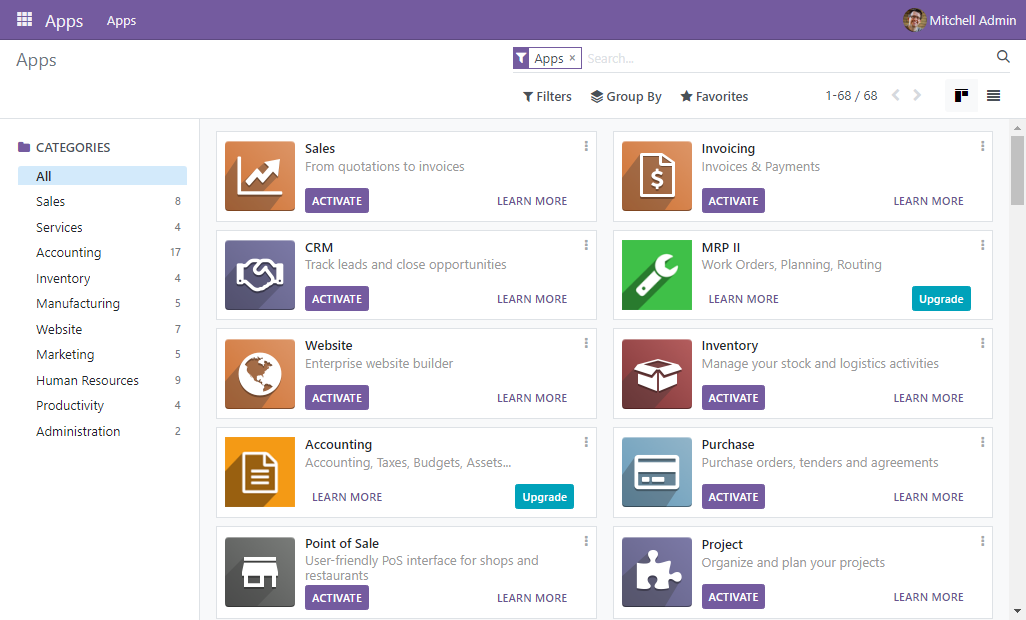
Odoo default runs on port 8069. Open a web browser on your system and connect to the Odoo server on the 8069 port. You will find the Odoo create database page for the first time. Use the master password configured on odoo-server.conf file. Set a database name of your choice. Then set username and password, that will be used for future logins to Odoo dashboard. Select the Demo data checkbox to import it. Finally, click the “Create Database” button to complete the installation. After successfully creating the Odoo database, you will be redirected to the login page. Use the login credentials created in the previous screen: After successful login, you will be redirected to apps page, where you can install applications of your choice.
Conclusion:
Everyone wants ease in life so Odoo fulfills this by providing all departments needed to run a business in one place. Now you don’t have to recruit a lot of employees to handle your company, all the needs are being fulfilled by Odoo. In this article, we learned how to install Odoo 16 ERP server on Ubuntu 22.04 Jammy Jellyfish Linux system.