That’s a great idea! And not just because sharing is caring, but also because it’s a proven way to attract viewers and followers. It’s not a secret that many people today use YouTube as their primary search engine for practically everything. So, yes, tutorials are definitely a trending genre. Below, we’ll walk you through a generic scenario and show you how to make a video tutorial without spending a dime.
Step 1: Choose the Topic for Your Tutorial Video
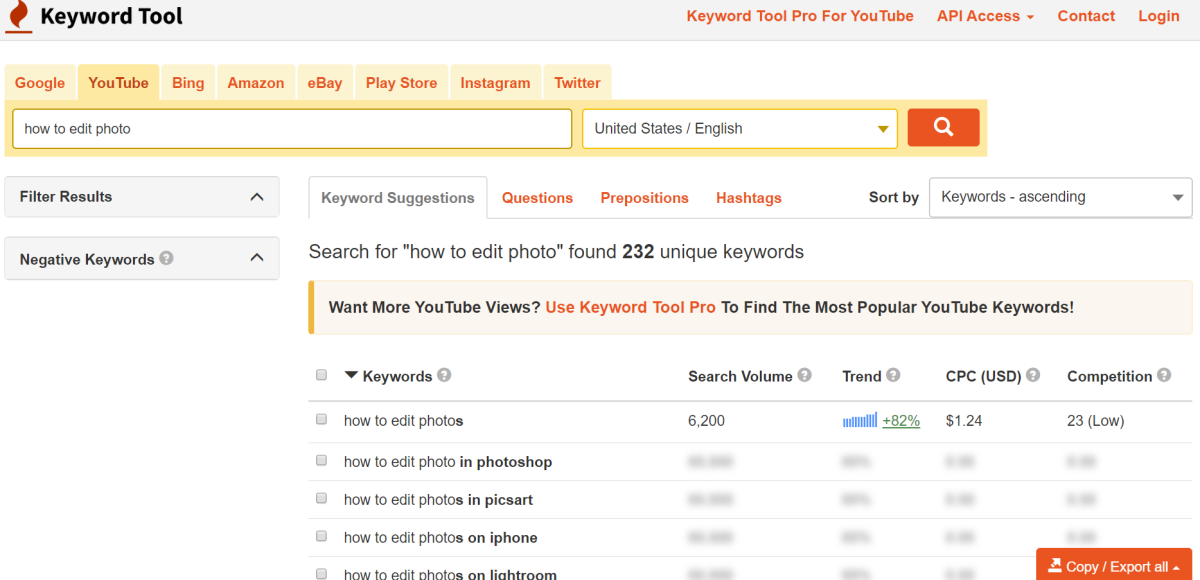
If you already have an idea—that’s wonderful. If you don’t have an idea, but you have a niche where you’re an expert, you can find out what people are actually searching for by using free keyword research apps. Specifically, the aptly-named Keyword Tool will show you the keywords and phrases people type in a search field. All you need is to open the YouTube tab (because you’re looking for YouTube searches) and type “how to + your niche”. There are other free keyword research tools, such as Ubersuggest and AnswerThePublic. These two won’t provide searches pulled from the YouTube engine specifically, but you’ll surely find plenty of ideas for making your tutorial video just by looking at what people are trying to find on the Internet.
Step 2: Break Down Your Idea Into Steps
At this point, you may want to do a bit more research. Find out what other video tutorials on the same topic include and think about how you can make yours stand out. Once you figure that out, break the video tutorial into key steps and roughly outline the scenario.
Example of an Outline Draft
Step 3: Capture the Tutorial With a Screen Recorder
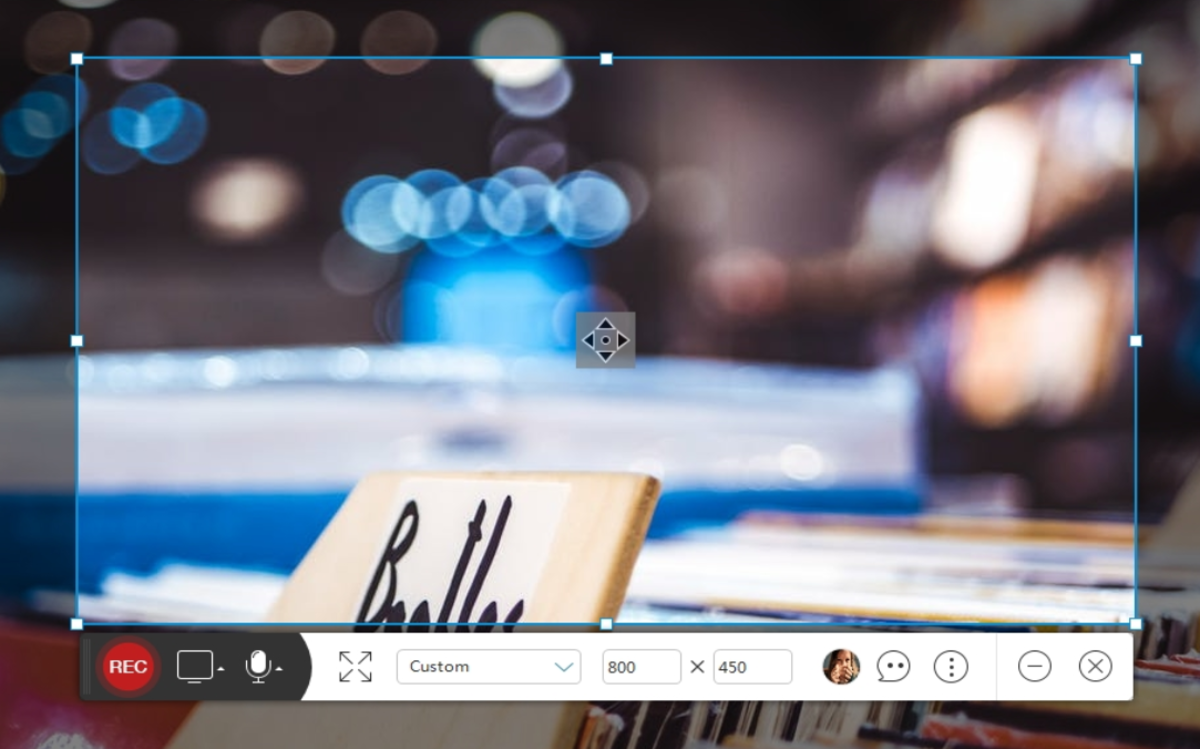
Time for action! If for the topic of your choice, you need to give a live demonstration—start rolling the camera. If like in our example, you’re creating a video tutorial on how to use software, you’ll need a screen recorder. There are plenty of intuitive, feature-rich screen recording tools on the Internet today. Some of them even run right in the browser tab (you’ll just need to download a lightweight launcher before starting). Here is a list of free tools that should be great for your purposes:
OBS: open-source screen recorder, also perfect for video streaming Apowersoft: free screen recorder that brings both online and desktop solutions Screen-O-Matic: web-based tool for recording screen and web camera videos
You can also take advantage of the free trial period offered by such professional-level tools as Camtasia! Once you pick the software, go ahead and start shooting. Notice that all screen recorders provide drawing and highlighting tools to help you drive viewers’ attention to the important details. Feel free to use them when it’s needed. And don’t worry about the audio at this point—you’ll deal with it later.
Step 4: Time to Brush Up Your Voiceover Script
The reason why I didn’t recommend writing a set-in-stone scenario before shooting is because as a beginner, you may not foresee certain moments that will pop up in the process. Since you’re a beginner, you might not be able to record the entire video tutorial in one seating. You may also have a few hiccups while recording. That’s OK. You’ll be able to fix everything in a few minutes using video editing software. Perhaps, you’ll realize you should skip some in-depth parts to avoid overwhelming your viewers, or the opposite—focus on other parts more precisely. Now, don’t get me wrong. Having an outline is important. Rehearsing might be a good idea too. Just keep an open mind because you might need to make quite a few changes to the voiceover script after you’ve recorded the video. Hate typing? Use free speech-to-text software. There are smartphone apps that will transcribe your speech in an instant (consider Just Press Record for iPhone and Google Keyboard for Android). Plus, Google Drive has a handy voice typing feature.
Step 5: Record Voiceover (or Create a Talking-Head Style Tutorial)
When you’re making a video tutorial, there are two ways to include your voice commentaries. First, you can create a voiceover based on your script. All you need is a microphone or even just a smartphone (and a few moments of pure silence, of course). If you need advanced-level audio editing, there is a free open-source tool called Audacity to help you remove the background noise and adjust audio pitch. The second option is to use a camera and record yourself reading the script in front of a green background. You can then remove the background using free chroma key software and add your talking head to the corner of the tutorial video using a simple picture-in-picture effect. Sure, the first option is way faster and easier, but seeing the narrator will keep the audience more engaged and create a higher level of trust. So, going the extra mile might be worth it!
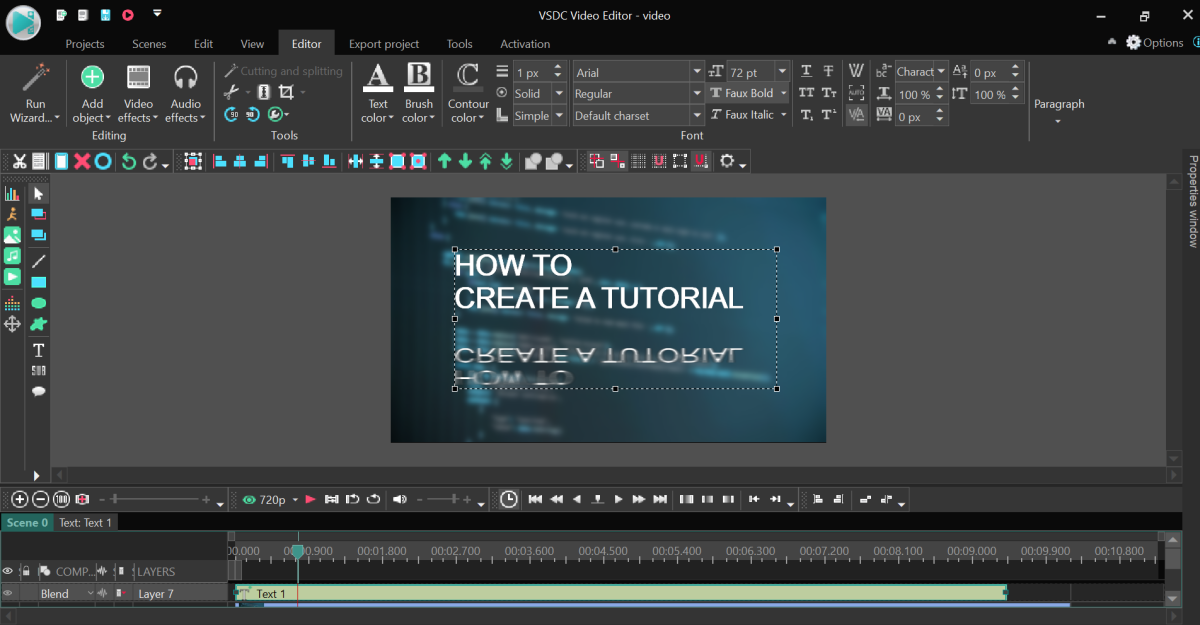
Step 6: Edit Your Video Tutorial
Editing a video tutorial is not as difficult as it may seem. You can use any free video editor that works on your OS. Here are just a few suggestions: If your computer is running low on the memory, check out these three video editors for slow computers. If you’re on Windows 10, check out this list of free editors. Essentially, you’ll need to cut out the bloopers, work on the sound, and add captions if necessary. That’s very basic editing. As you go, you may also consider:
Breaking the video into chapters and adding a title to each one Zooming in on the selected areas or blurring/hiding certain parts Using the fast-forward effect—to speed-up monotonous or repetitive actions
Step 7: Add Audio to the Video
When you’re done with the voiceover, there are just a couple of steps left: You may also consider adding a nice background tune to create the rhythm and a more pleasant experience for your viewers. Find royalty-free music for your project in the YouTube library or check stock music marketplaces like Bensound.
Step 8: Upload Your Video Tutorial to YouTube
Congrats! You’ve made a video tutorial (and almost made it to the finish line). Before uploading your video tutorial to YouTube, remember to include the keywords and phrases you’ve found during your research (Step#1) to the video title, description, and tags. Next, check out free online apps like Canva or Snappa to quickly create an eye-catching thumbnail for your video. Once the video is published, get ready to receive thankful comments from those who found your video tutorial helpful. Looks like you’re off to a good start. It might be time to think about your next project!
Comments
ipmedia from Gurgaon on April 24, 2020: Its a very useful content, thanks for sharing this amazing article..