The problem is that even if you want to paint along with Bob, paint isn’t cheap, and that’s assuming you already have your own supply of odorless paint thinner. Luckily, we live in the future where modern technology can have us making happy little accidents and giving trees friends without any of the cleanup work. Even better, you can do it for free. With this guide, you’ll be able to get started painting digitally and I’ll introduce you to a fantastic tutorial for how to start using Krita to replicate Bob Ross’s wet-on-wet style on your computer. You don’t need to spend any money to start painting and pick up a wonderful new hobby. The only thing that might vex you at first is if you only have a mouse; however, you can still do a decent facsimile and decide whether or not it might be worth your while to buy a pen or tablet.
Step 1: Download Krita
There are a lot of digital painting programs out there. Photoshop and Corel Painter probably come to mind. The latter even has a Bob Ross brush set (though the full ability to replicate Bob’s work requires the more expensive software, or a lot of extra steps). While you may eventually want to spend some money, with Krita you can start painting like Bob for free and be confident in the fact that you enjoy painting mystic mountains before making any monetary commitment.You can download Krita here for free: Get Krita You can also make a donation there. If you’re a fan of Steam, you can purchase it there, which will automatically download updates for you.
Step 2: Watch Age of Asparagus’ “Learn Krita With Bob Ross Tutorial”
Now that you’ve downloaded and Installed Krita, it’s time to get started on your first painting. The tutorial, while still quality and good for beginners looking to imitate Bob’s style, it is a bit dated when it comes to Krita. He made it back in the days of Krita 3. Since, the good folks over at Krita have made it to version four and so there’s a few things you’ll need to do.
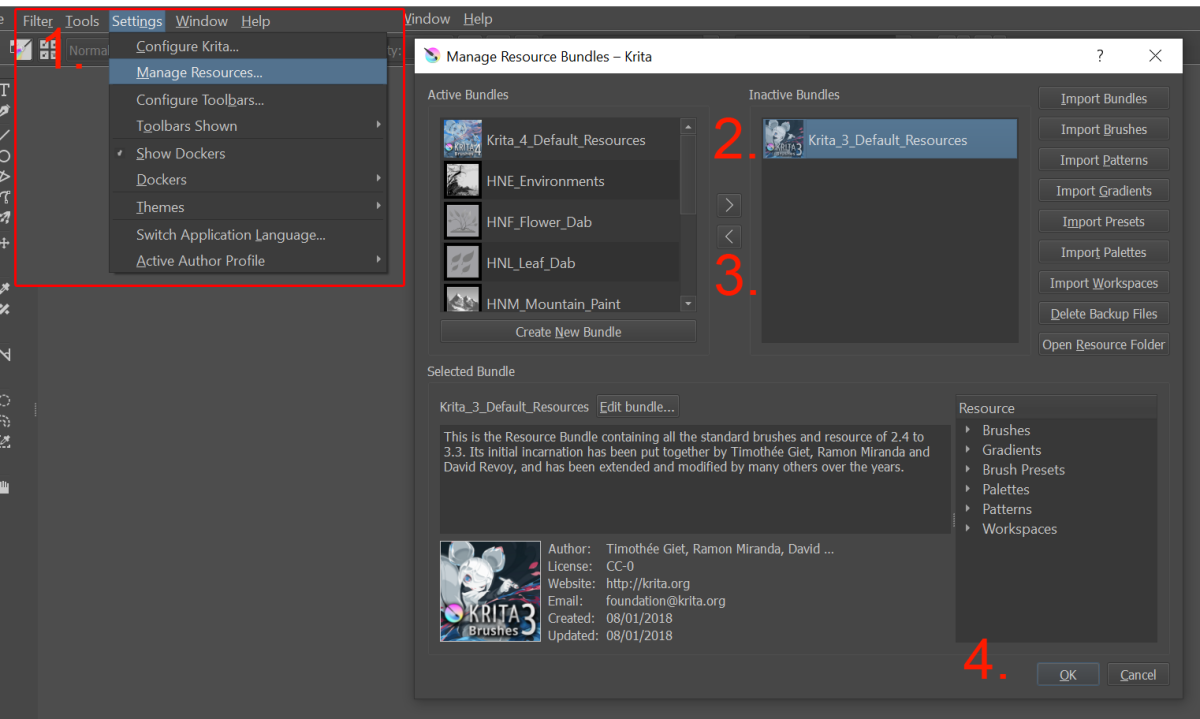
Step 3: Enable Krita 3 Brushes
The first thing to do before you get started with the tutorial is to enable Krita 3 Brushes. Asparagus creates a few brushes based on this bundle and enabling them ahead of time will save you the awkward moment of trying to locate the brush he is using.
Step 4: Adjust Pen Pressure
The other thing you may wish to do is to change the pen pressure settings inside Krita. If you’re like me and using cheap equipment, it can require quite a lot of force to reach max pressure. Alternatively, you could have a hard time applying a light touch. By adjusting this setting you can control how much pressure is required to reach max pressure. By playing around with this setting you can find a setting that feels more natural to you, especially if your pen/tablet doesn’t have settings to adjust pressure elsewhere. For more information on tablet settings, you can read the Krita documentation.
Step 5: Practice
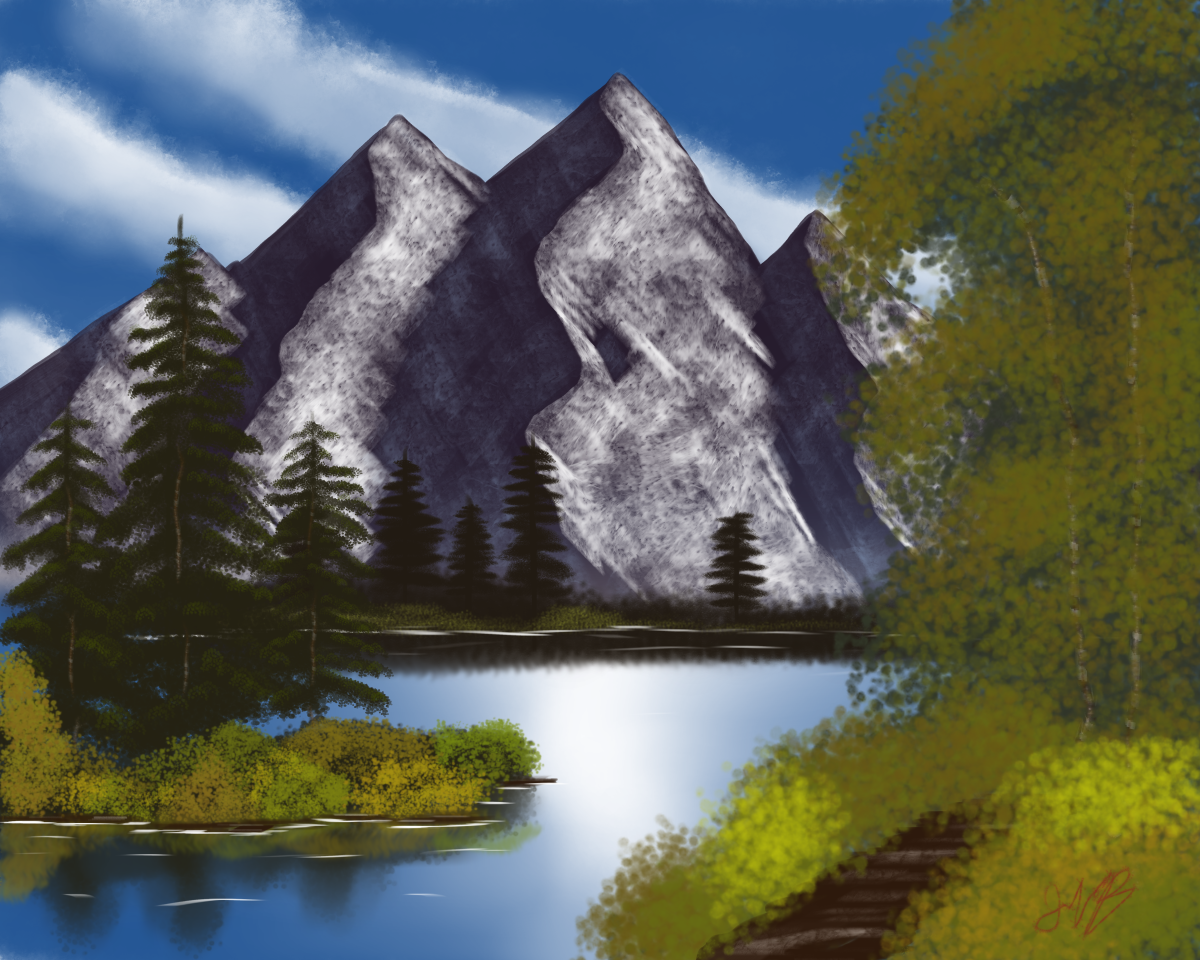
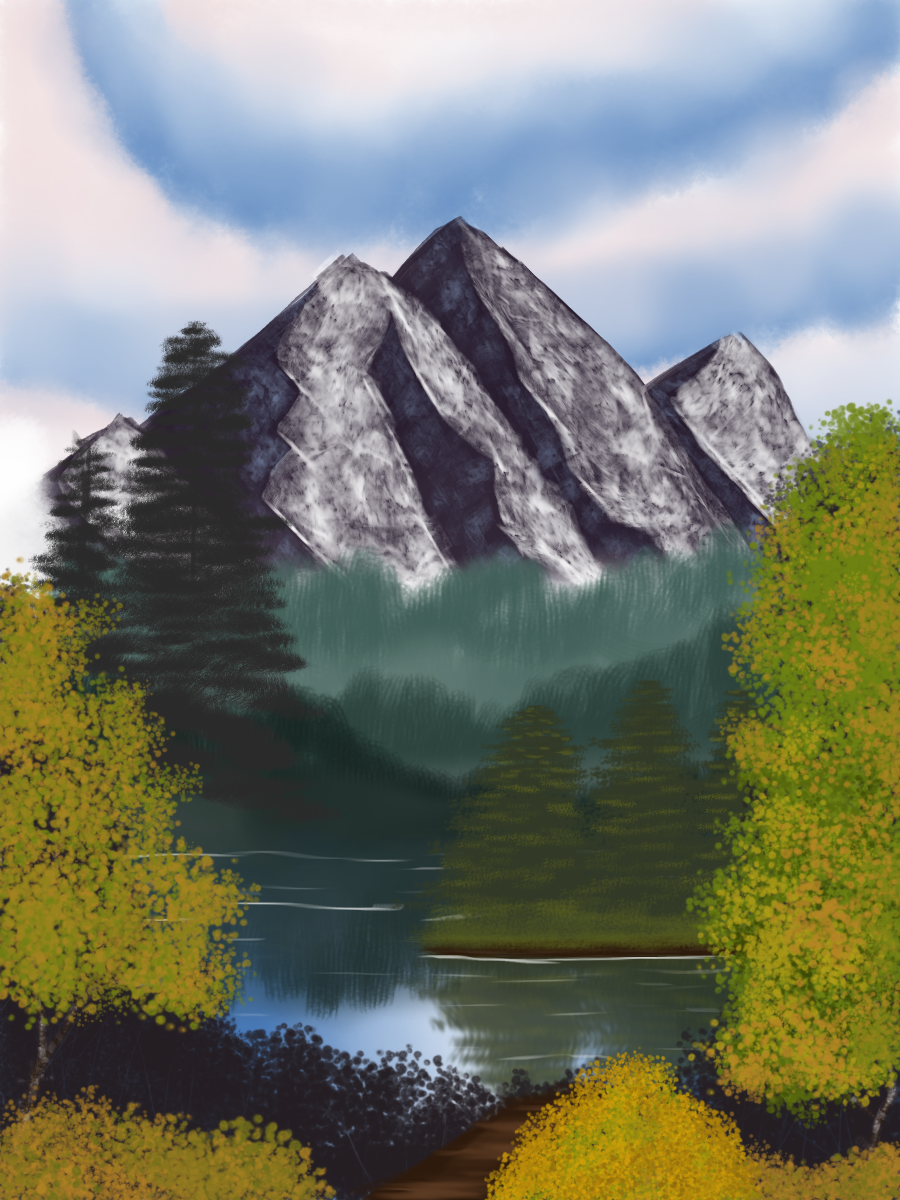
Now that you’ve added your first happy little cloud, gave a tree a friend, and made some happy accidents it’s time to recognize that your first attempt is just that. You’ve got plenty more clouds, trees, and accidents in your future. Sit back. Reflect on what you’ve created. Be proud of what you’ve accomplished. Maybe even show your friends and family. Now start another painting. As Bob says…
Step 6: Install Additional Brushes
If you’re like me, you may not have been entirely satisfied with some of the brushes you made in Asparagus’ tutorial. That’s perfectly normal. One of the big differences between digital and normal painting is that brushes are handled differently. While Bob may just use a palette knife for a plethora of different skills, digitally we need different brushes with different settings to accomplish that. In my case, I wasn’t happy with the tree brushes I had. If you want to experiment with a large set of environmental brushes for things like skies, mountains, and trees then I recommend installing IForce’s Environments 2.0 pack after you’ve done a few paintings based on the tutorial. — Bob Ross You can find both the pack and instructions on how to install here.
Step 7: Consider Upgrading Tools
Now that you’ve finished your first painting or more, you might find yourself wanting to have better control of your digital brushes. After all, while many things involve the skill of the individual artist, having the right tools does make a difference. In my case, I got a good deal on a pen when I got my new laptop and it does a decent enough job. However, tablets have come down in price over the years. An entry level one isn’t going to break the bank. So, if you’re keen to continue this hobby, it might be time to think about investing in an equipment upgrade.
Comments
RTalloni on September 22, 2019: — Bob Ross Thanks for this introduction to Krita. It would be interesting to work with it.