Photo by NeONBRAND on Unsplash However, one of the major problems of this visual-heavy site is the supposed inability to post from the comfort of your own desktop. Sure there are some tricks you can use, such as an android emulator or forcing your web browser into “mobile mode.” And there are lots of services that will let you post from desktop and even schedule posts . . . but those usually cost money. And their free versions also tend to be severely limited in how much you can post and how often. In this article, I’ll show you how to post directly from your web browser—no mobile mode, emulators, or paid services required! You will, however, need a few things: Once you have all of those, it’s on to the next step.
Getting Things Set Up
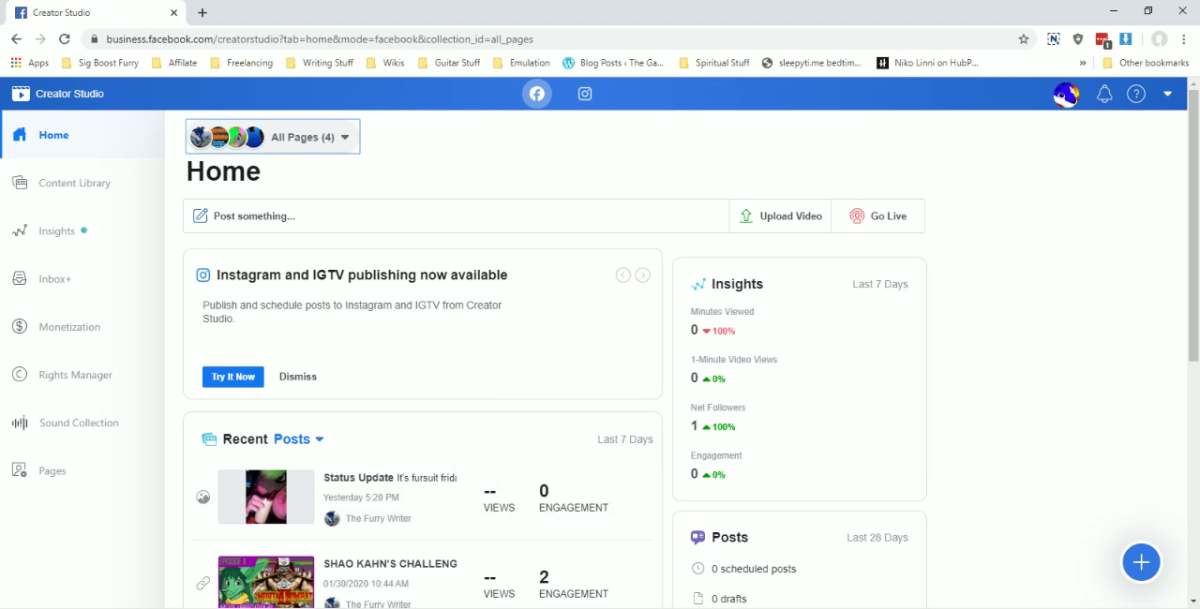
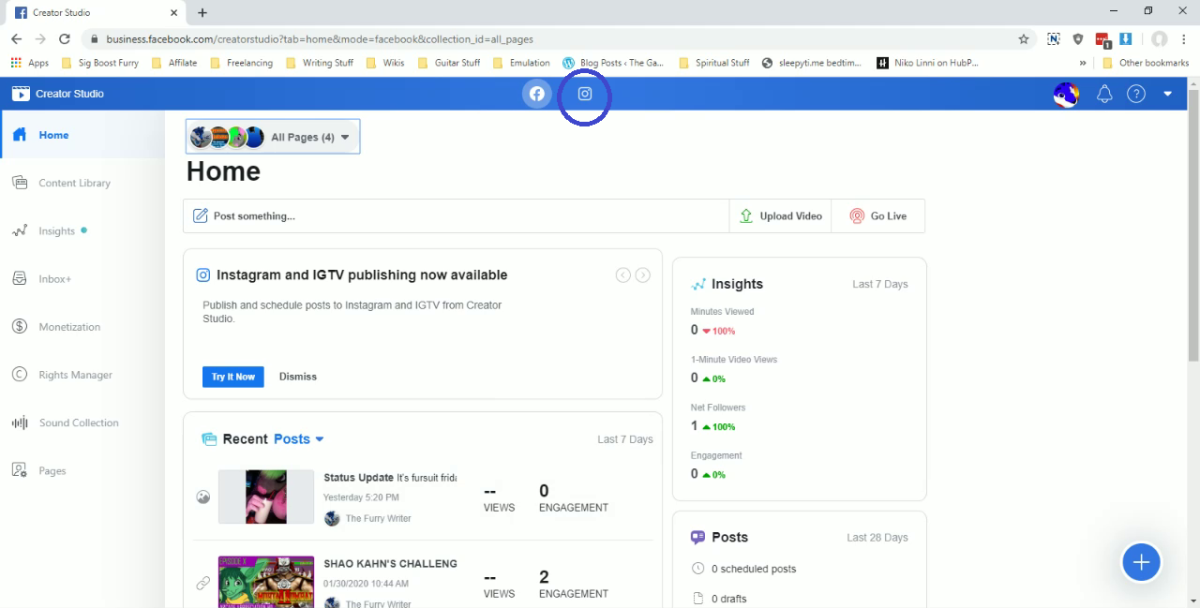
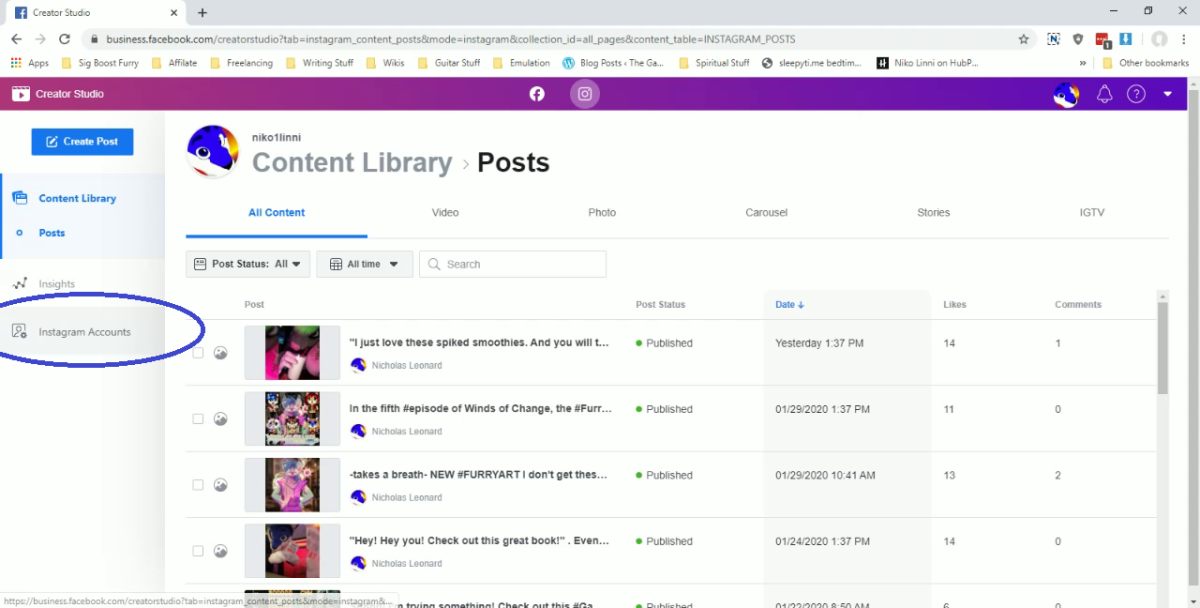
First, you’re going to want to go to the Facebook Creator Studio. This is one of the tools provided by the Facebook Business Manager. If you’re unfamiliar with the Business Manager don’t worry, we won’t be doing anything on that page. Only on the Creator Studio. When you load up the Creator Studio, here’s what you might see: If you haven’t used the Creator Studio and you’re serious about building up your Facebook Pages you really should get more familiar with it! You can switch between pages with ease, make posts, schedule posts, and see some great analytics. If this is your first time to the Creator Studio you’ll be prompted to “Get Started”. Go ahead and click on that, and you should be taken to the main page. From here the page will give you a short tour to get you more familiar with the Creator Studio. While you can post and schedule directly on your pages, I’ve found that it can be a little cumbersome and depending on your system, slow. Doing it through the Creator Studio was a much easier time for me. Getting back on track, the first thing you want to do is go to that blue ribbon on the top and click on the Instagram icon. This will take you to the Instagram portion of the Facebook Creator Studio. Once it loads up, go to the left sidebar, and then click on Instagram Accounts. If you’ve never added an Instagram Account before, click on “Connect Your Account”. A window will pop up asking if you’d like to give the Creator Studio permission; click yes, and you’ll be prompted to log in to your Instagram Account. Once you do, you’ll be taken to the IG Mode. IMPORTANT SIDE NOTE Remember, you need a Facebook Account that’s linked to your Instagram Account. If you’ve given any other users permissions with that linked Facebook Page they will also be granted permissions with the Instagram Account as well!
Managing Multiple Accounts
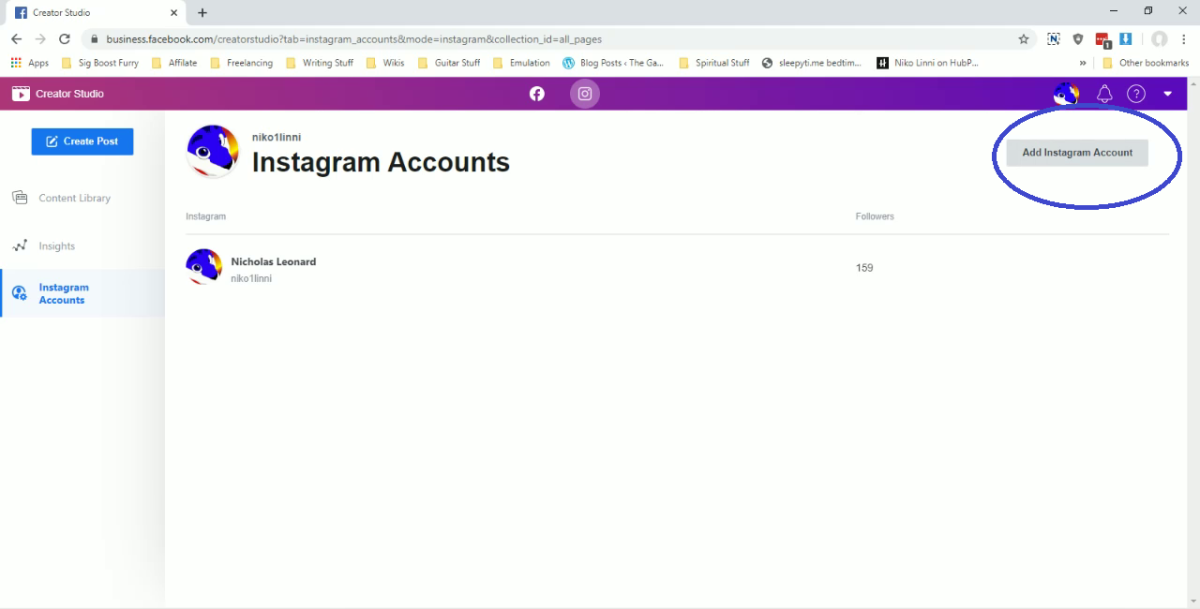
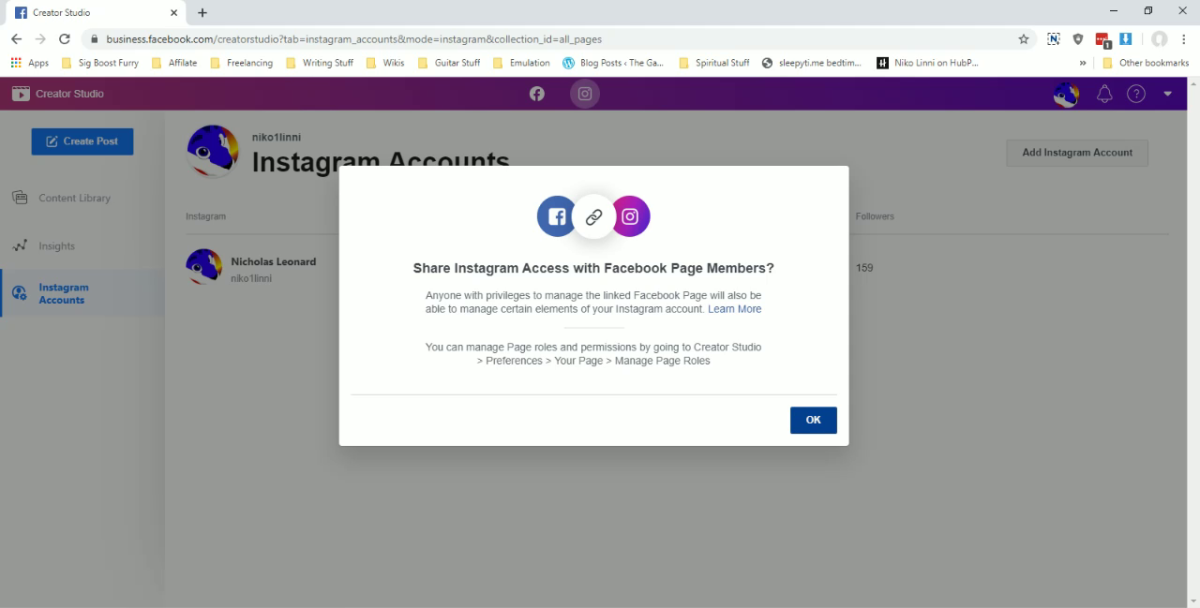
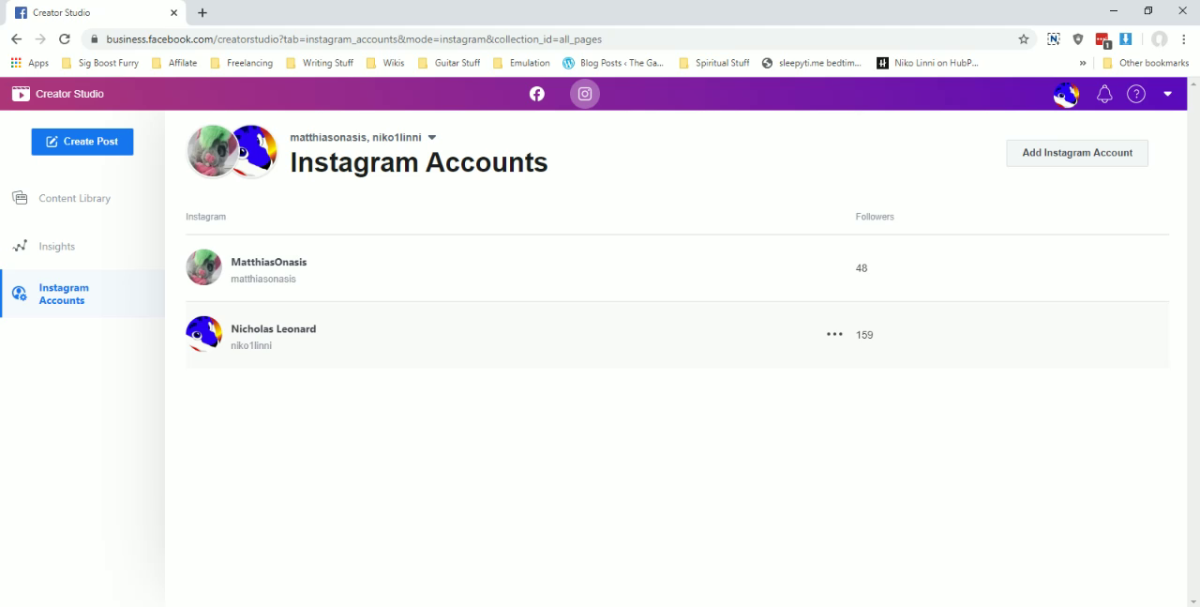
If you’re like me and you have a habit of making Instagram accounts for your multiple interests, you might also want to have those linked up to your Creator Studio too. Similar to the Facebook side, you’ll be able to switch between accounts easily. So no more having to log in and out of accounts to make posts - or worse, paying for multiple accounts! There are a few extra steps to go through though. Let’s begin by clicking “Instagram Accounts”. From here you can see all the Instagram accounts currently connected. Click on Add Instagram Account. You’ll get that familiar warning about your linked accounts and permissions. If you’re fine with users who have access to your pages getting access to linked Instagram accounts, click Ok. Once again, the login window for Instagram will pop up. Enter your credentials, log in, and now your account will be linked to the Creator Studio. When that’s done, the window will close, and if you see your other account listed with the currently connected accounts, you’ll know the process was a success!
Getting Started With Posting
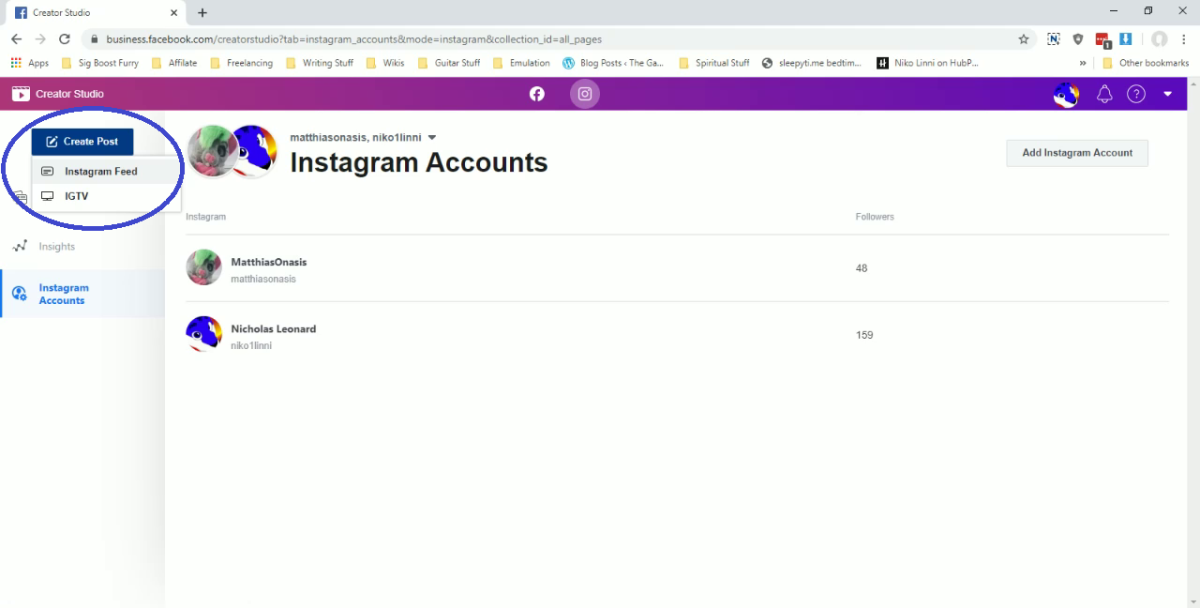
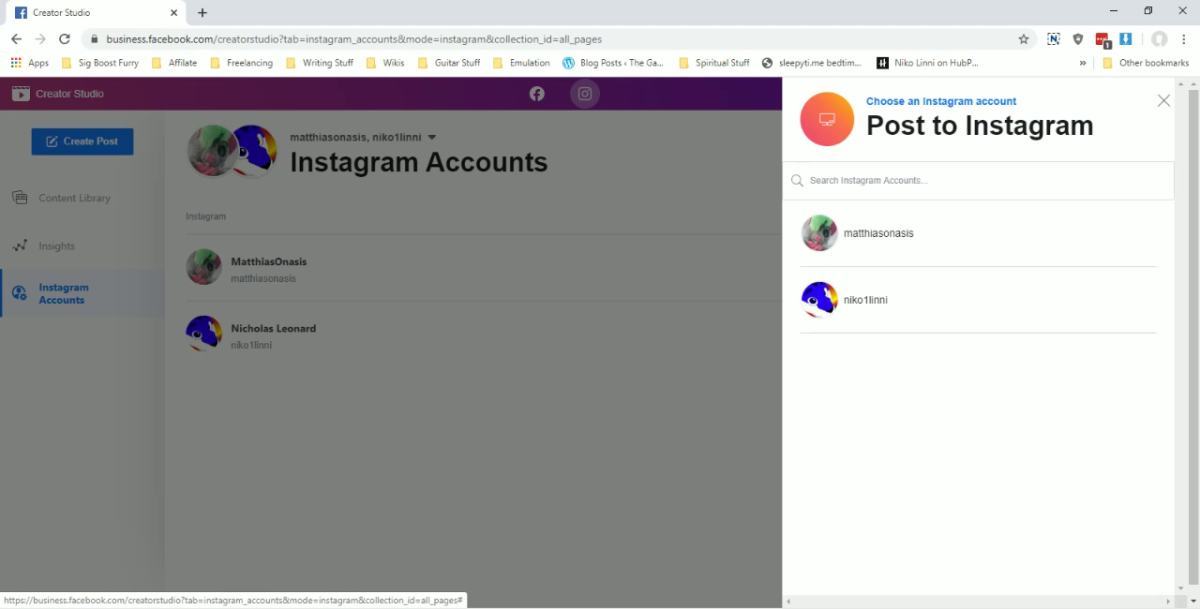
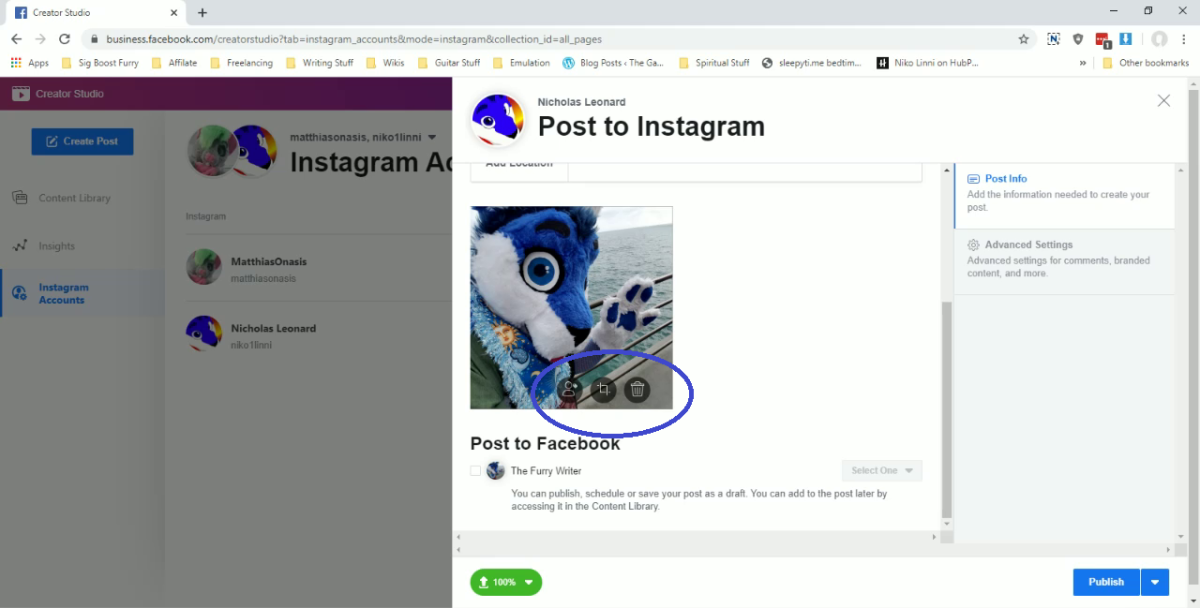
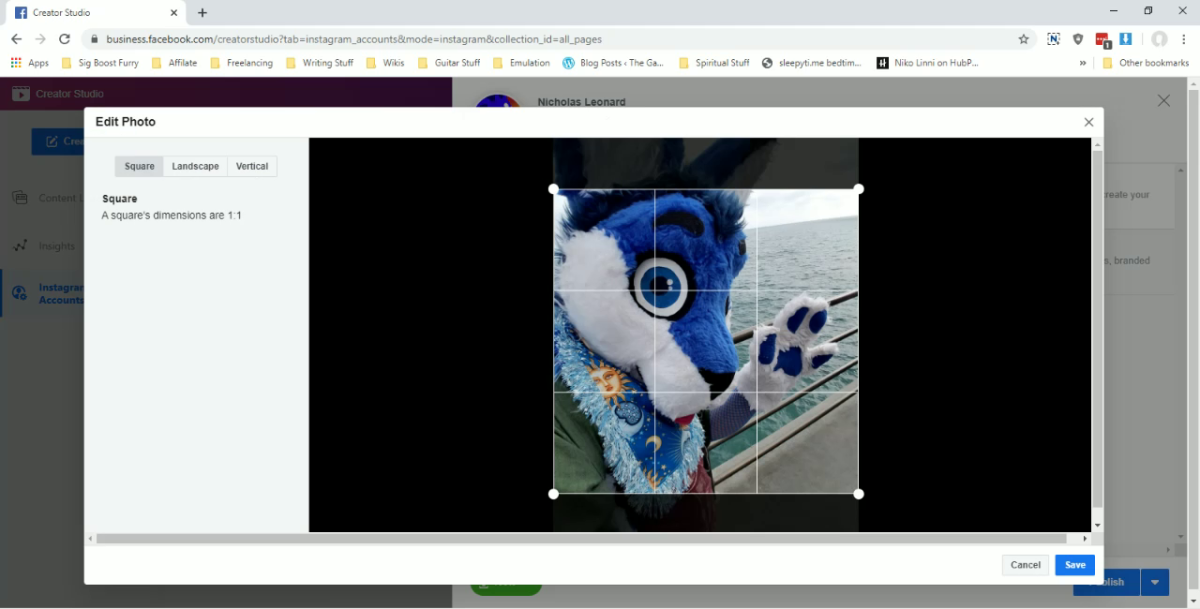
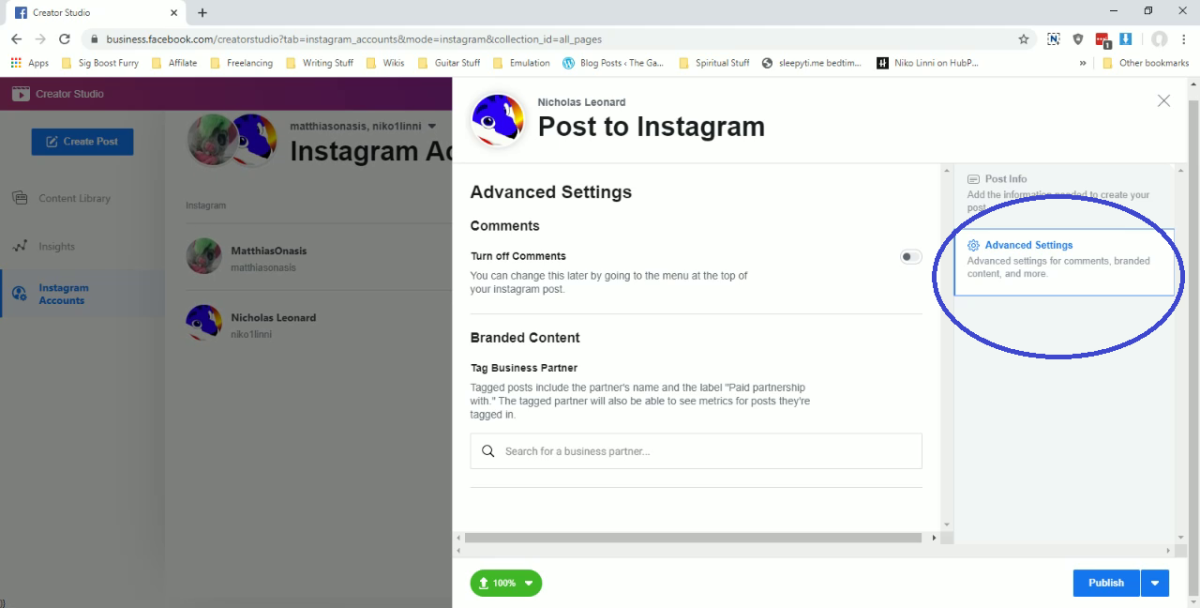
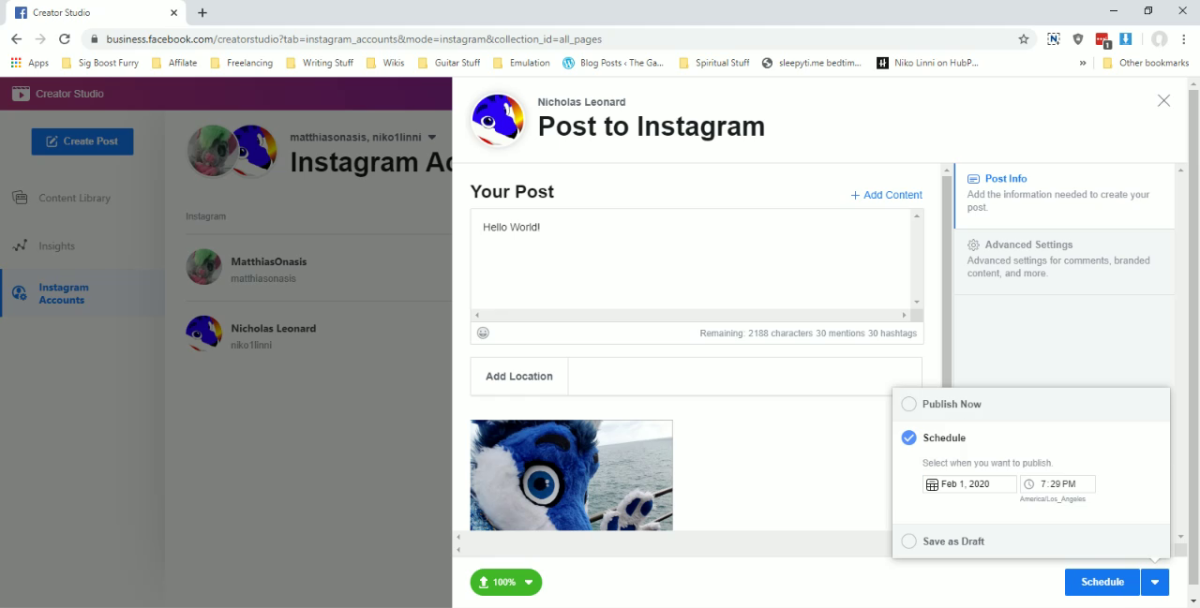
Now that we’ve got our account(s) connected, it’s time to make a post. Go back to the left sidebar, and click on the blue Create Post button. A small menu pops out asking if you want to post to your Instagram Feed or to IGTV (Instagram TV). Let’s stick to IG posts for now. Click Instagram Feed. If you have more than one account linked, a sidebar will pop up asking which account you want to post to. Select the appropriate account to continue. If you only have one account linked, don’t worry about this step. You’ll be taken to the post creation sidebar. Now it’s time to post! A new sidebar will open with a textbox. One huge advantage of the Creator Studio is it’ll let you know how many characters, mentions, and hashtags you have remaining for your post. Native Instagram doesn’t even do that! You can also Add location. When you’re ready to post, hit the blue Publish button. But wait, there’s more! You’ve also got some great features to work with. At the bottom of your preview image, there are buttons to tag friends, customize your photo’s cropping, and delete the photo if you need to trash it and replace it with something else. Remember though - Instagram likes a nice 4:3 aspect ratio. So if your image doesn’t quite fit that, you’ll have to crop the image. If you need to, this window that pops up when you select the crop tool will help you out! I like to keep my images in a 1080x1080 resolution: it fits the 4:3 aspect ratio perfectly. Need help? Check out this other article where I walk you through how to fit images in that aspect ratio as well as give my own examples. Also for videos, they must be in a 4:3 resolution and can be no longer than a minute. Unfortunately, there are no crop tools available for videos, so make sure they’re the correct resolution and length before trying to upload! There are also some Advanced Settings available that let you turn off comments and tag business partners. You can also easily schedule posts for later uploading, or save the post as a draft by clicking the triangle next to the blue publish button. And that’s it! You can now post pictures and videos to Instagram from the comfort of your own home browser. It’s a bit to go through, but after a few posts it’ll quickly become second nature. Instagram does tend to get lots of use from mobile, but if you’re someone who does say, art on their computer, graphic design, or professional photo editing this can be an excellent way to get content out fast and easy. No paid services, no tossing files between cloud services, no nothing! Just link your Instagram account in the Facebook Creator Studio and you’re good to go!
Other Awesome Elements
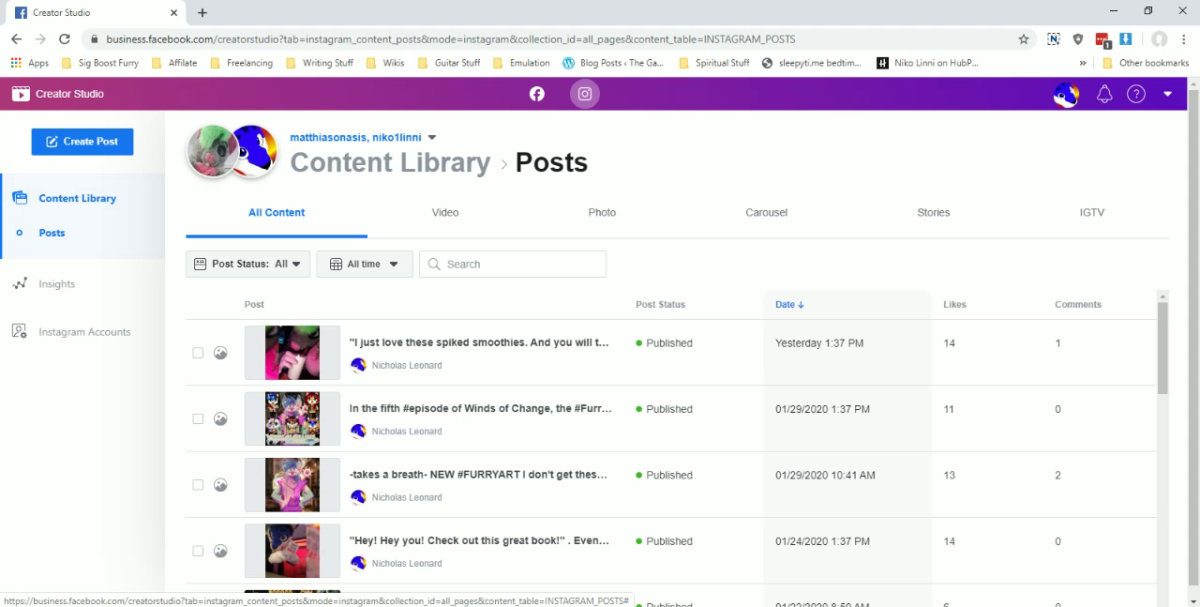
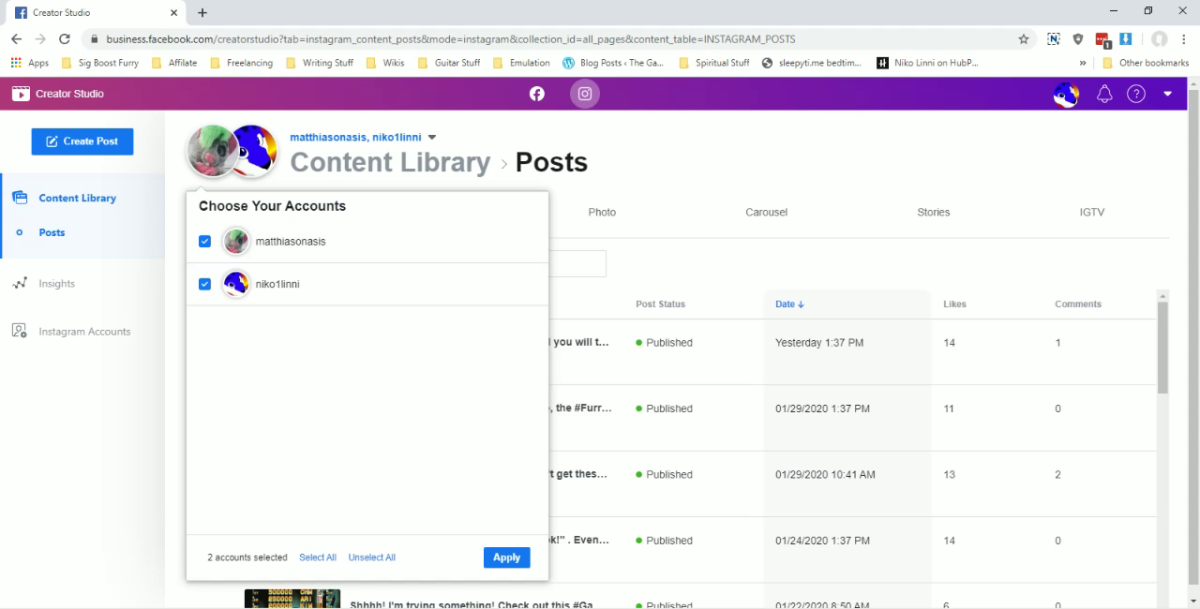
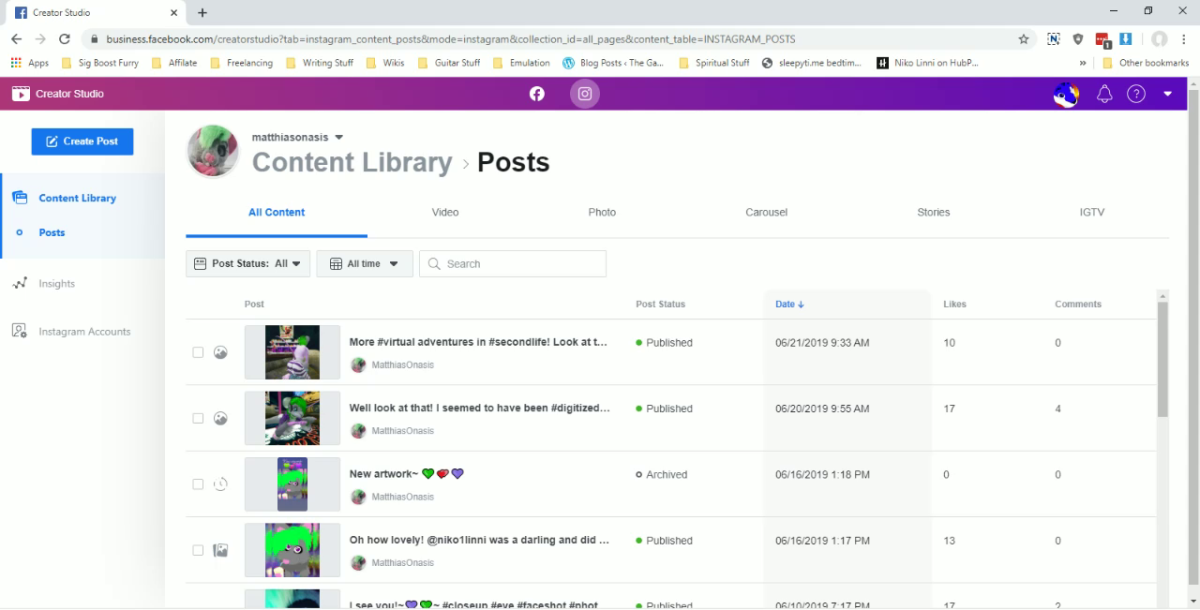
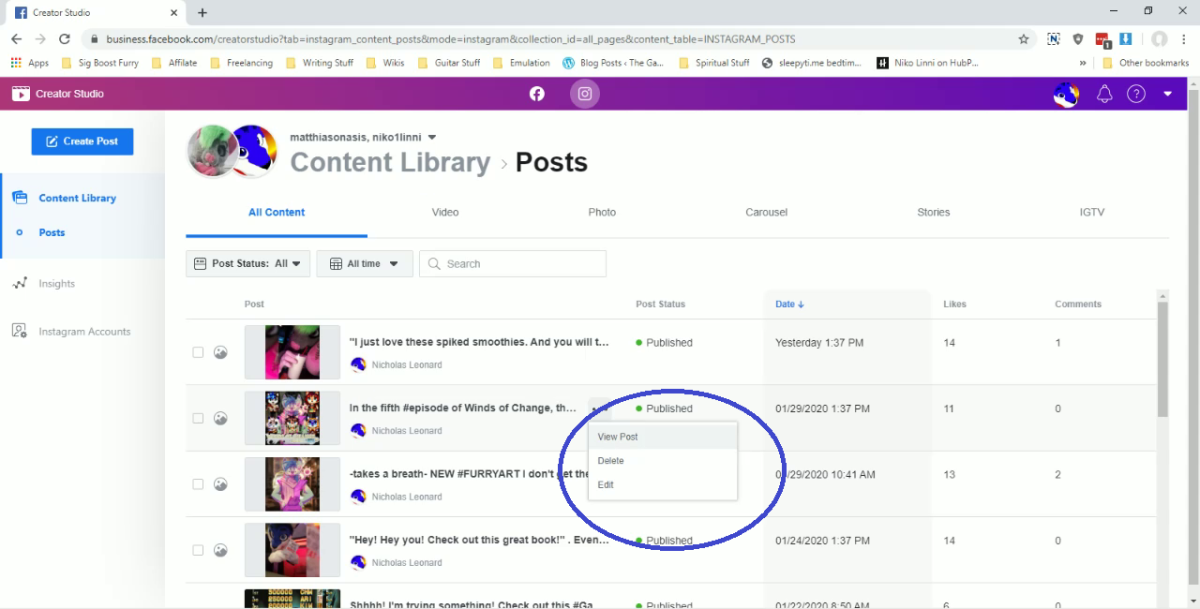
There’s also some great things to take note of in the Creator Studio. For example, if you click Content Library on the left sidebar you can view all the posts that are currently both live, scheduled, and drafted. Insights will give you some useful analytics for your connected accounts too. Unlike the Facebook side of things all posts from all connected accounts will show. However, there is a fix for that.. Click the icons for your accounts at the top of the screen. A little drop-down menu will pop open, and you can check off which accounts you want to see the posts of. Click the blue Apply button and…. Boom! Now you can only see the posts from the accounts that you want to see. This won’t be a remembered setting, however, so you’ll need to do this every time you load the Creator Studio for Instagram. You’re also allowed to edit posts…to a certain extent. Find a post in your Content Library and hover over the text preview for it. Three small dots will appear. Click on those and a small drop-down menu will pop up. View Post will let you see the picture/video and text of the post. You can also get the same handy analytics that you would get from the Instagram mobile app. Edit will let you edit the text of the post, and if you really want to, Delete will delete the post. If you click Edit the post sidebar will come back up. You’ll be able to edit the entirety of the text, advanced features, and location. However, you cannot edit the picture itself! This includes changing it! This goes for posted and scheduled posts. If you decide to change your mind about photos used in a scheduled post, you’ll have to make a new post and delete the old one.
You’re Ready to Go!
And that’s all there is to it! Well, to get you started at least. I didn’t even know about this when I first started using Instagram and I’m glad I found it, as I thought the only thing out there for desktop posting were mobile emulation tricks or subscription services. While some of those services might have a more robust or streamlined service, the Creator Studio is a great method to use for those of us who are tight on a budget…or don’t mind some small inconveniences in order to save some money. Time to get posting! Let me know what you think in the comments, or if you have any questions, comments or concerns.