So how well does it work? Let’s look at some photos and see what it does well, as well as identify a few weaknesses of the algorithm. We will start with the most excellent results and work our way down to fair or poor results. Knowing this, you can use the feature more effectively in coloring your own black-and-white photos. Note: The below are royalty-free images from Art Explosion 750,000 Images clip art collection. They were originally color photos which I converted to grayscale for the purposes of testing shown here.
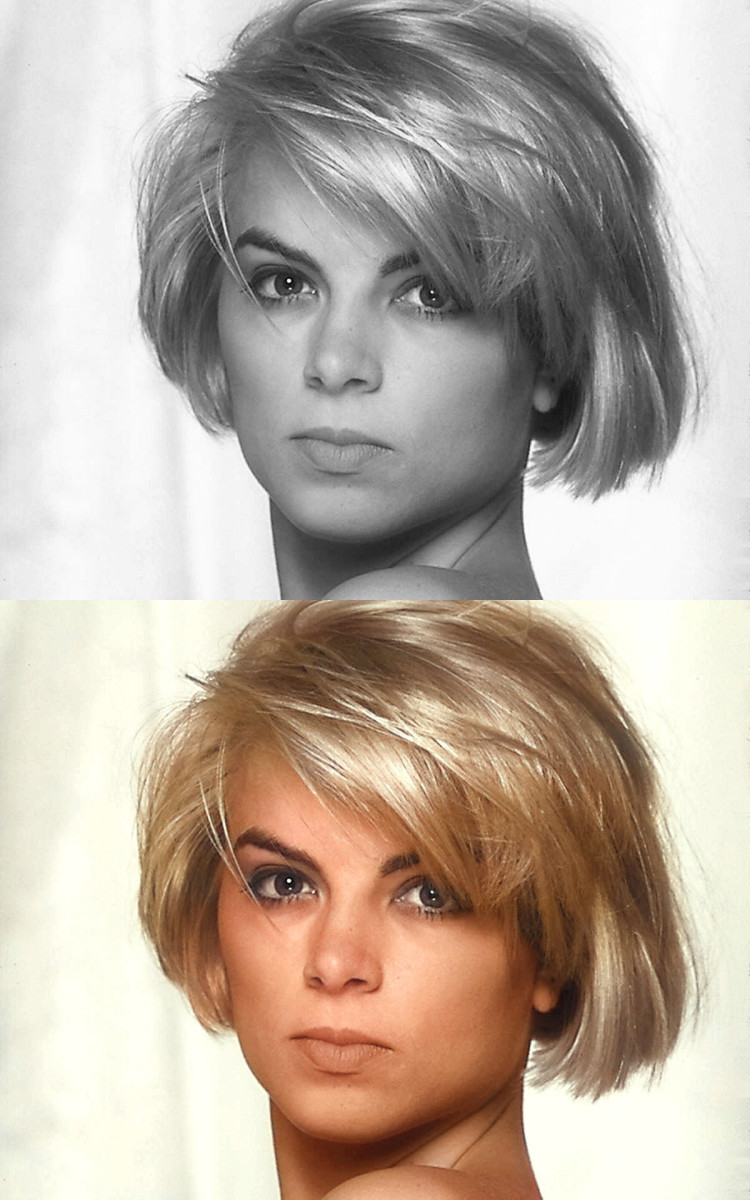
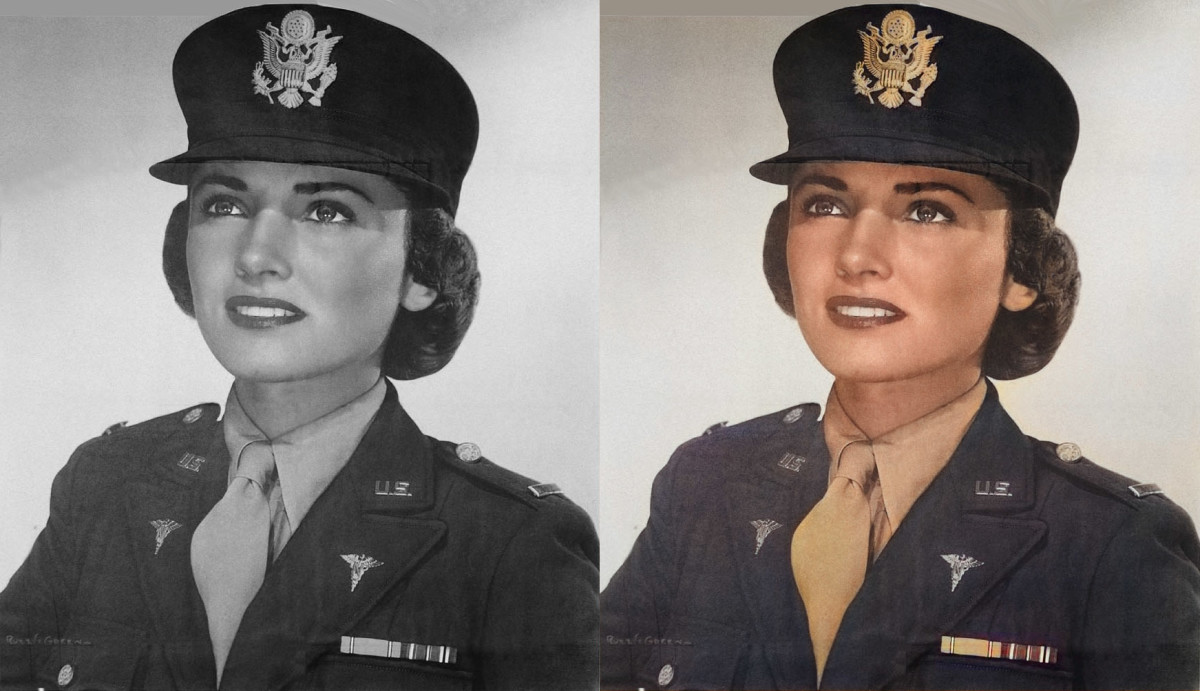
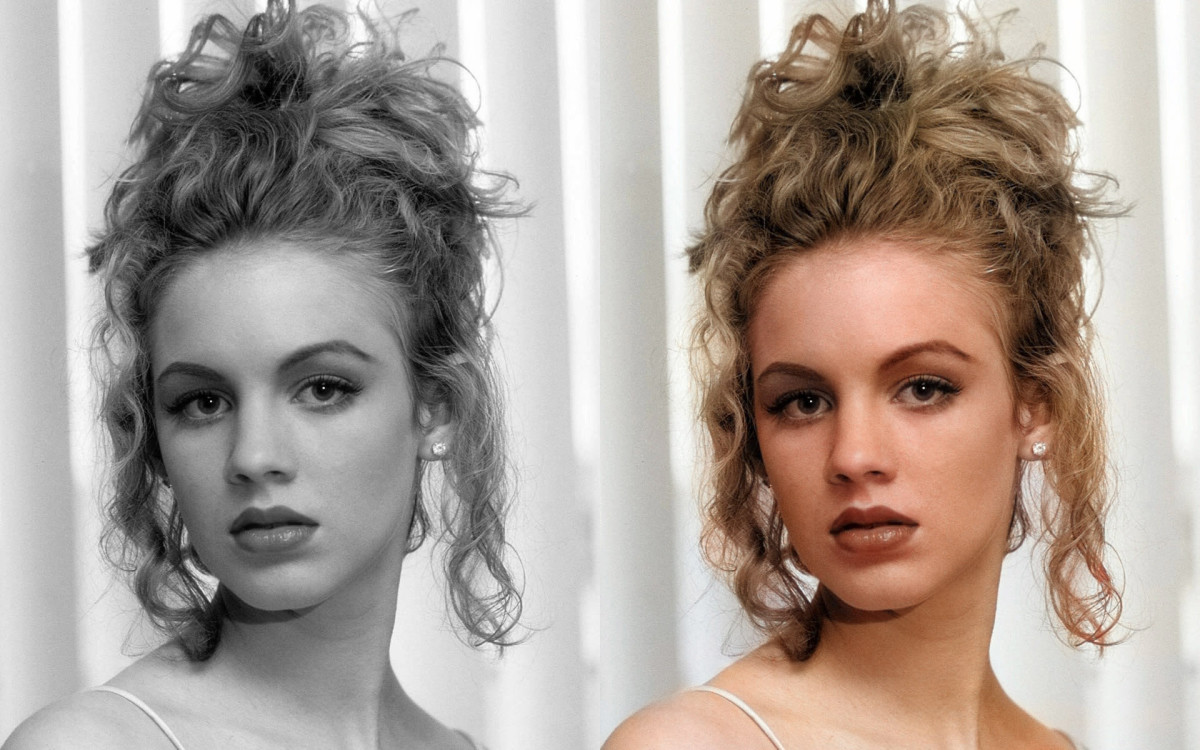
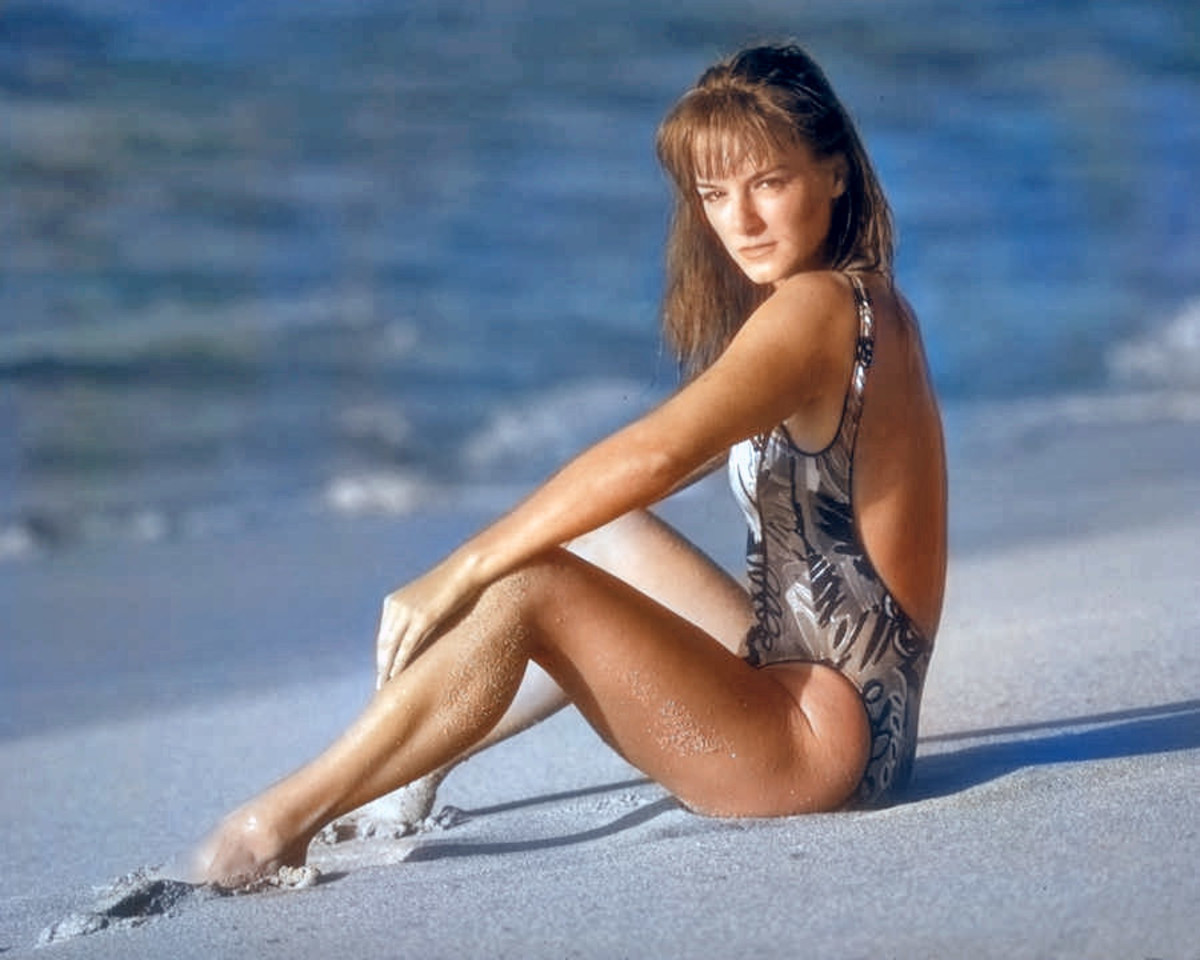
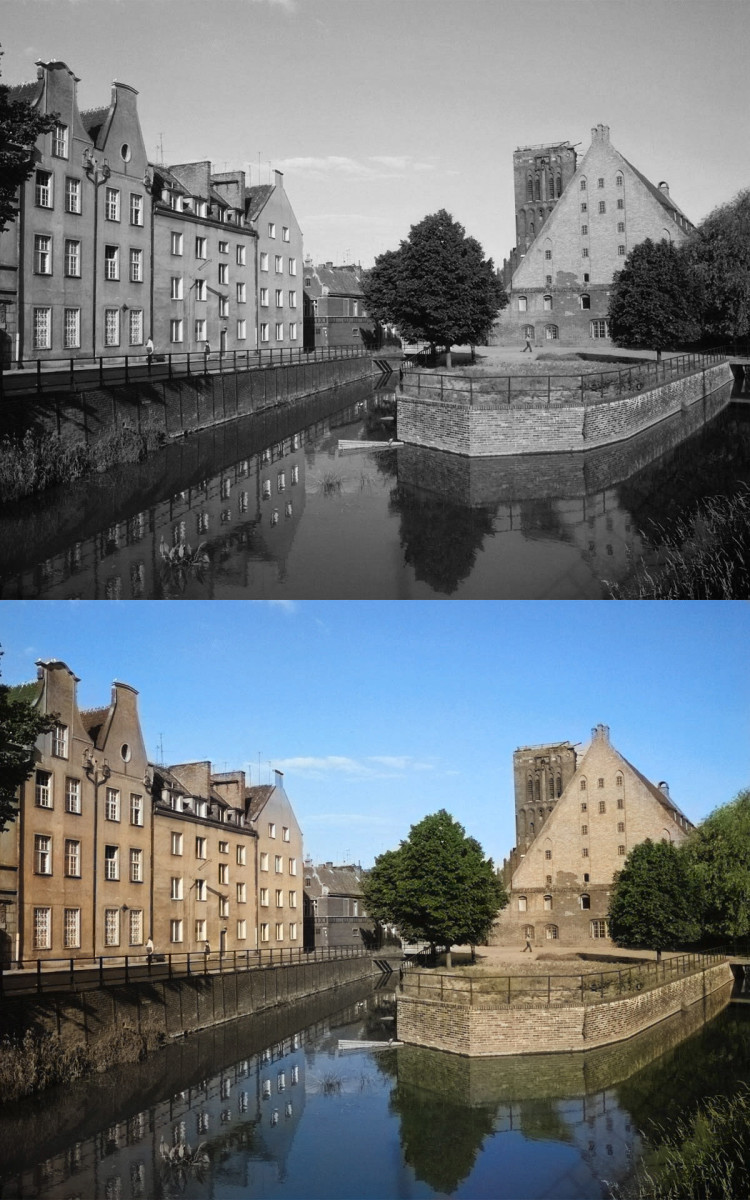
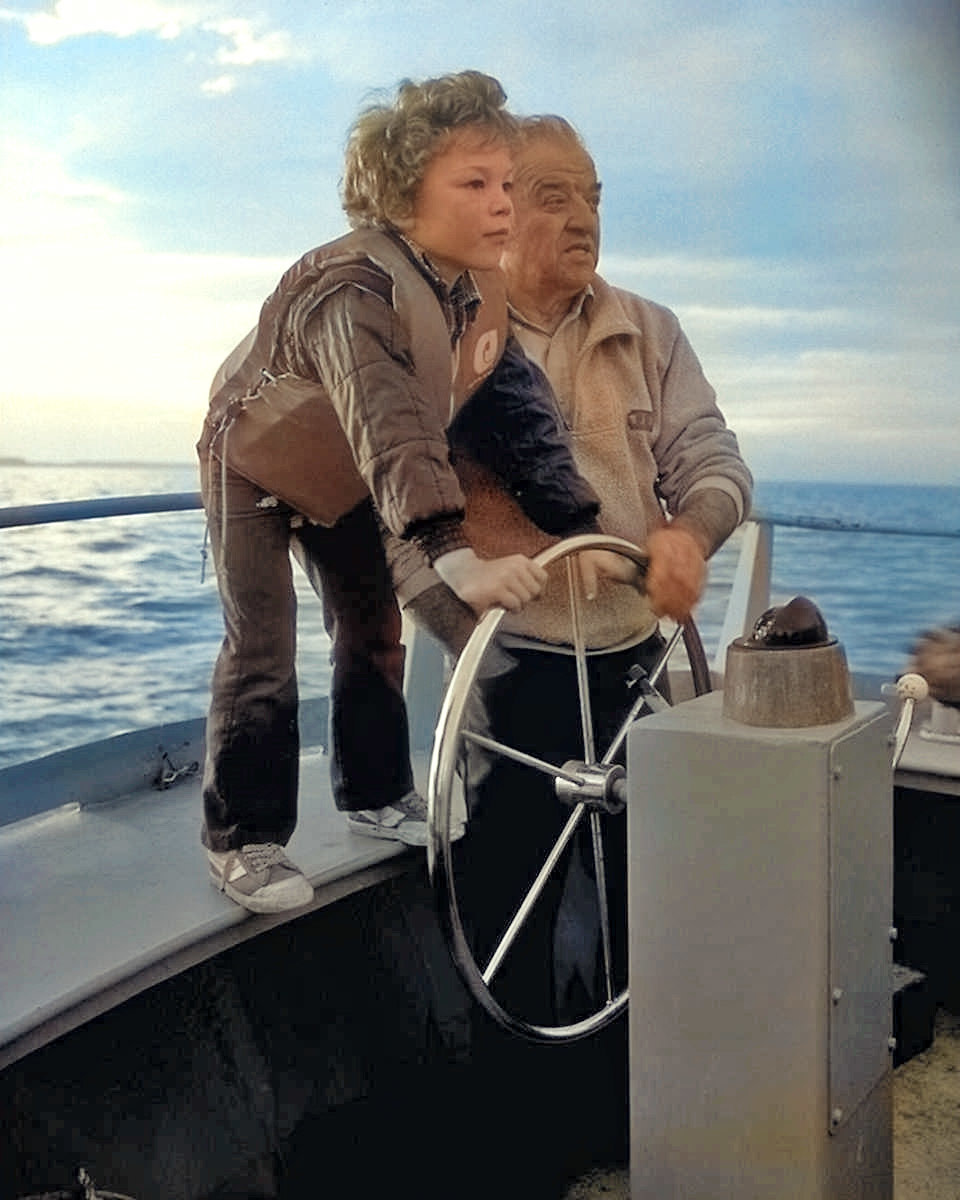
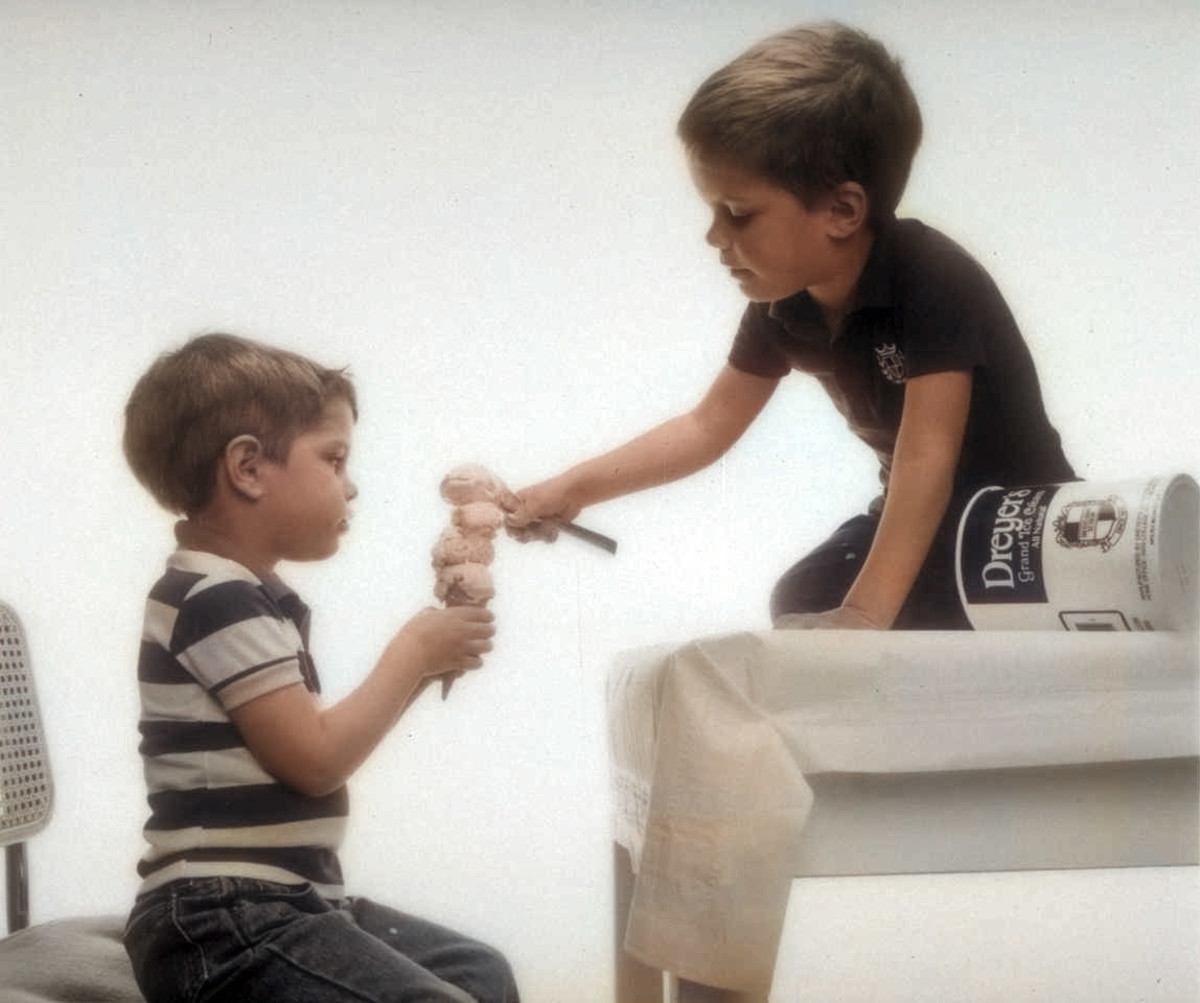
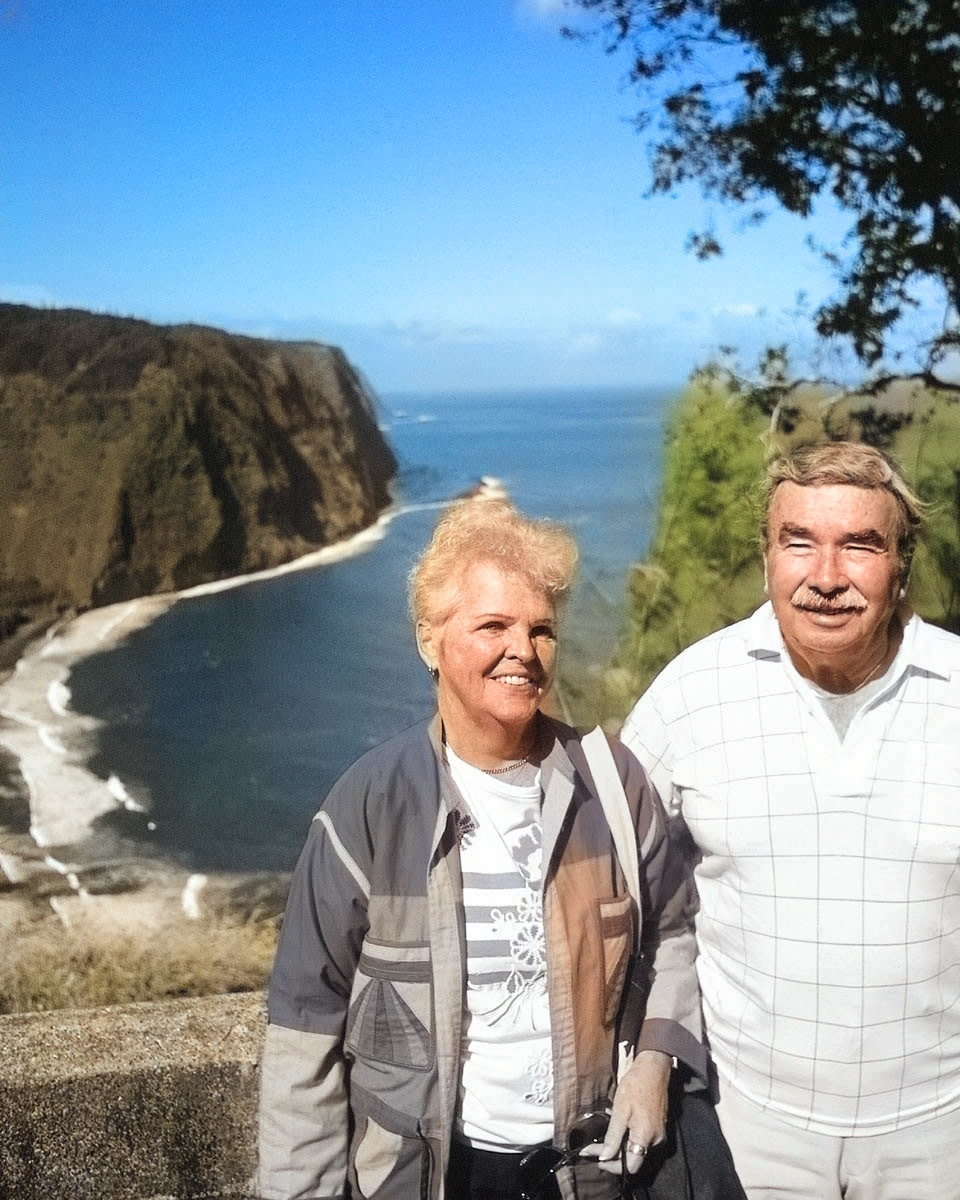
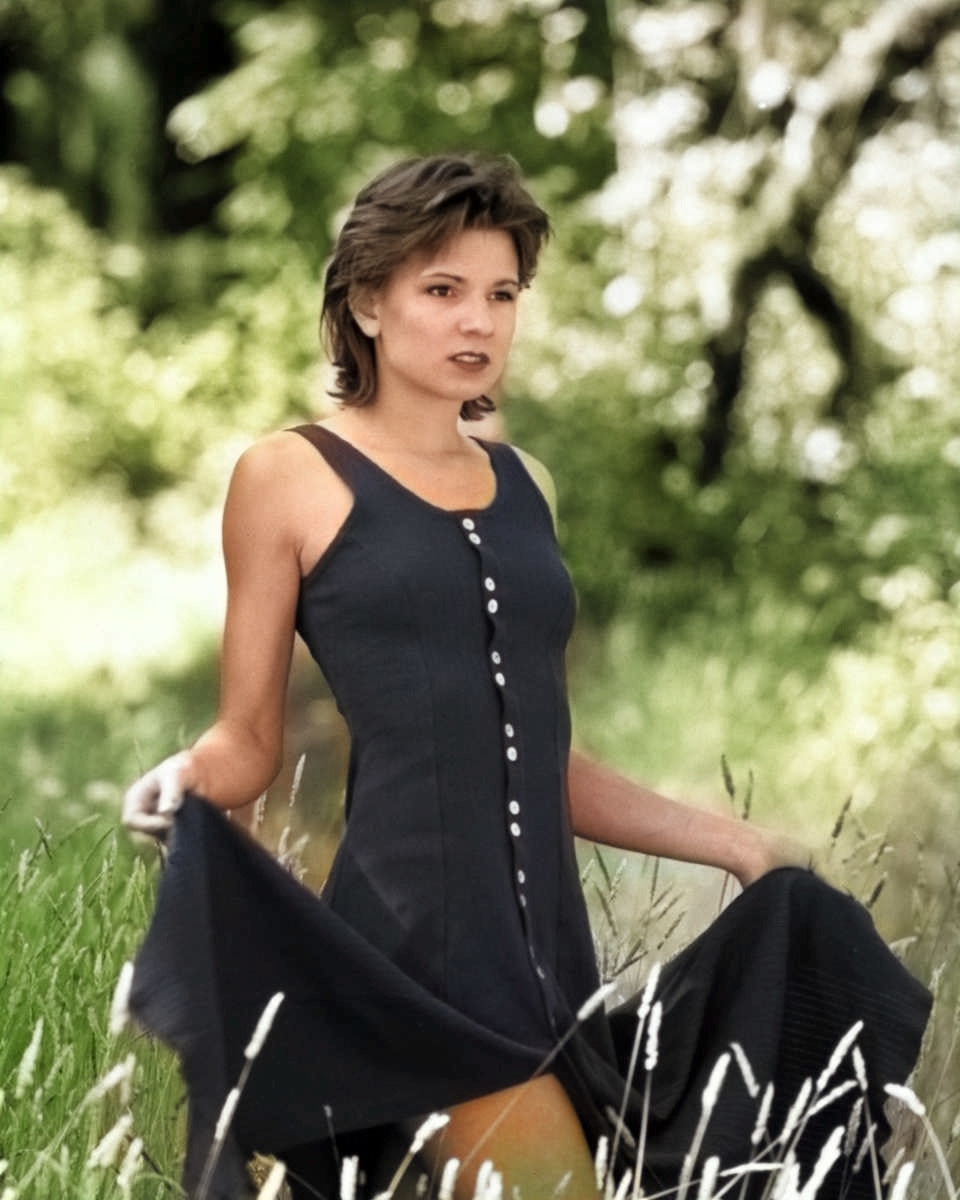
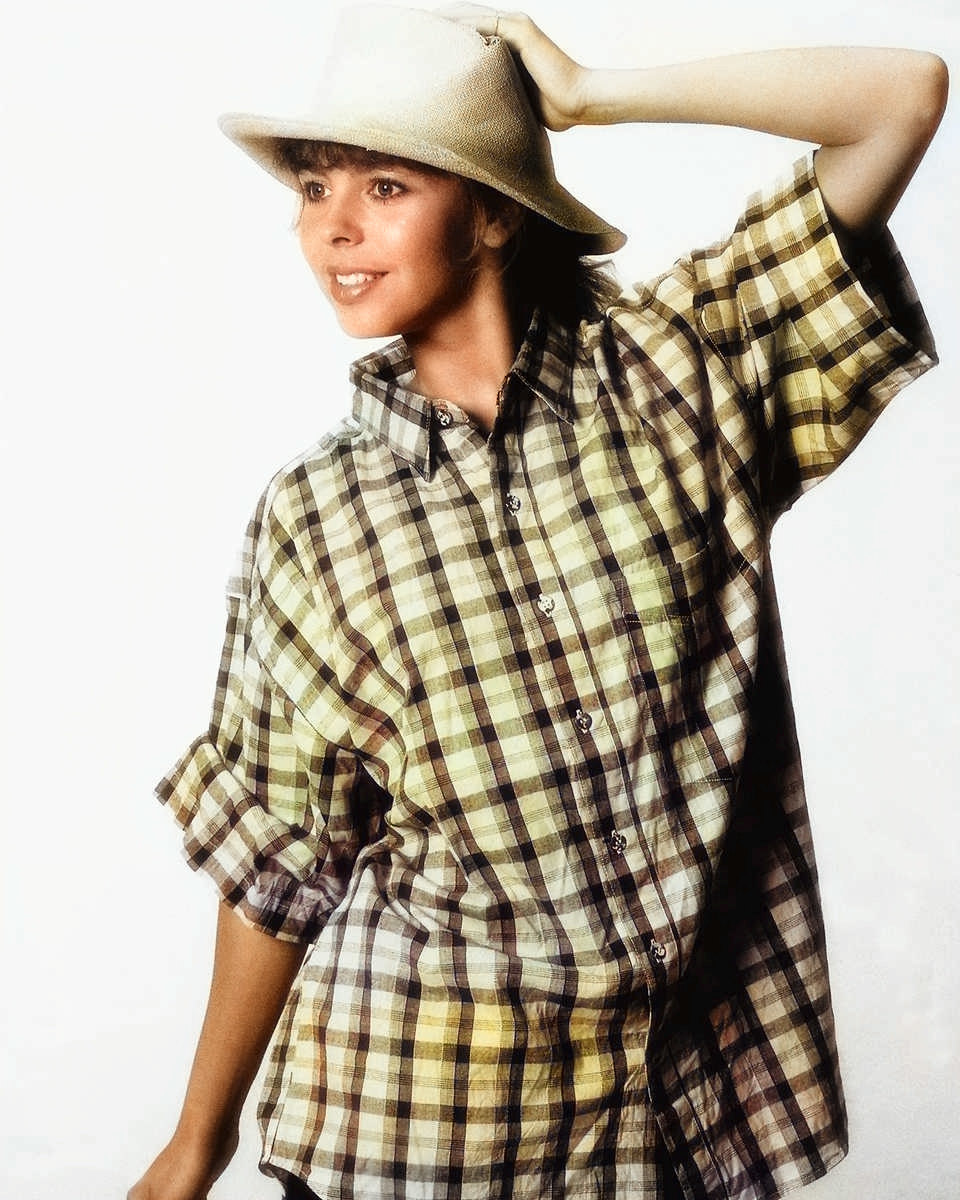
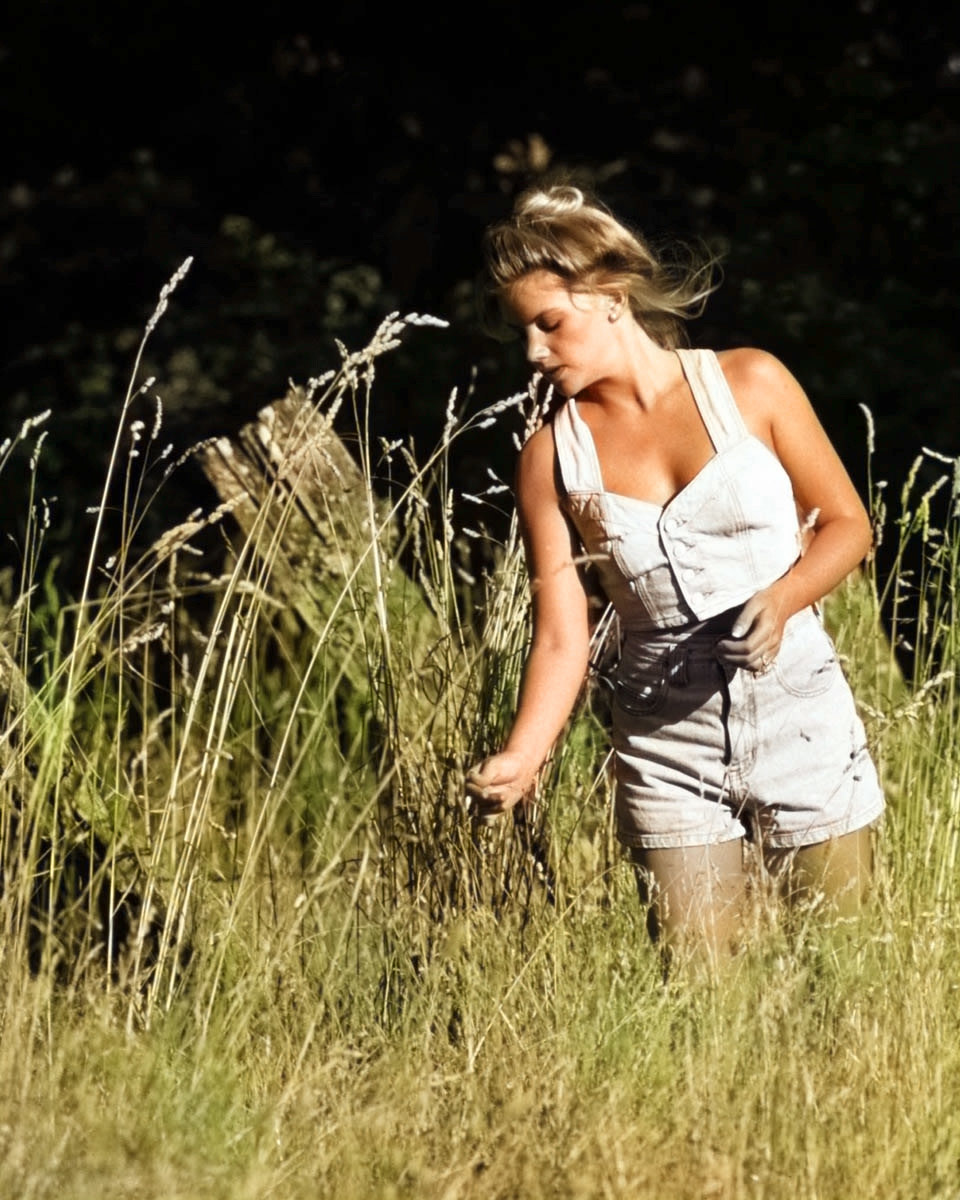
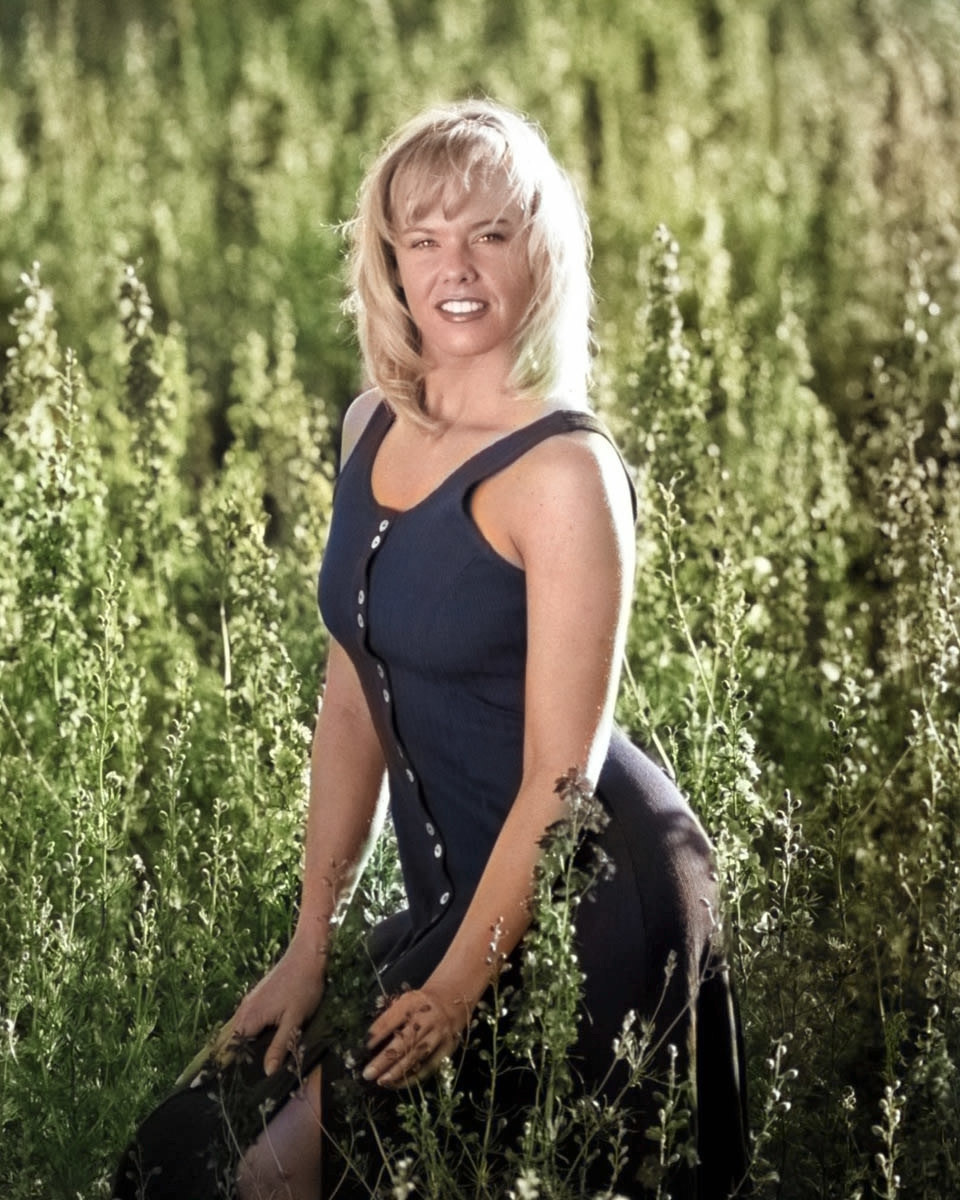
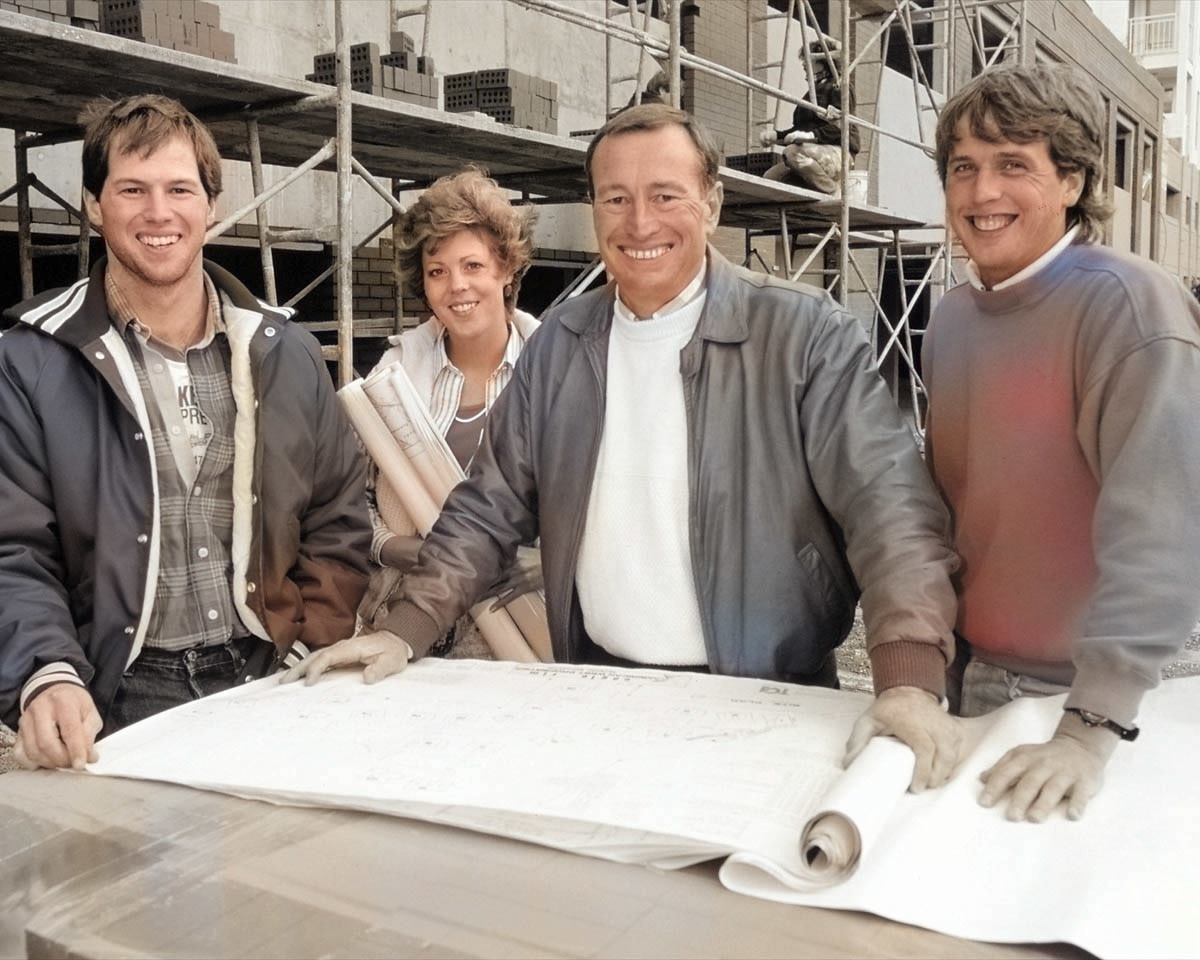
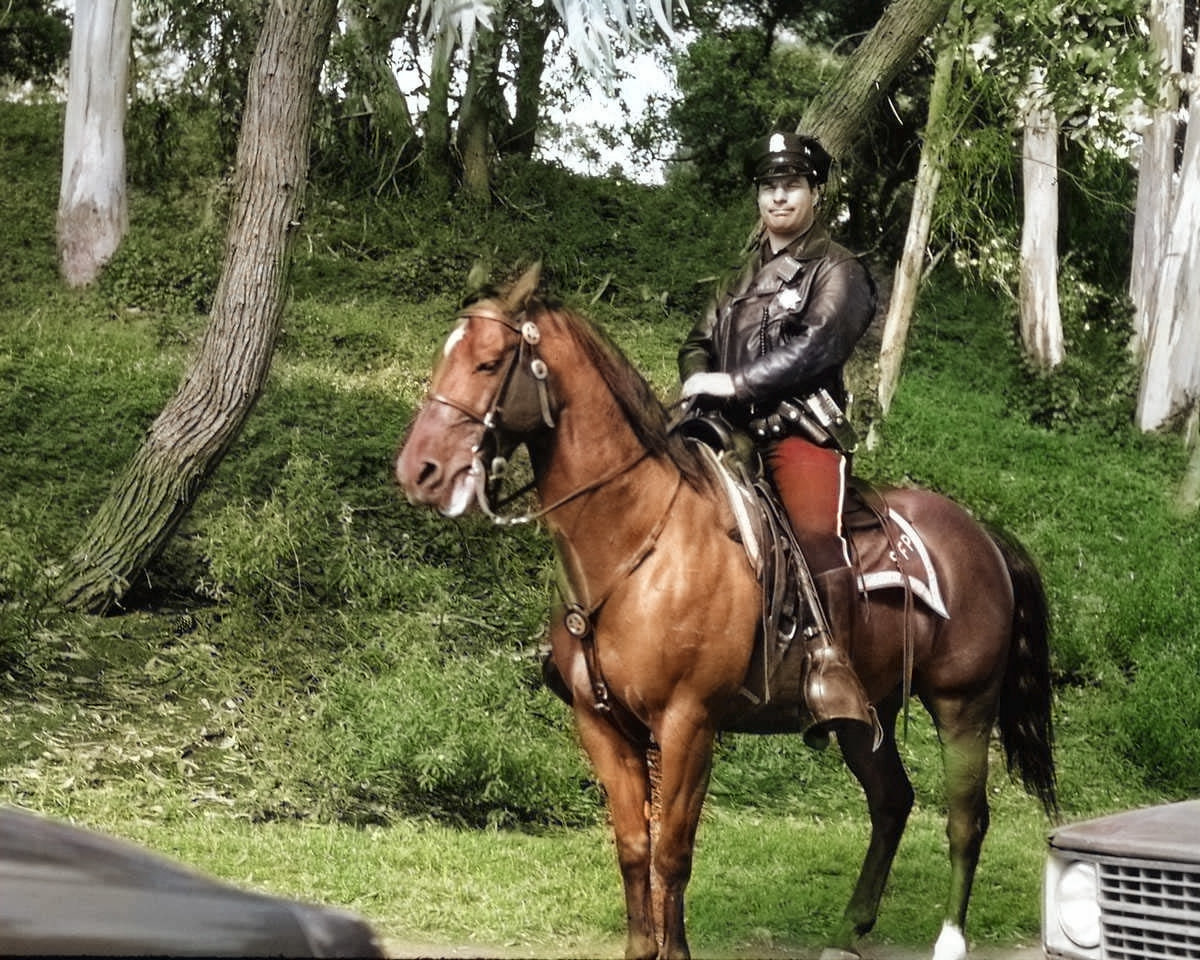
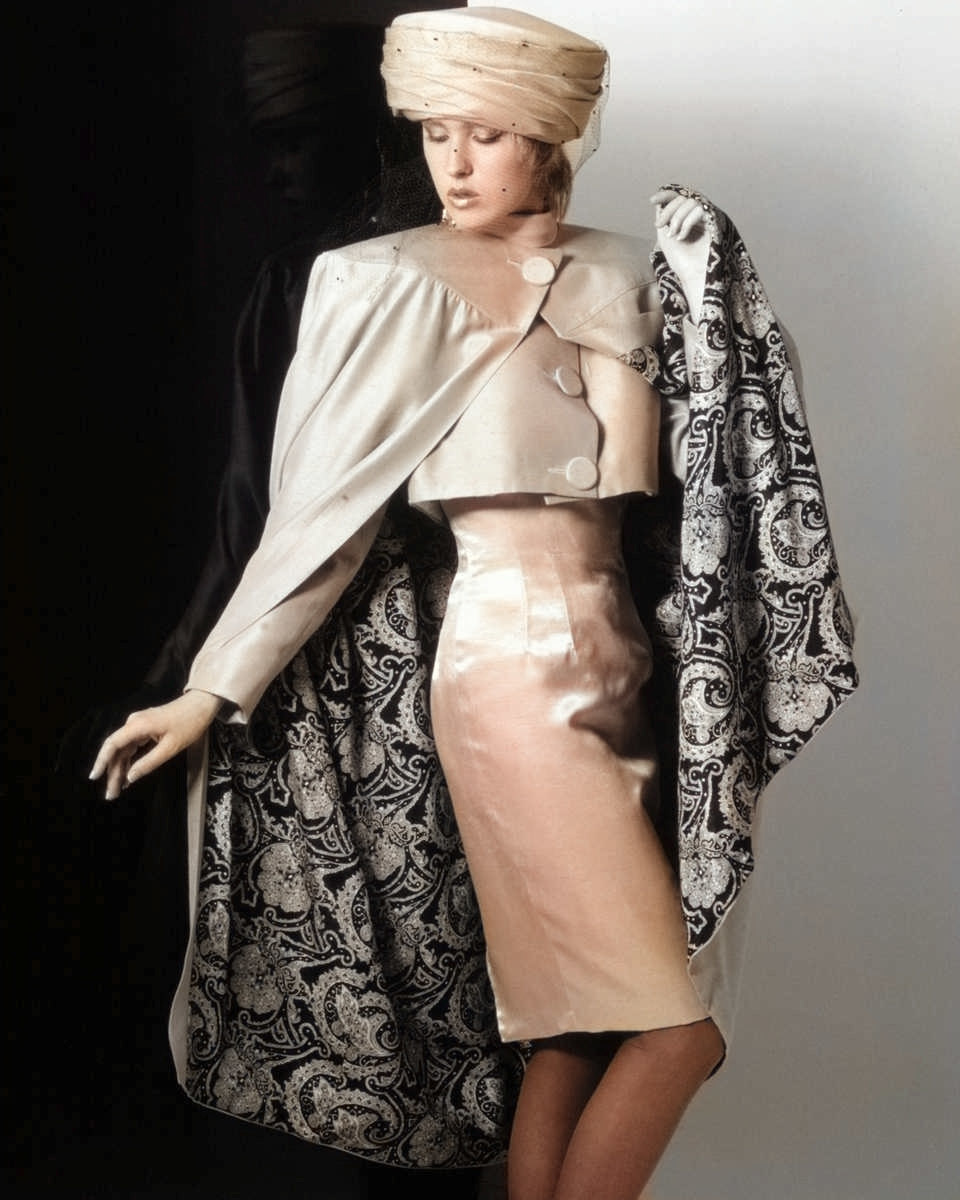
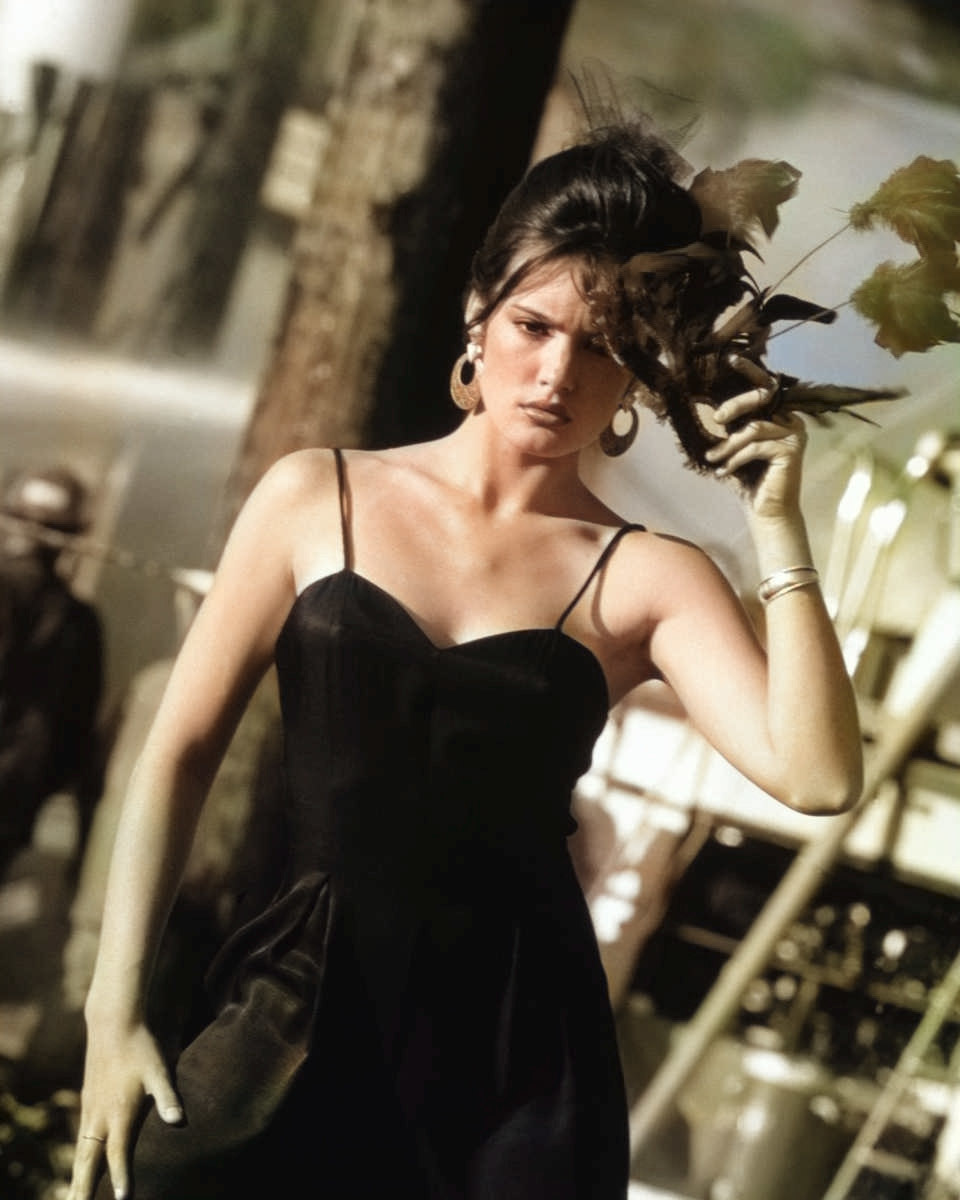
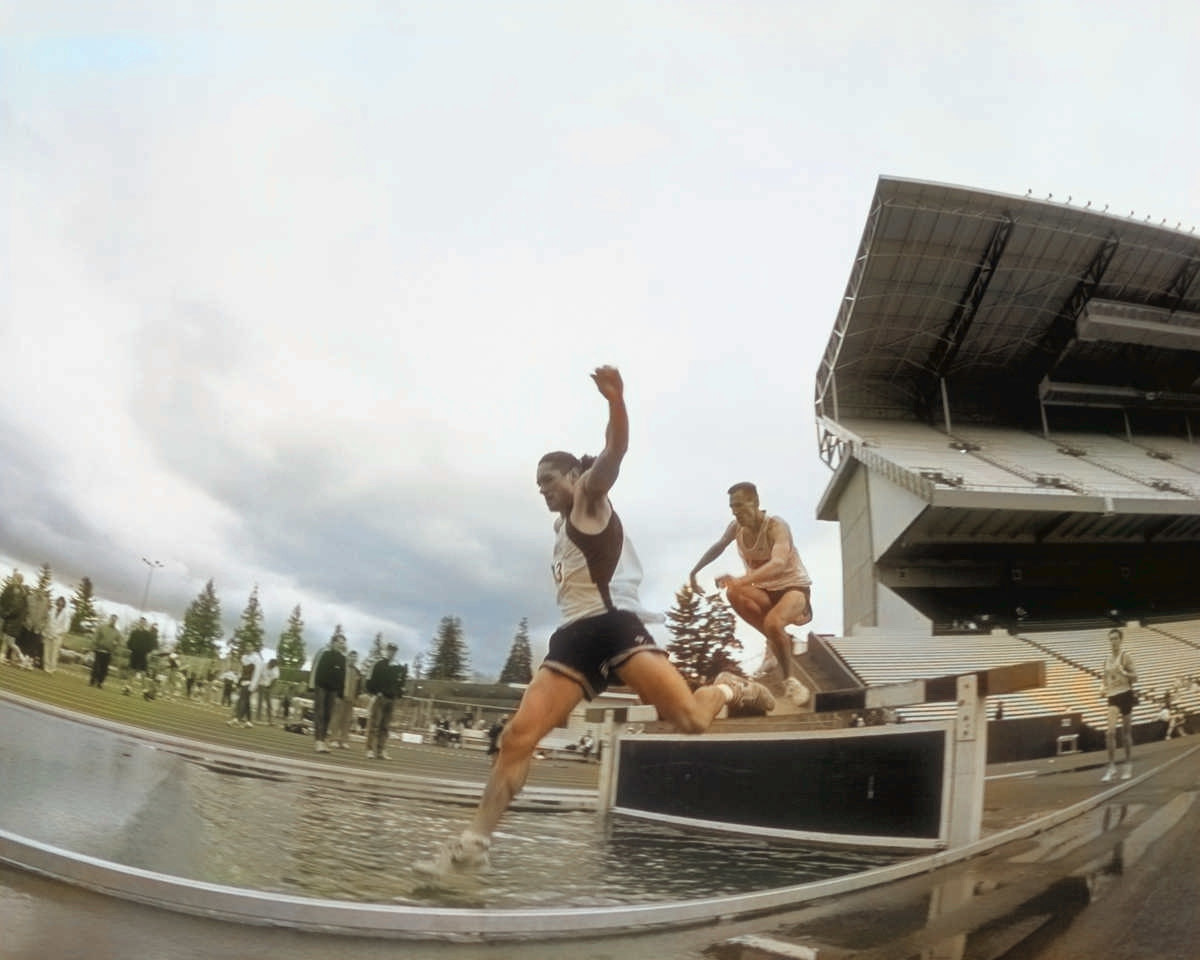
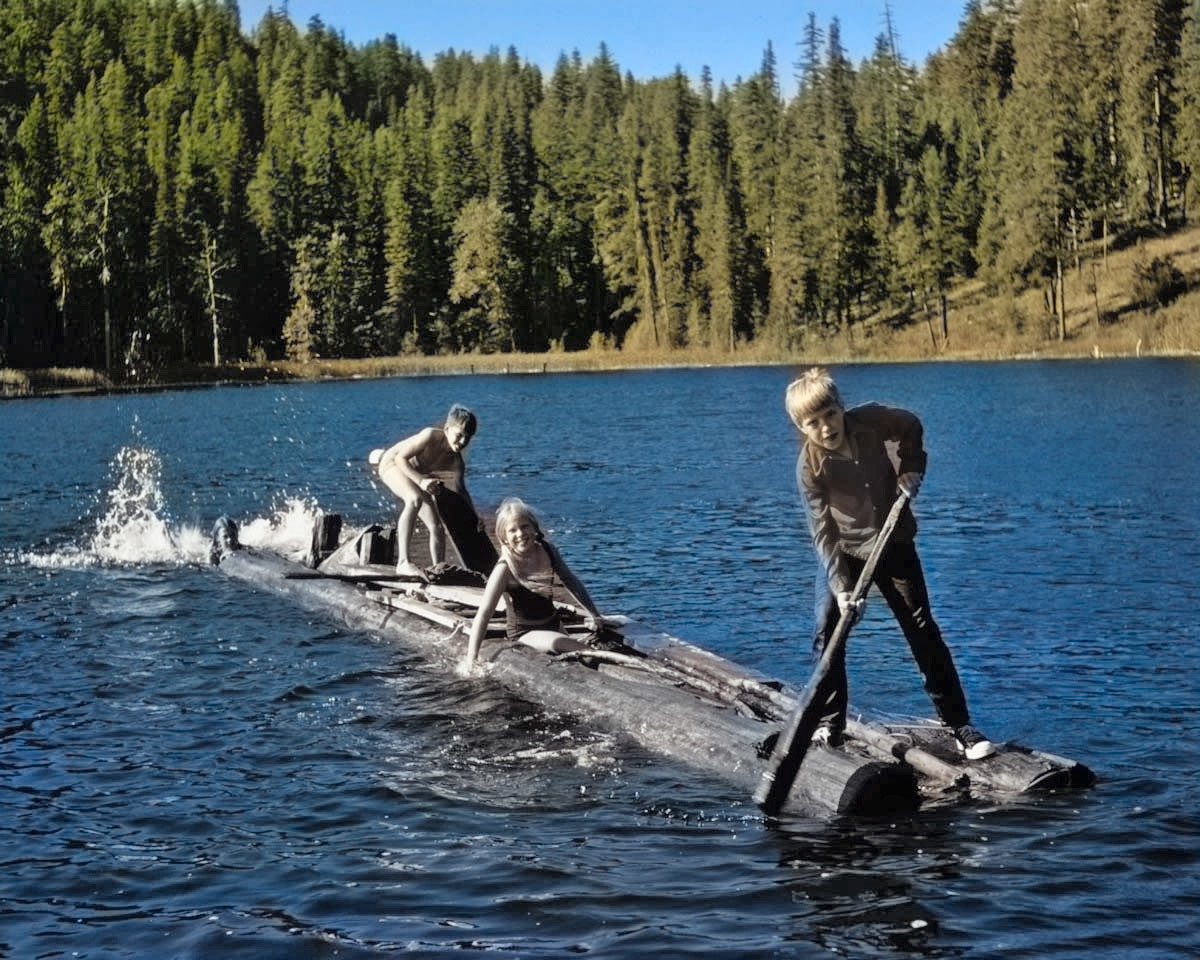
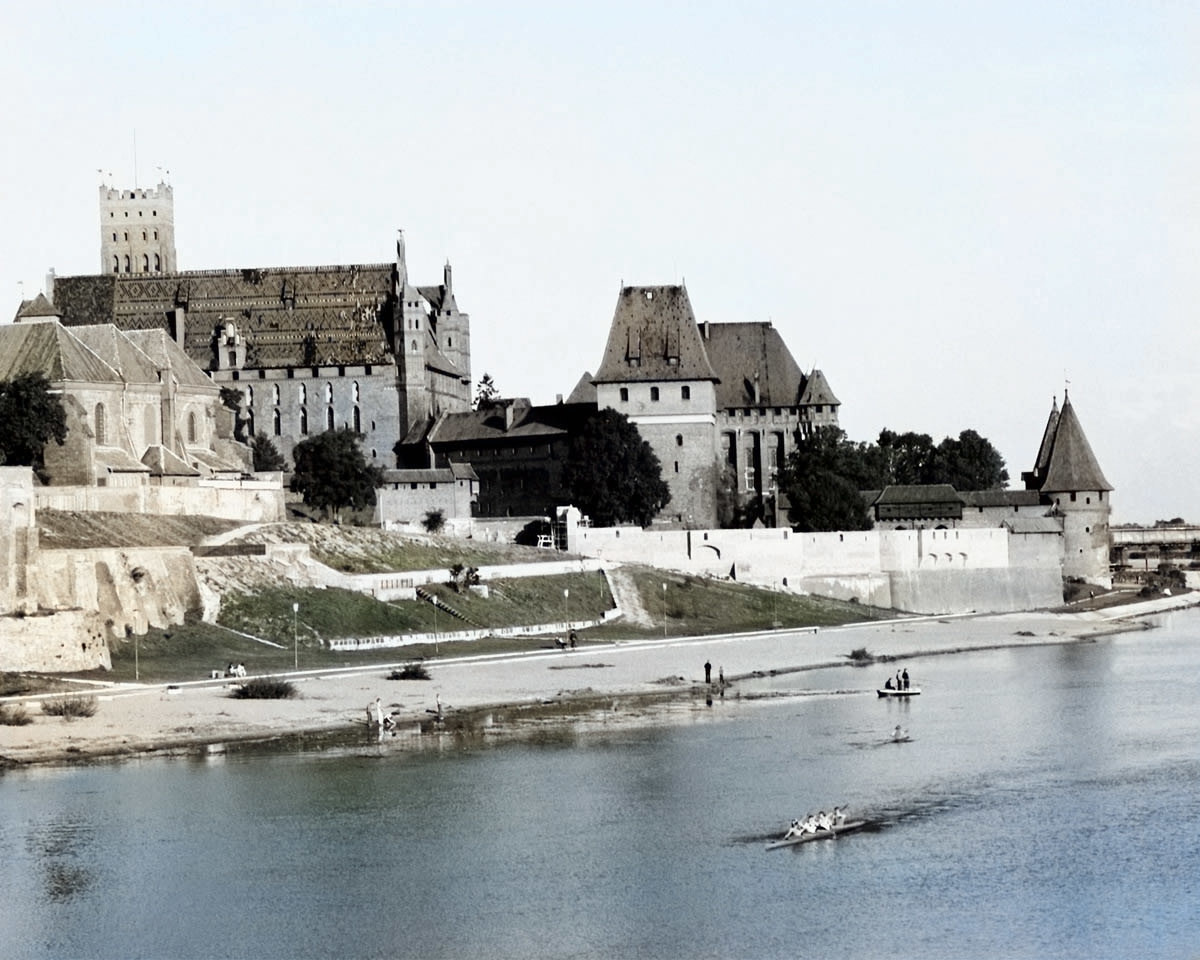
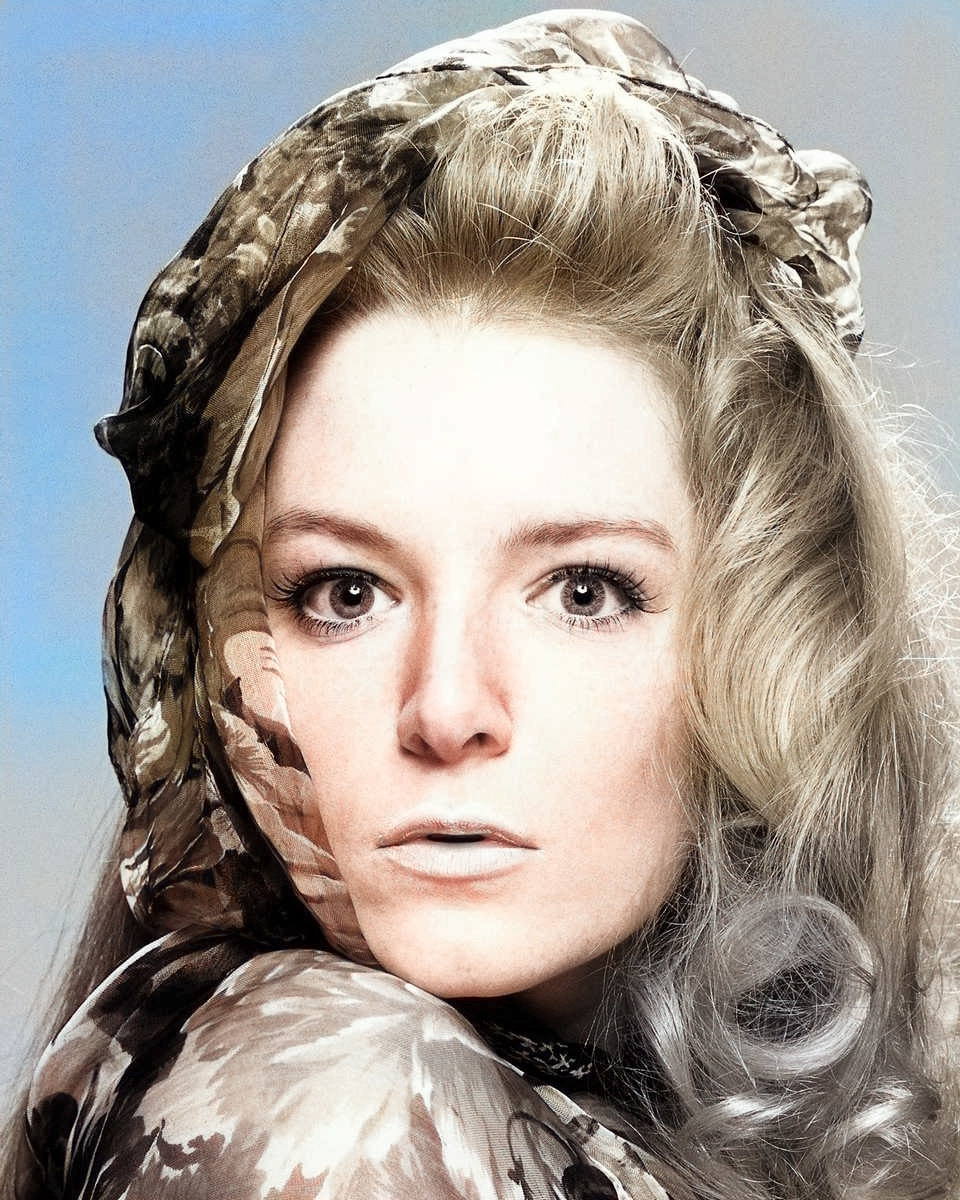
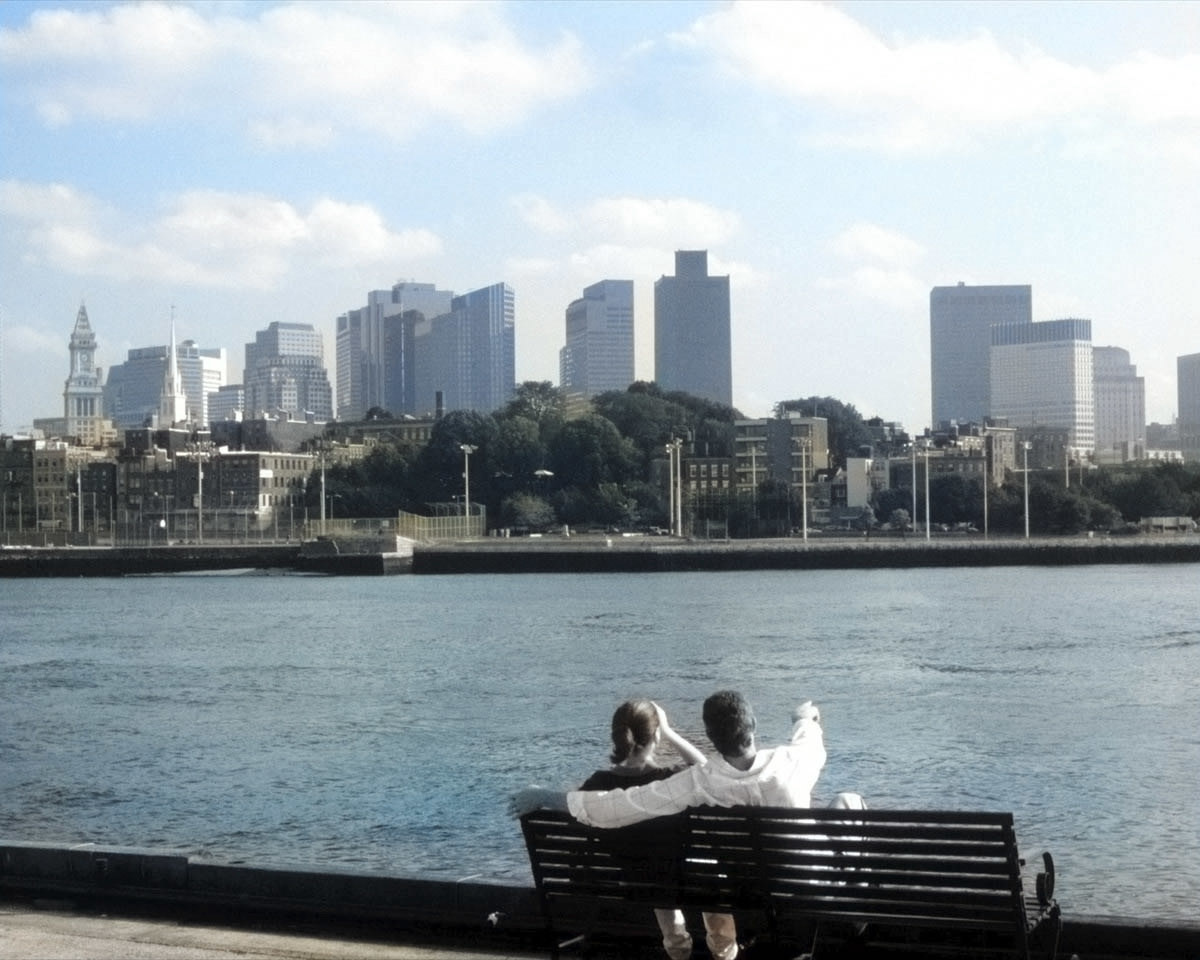
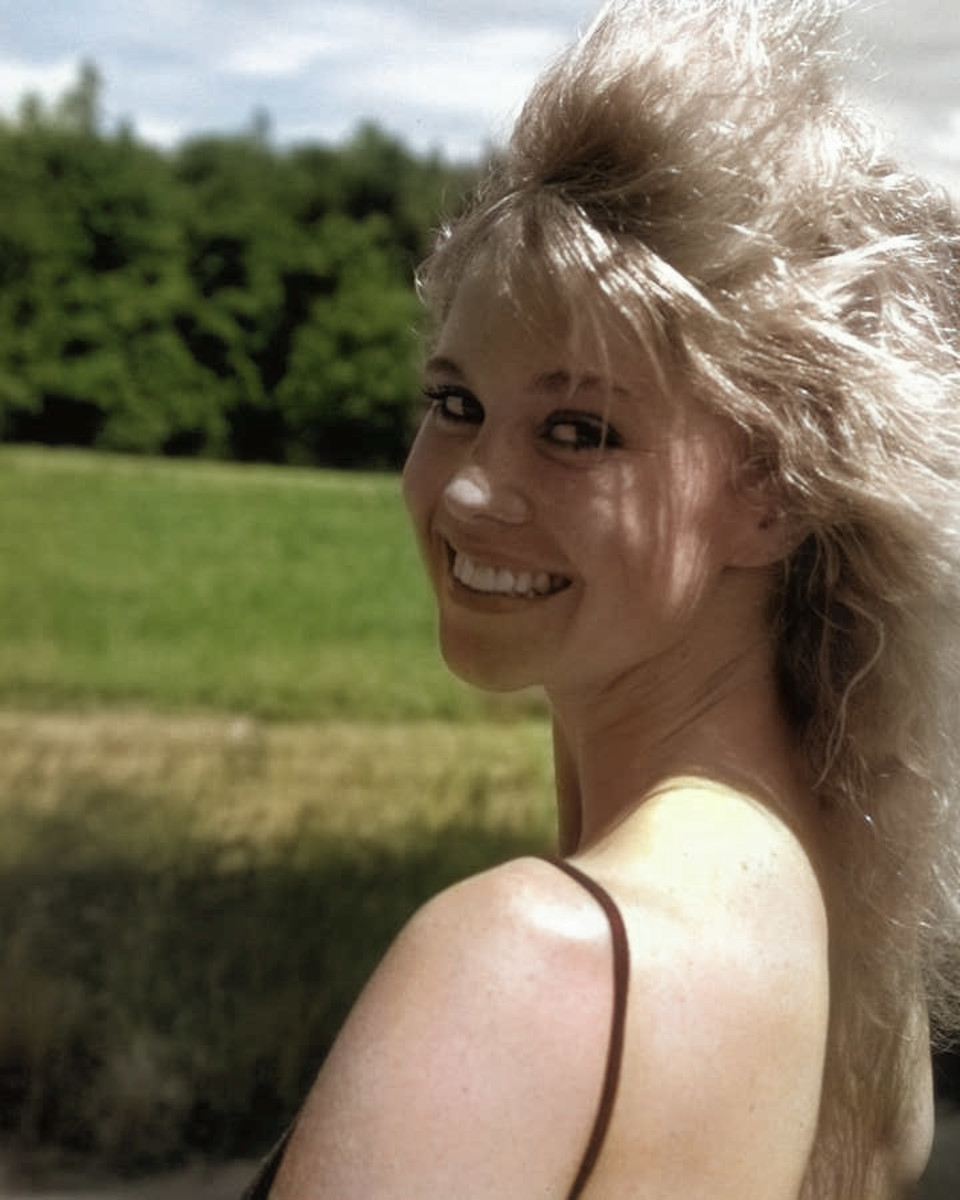
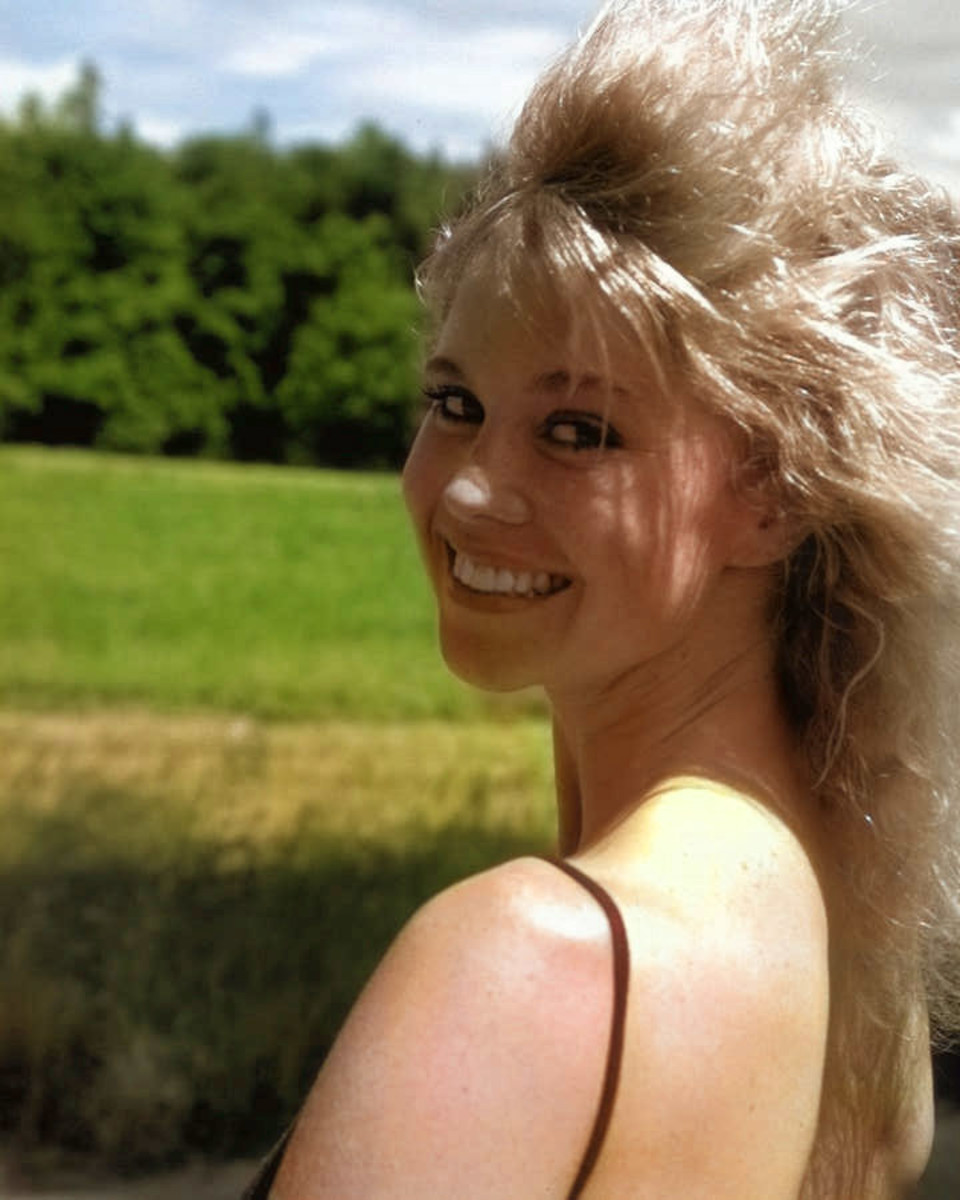
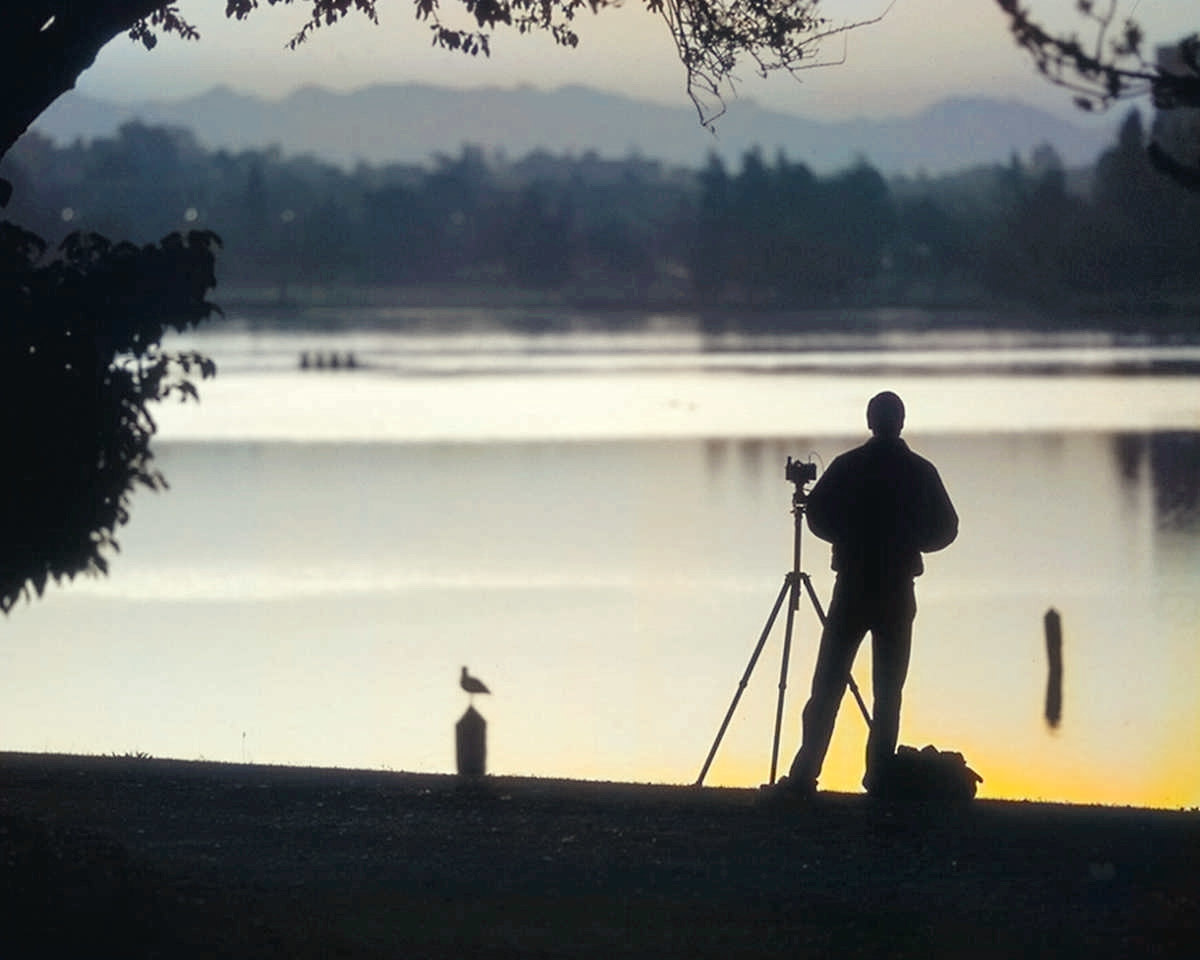
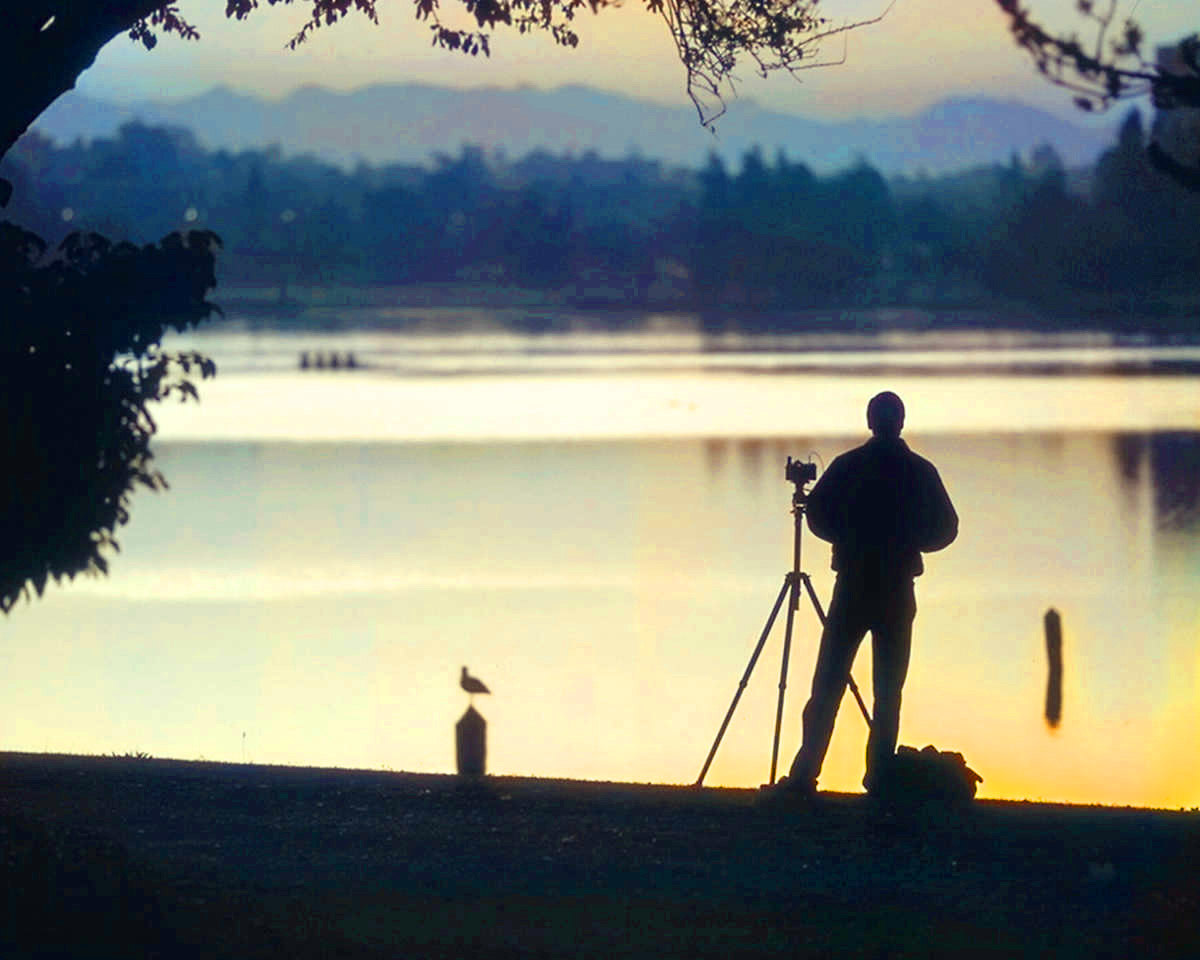
Examples of Excellent Results
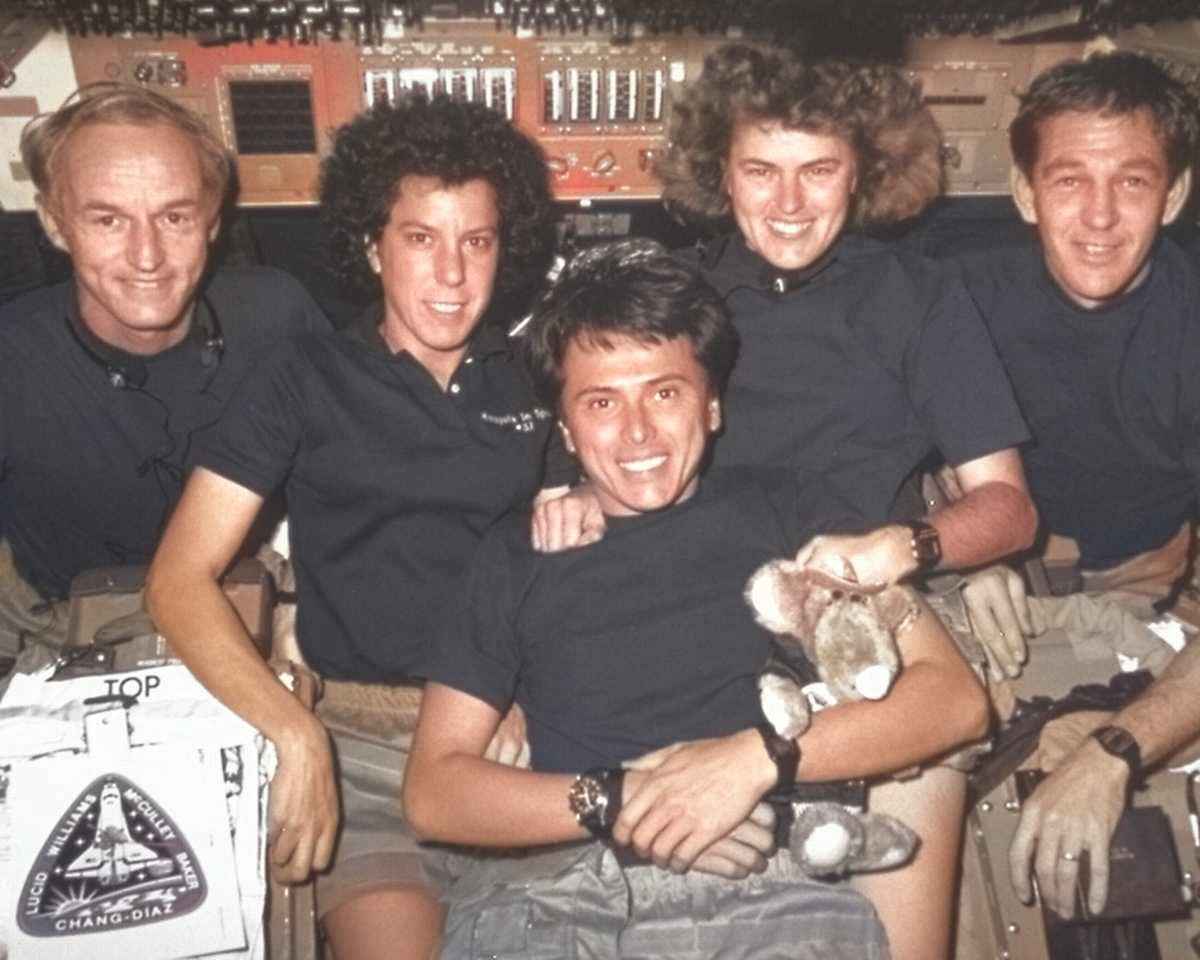
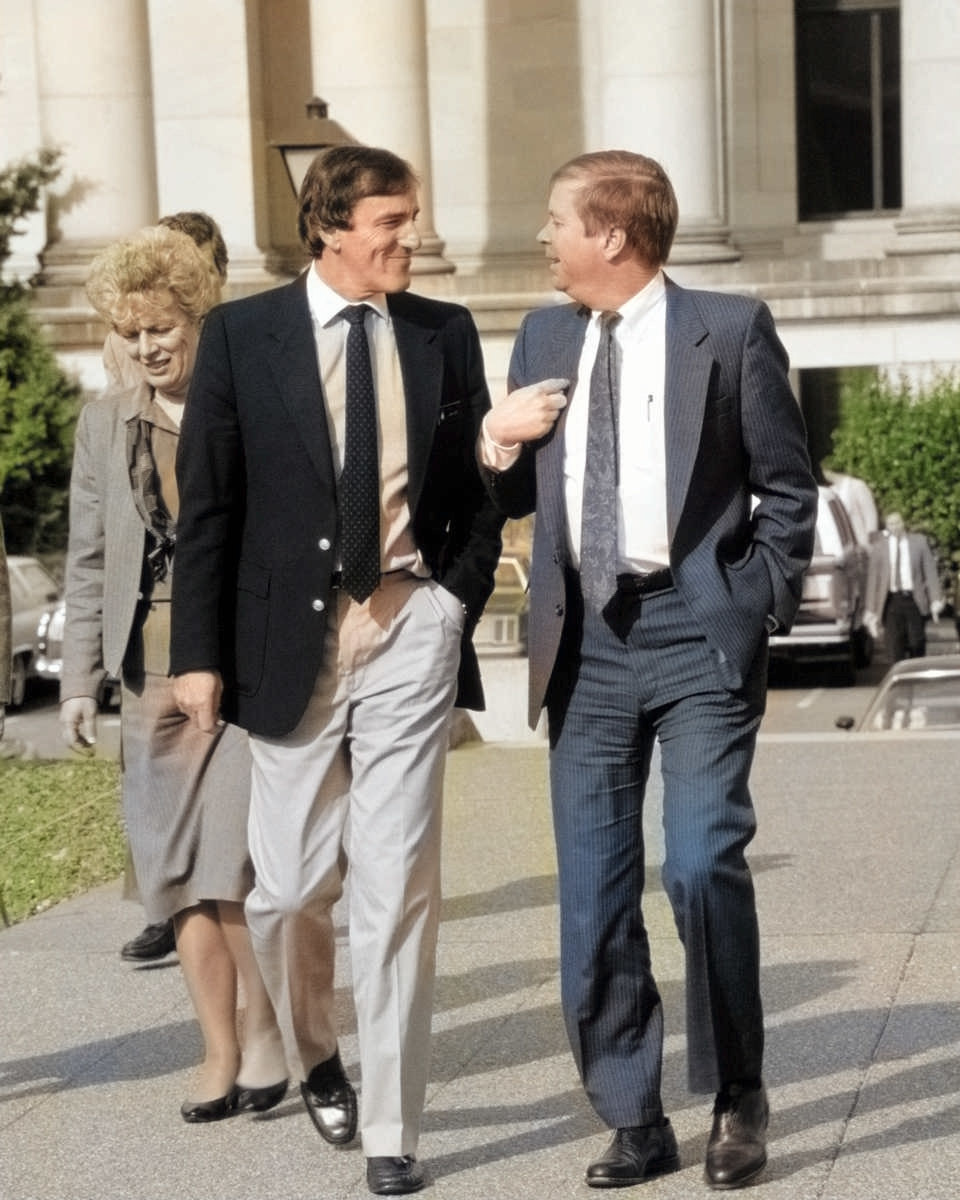
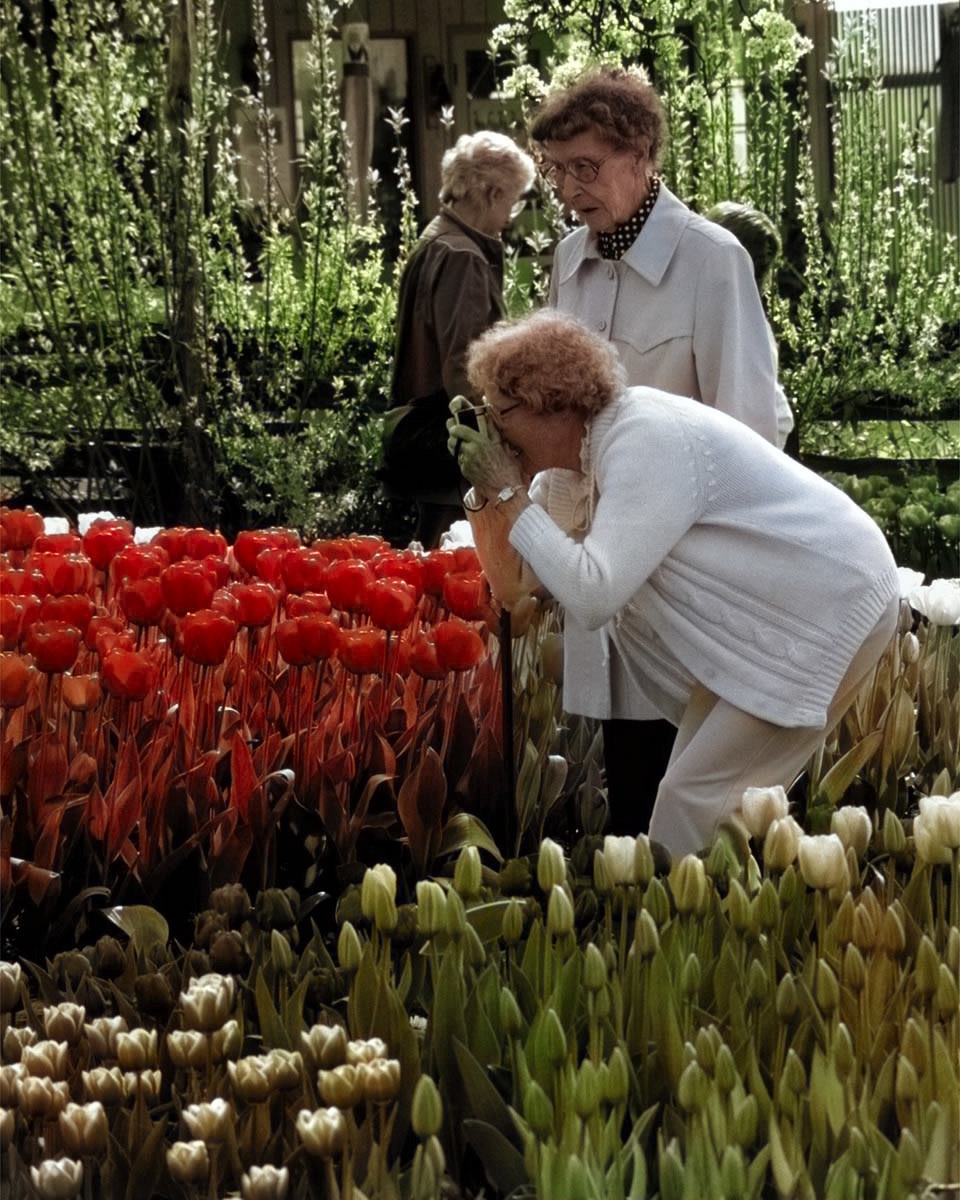
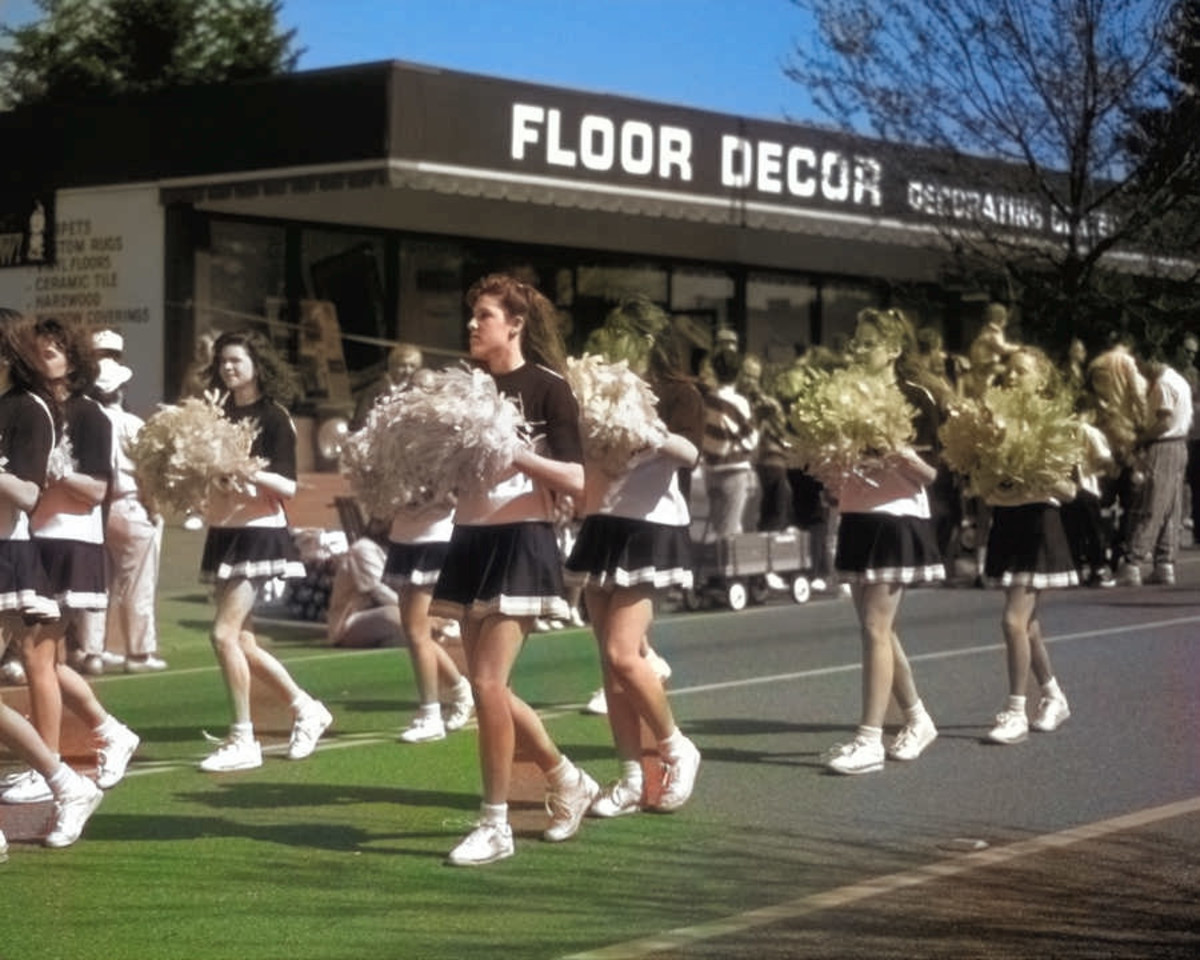
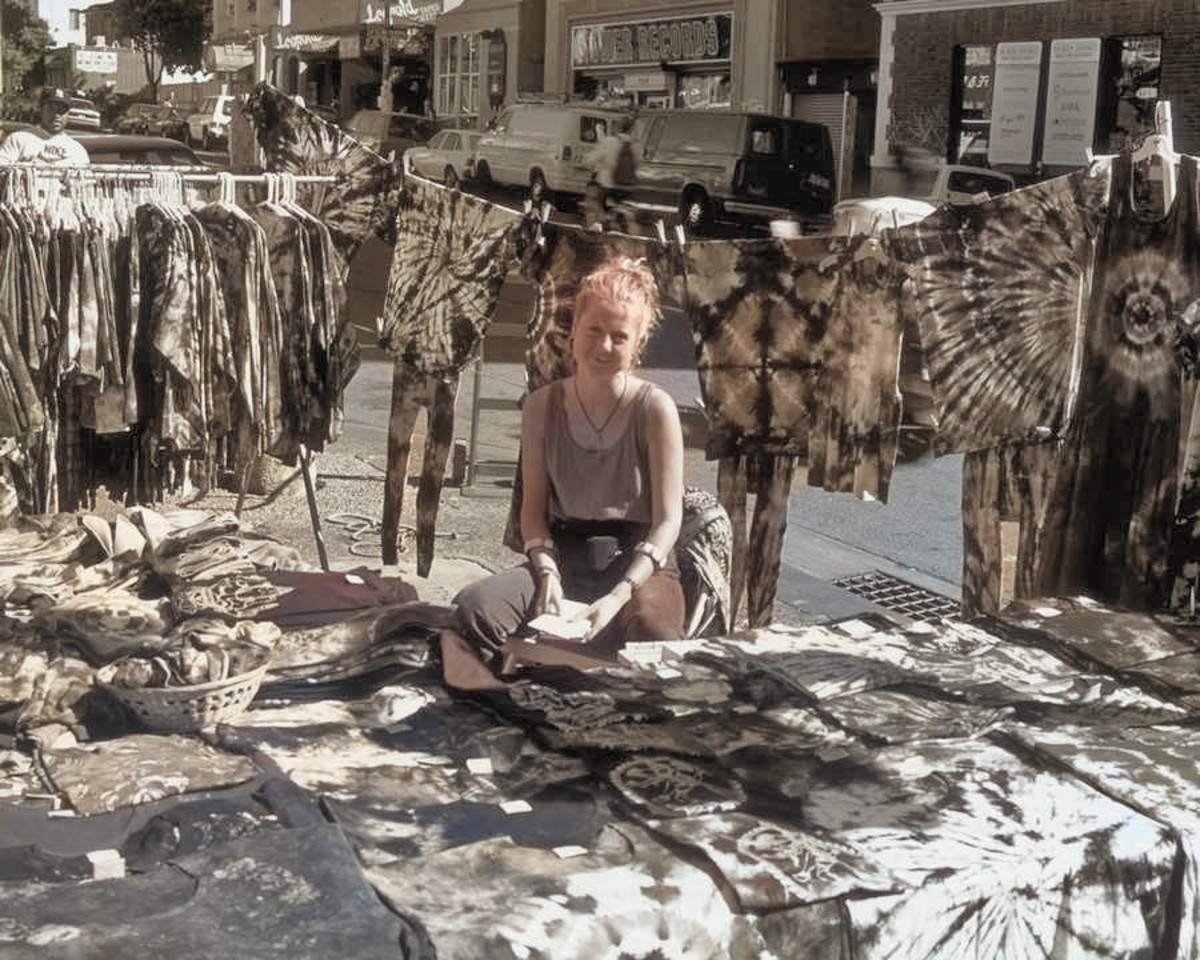
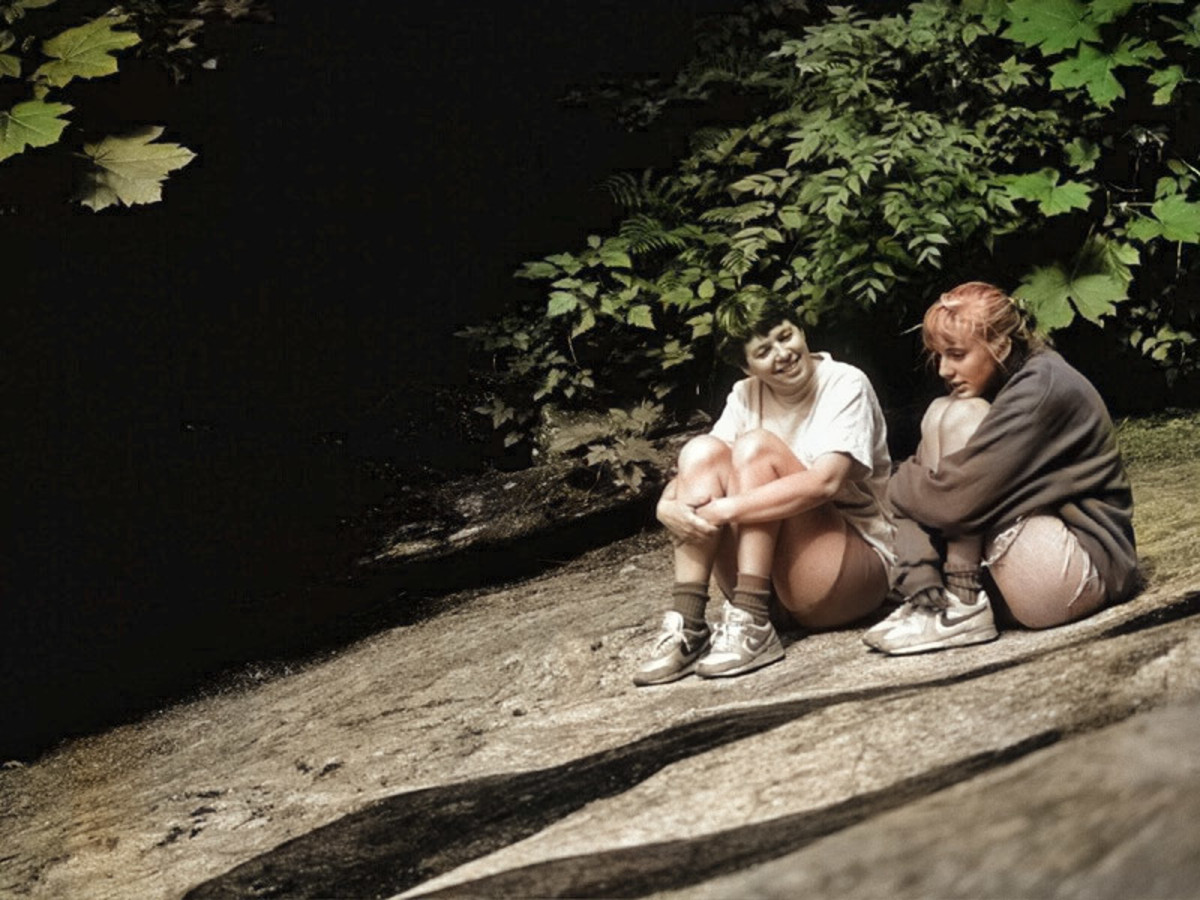
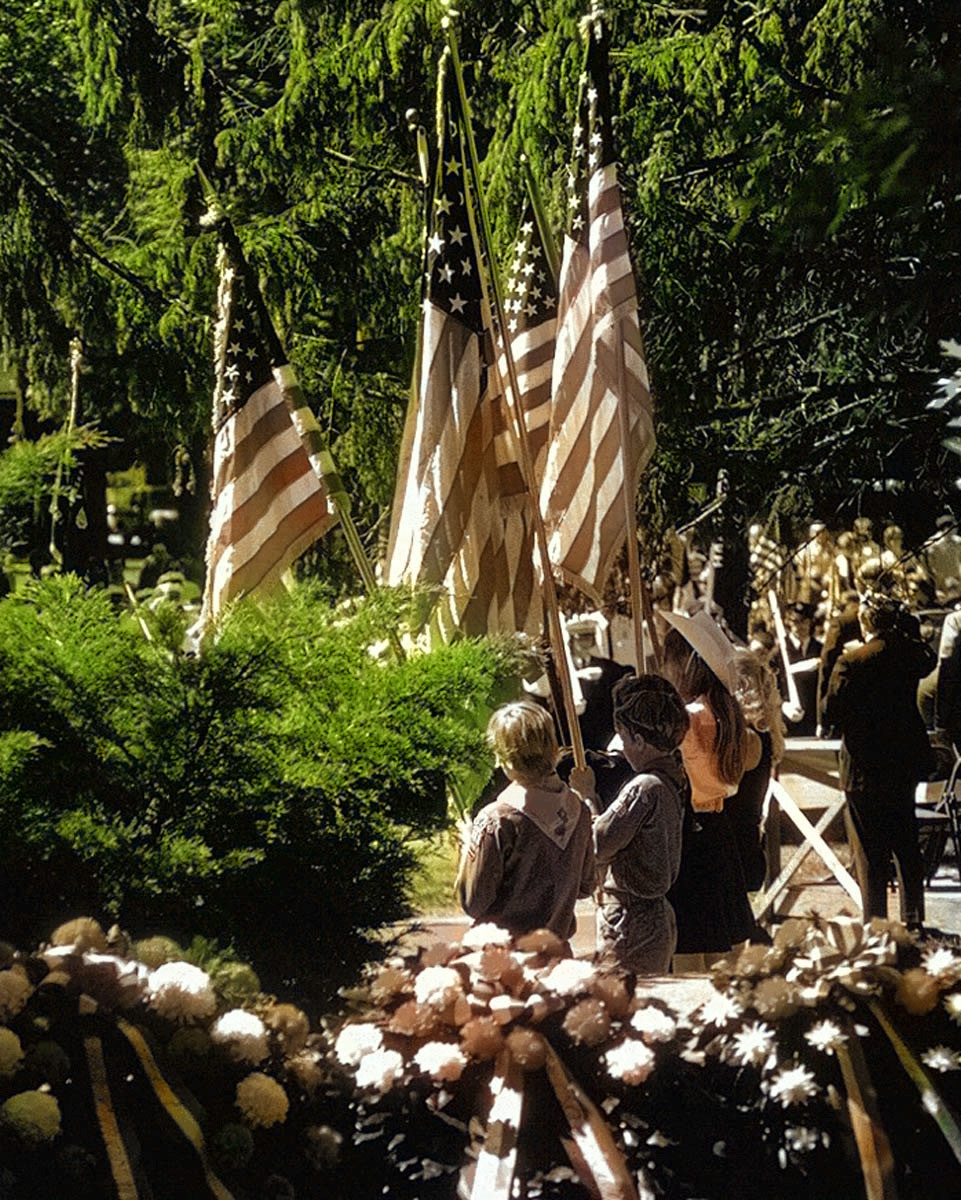
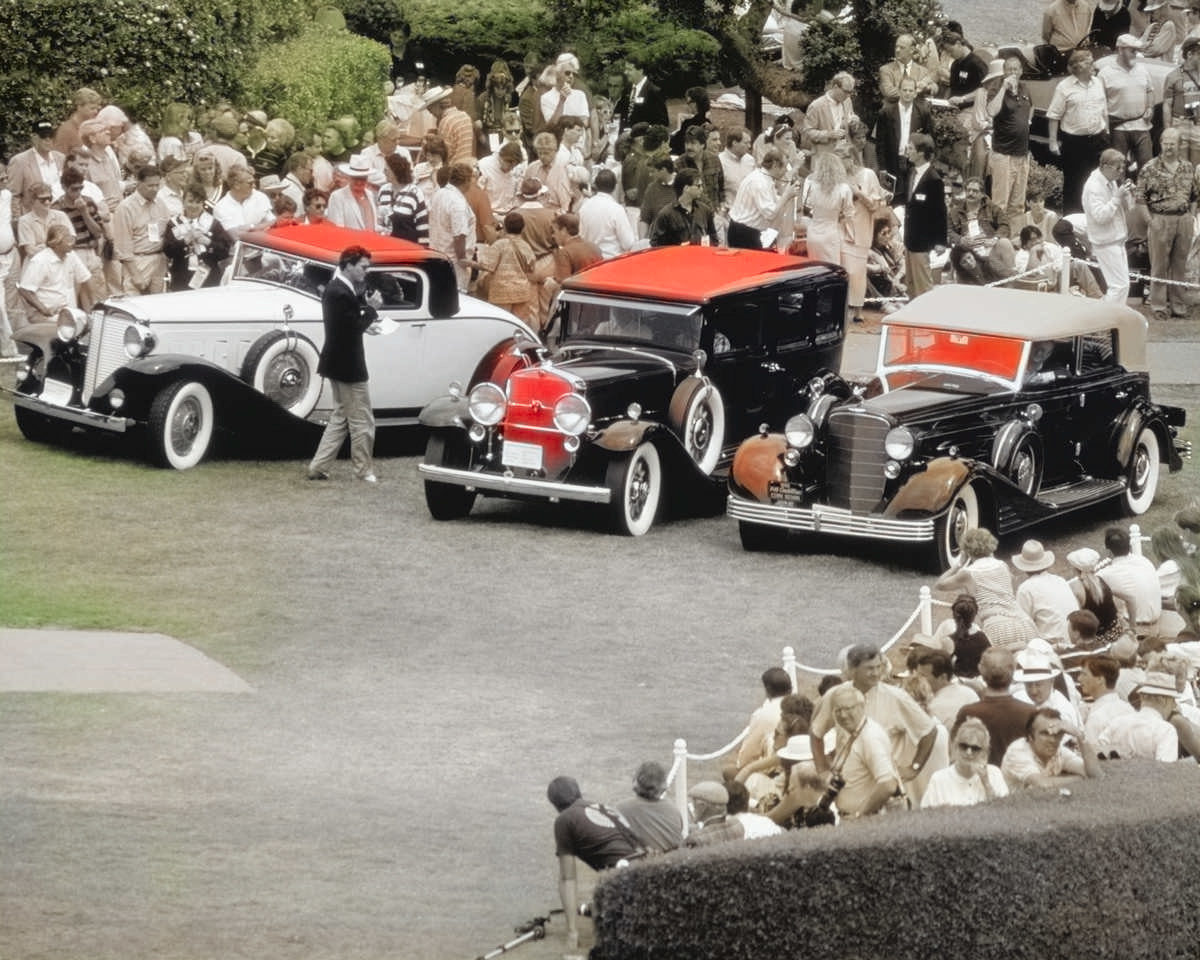
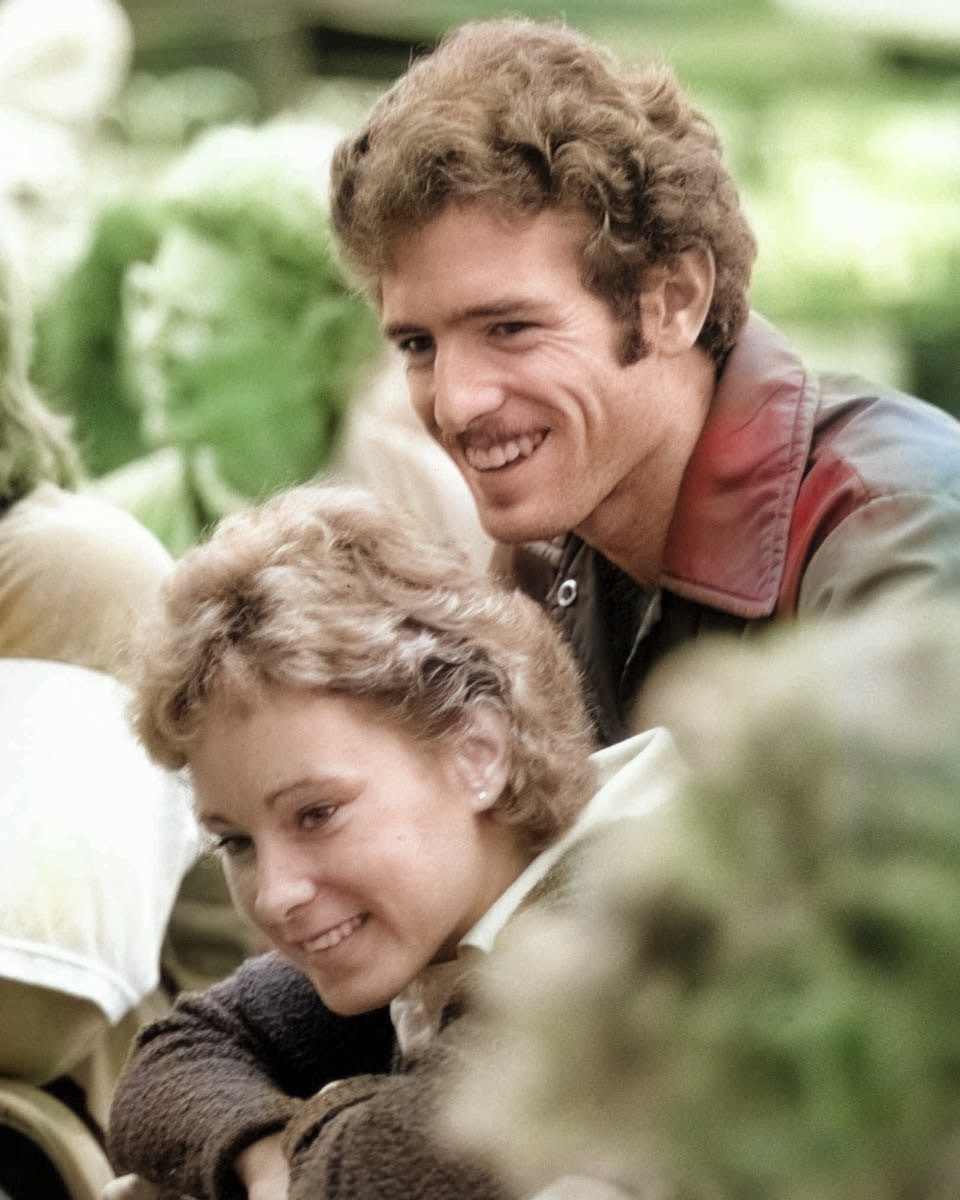
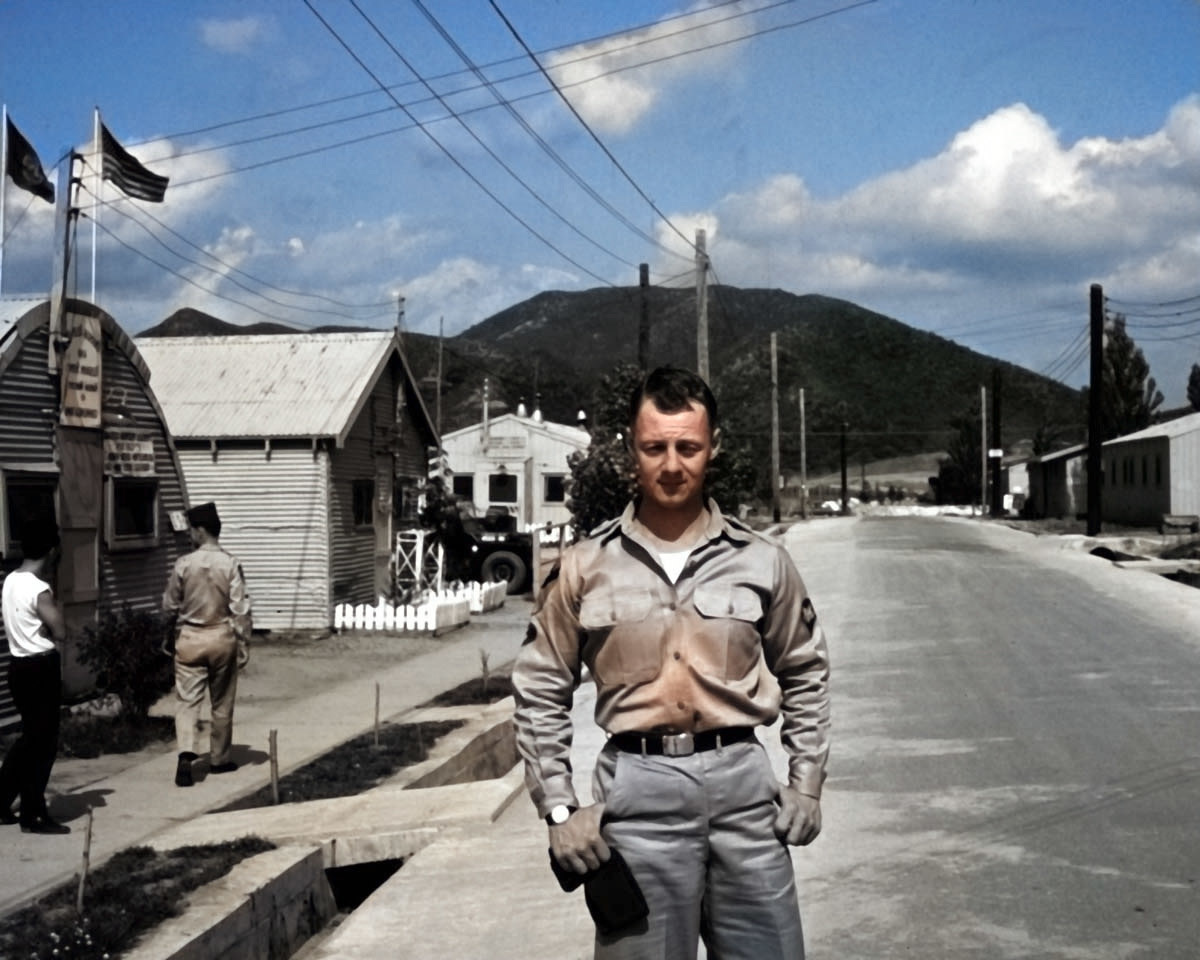
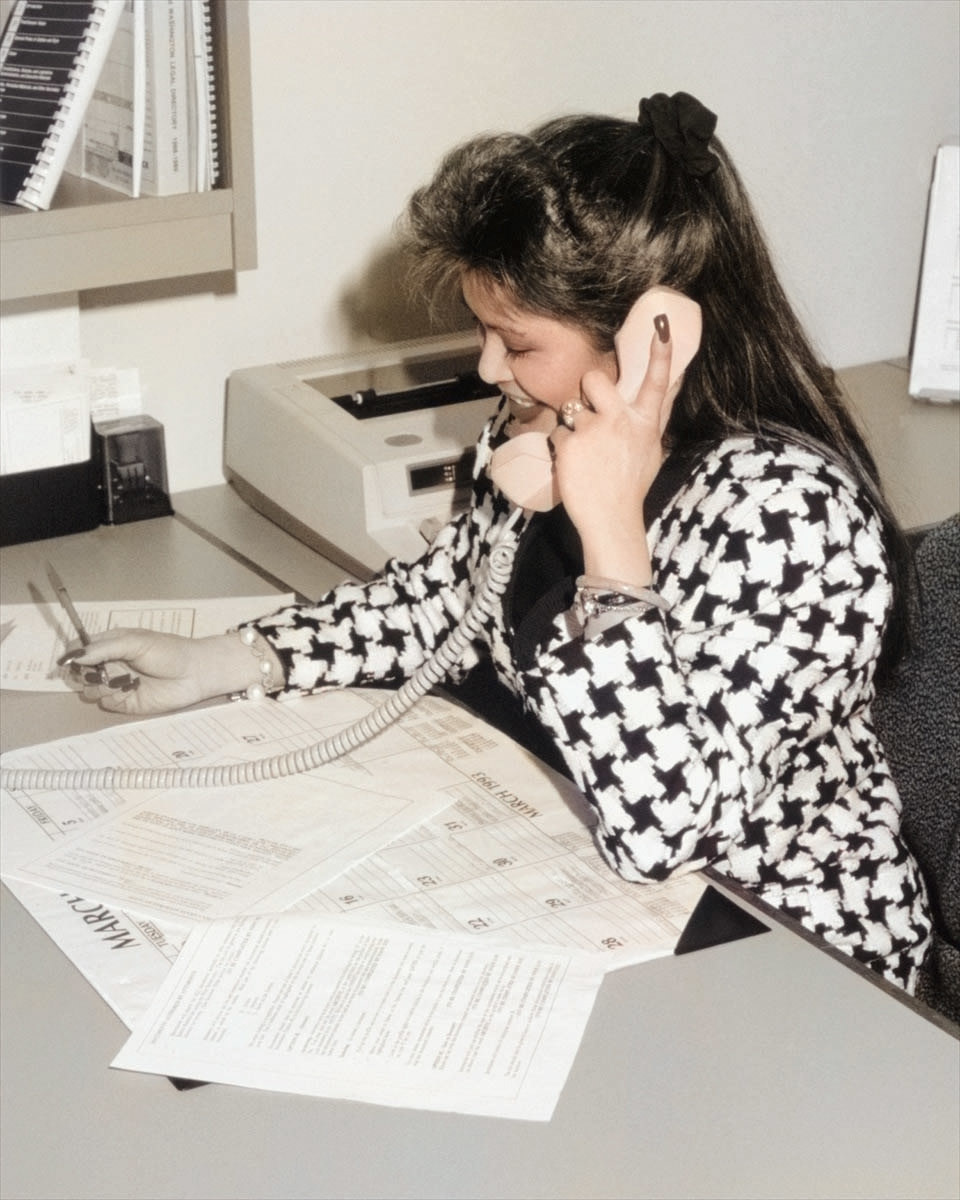
Below are some examples of excellent results from Colorize Photos. None of these have had any retouching of my own applied. You can expect results this good about 10% of the time.
Colorizing Photos with Artificial Intelligence
So you’ve seen some examples of Colorize Photos in action. How does it work? You’re probably familiar with Instagram-style filters. These take your images and apply various effects to them, such as giving them a slightly yellowed, old-time vintage effect. Instagram filters are known as “destructive” filters, because, in order to give photos that old-timey look, they throw away data from the image. You’re probably also familiar with the process of colorizing old movies, which uses computers to add color to a vintage film frame-by-frame. The process is made possible by computers, but it still requires a lot of human effort. The initial frame of each scene must be colored by hand. The computer then takes this information and extends it to the other frames of that scene. But the process has to be started and supervised by humans. Colorizing a still image by hand is a similarly laborious process. However, Photoshop’s Colorize Photos promises to turn a photo from dull black and white to vibrant color with a single click of a button. There’s no way a piece of software can do this without employing what is known as artificial intelligence, or the science of making computers do things that previously required human judgment and expertise. If you have performed a Google image search, you have seen a similar technology in action. Drag one of your own photos to the search box, and if the photo exists on the Internet, Google will usually find it. If it doesn’t, Google will show images that are thematically similar – a dancing woman, a couple on the beach, an automobile, etc. Google is employing a form of artificial intelligence called image recognition, which allows it to identify the subject of your photo and find similar photos. Sites like Pinterest, Apple Photos and others have a similar feature.
How Colorize Photos Works
So how does Colorize Photo work? Through a process of training artificial intelligence known as deep learning. The developers expose the algorithm to thousands of photos and eventually the software learns that a tree is usually green, the sky is usually blue, and so on. This is a far greater challenge than it seems. Although you may think a tree is a tree is a tree, the reality is that no two trees are alike, and even the same tree can look very different at different times of day and from different angles. So the challenge of image recognition was an incredible one for developers to surmount, but over the years they have made great strides in the process. Photoshop’s Colorize Photos algorithm employs a similar process. In order to work, it must scan the photo and do at least some analysis of the subject matter so as to determine which color should go where. I believe the algorithm also uses facial recognition to identify faces and uses these as a starting point in determining that the photo contains a person, as well as in coloring the rest of the photo. It often works particularly well with portraits. By the way, unlike Google’s image recognition, Photoshop’s Colorize Photos algorithm does not require an Internet connection. I tested this by unplugging my computer from the Internet and running the algorithm, and it worked! That means the “brains” of the AI are built into the software and reside directly on your computer when you download and install the program.
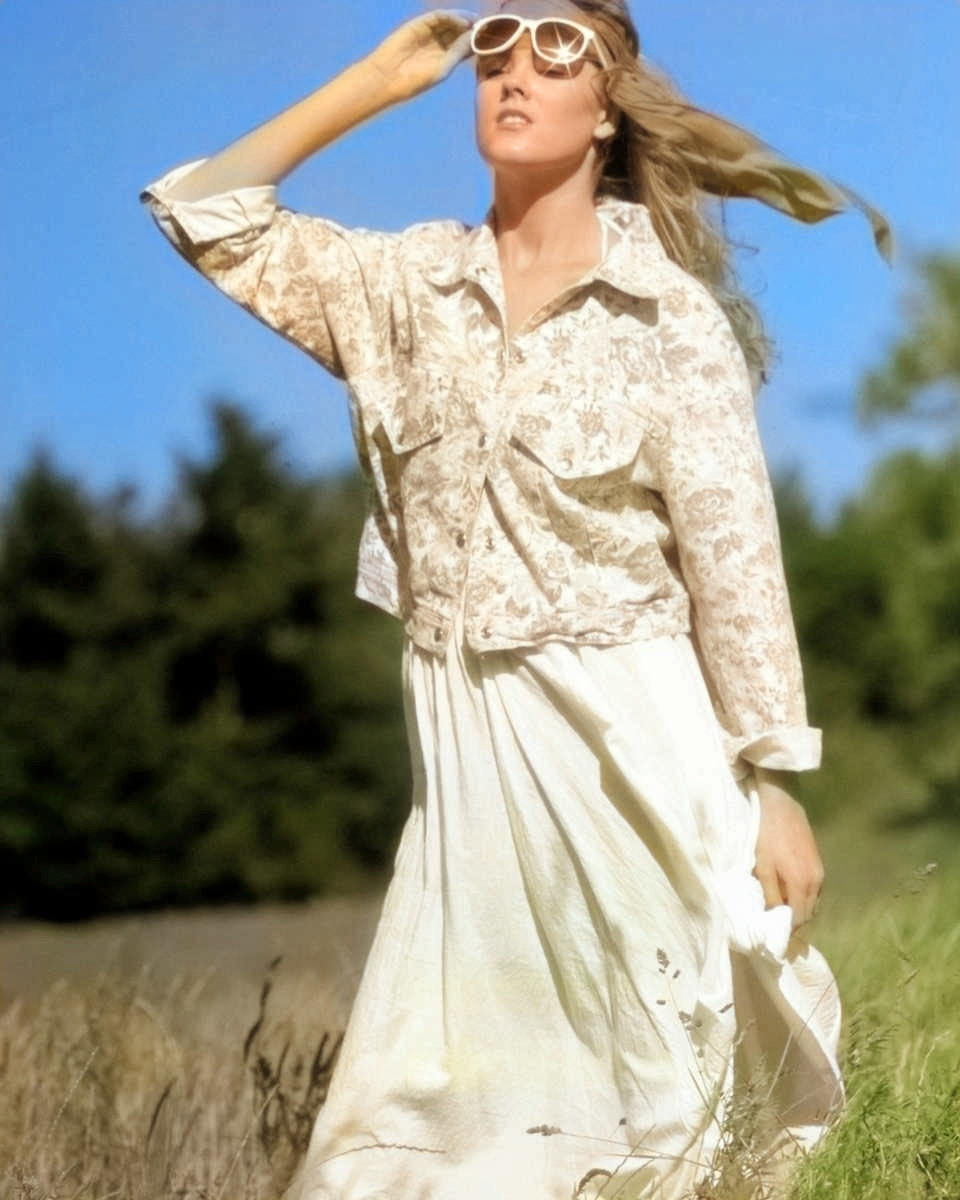
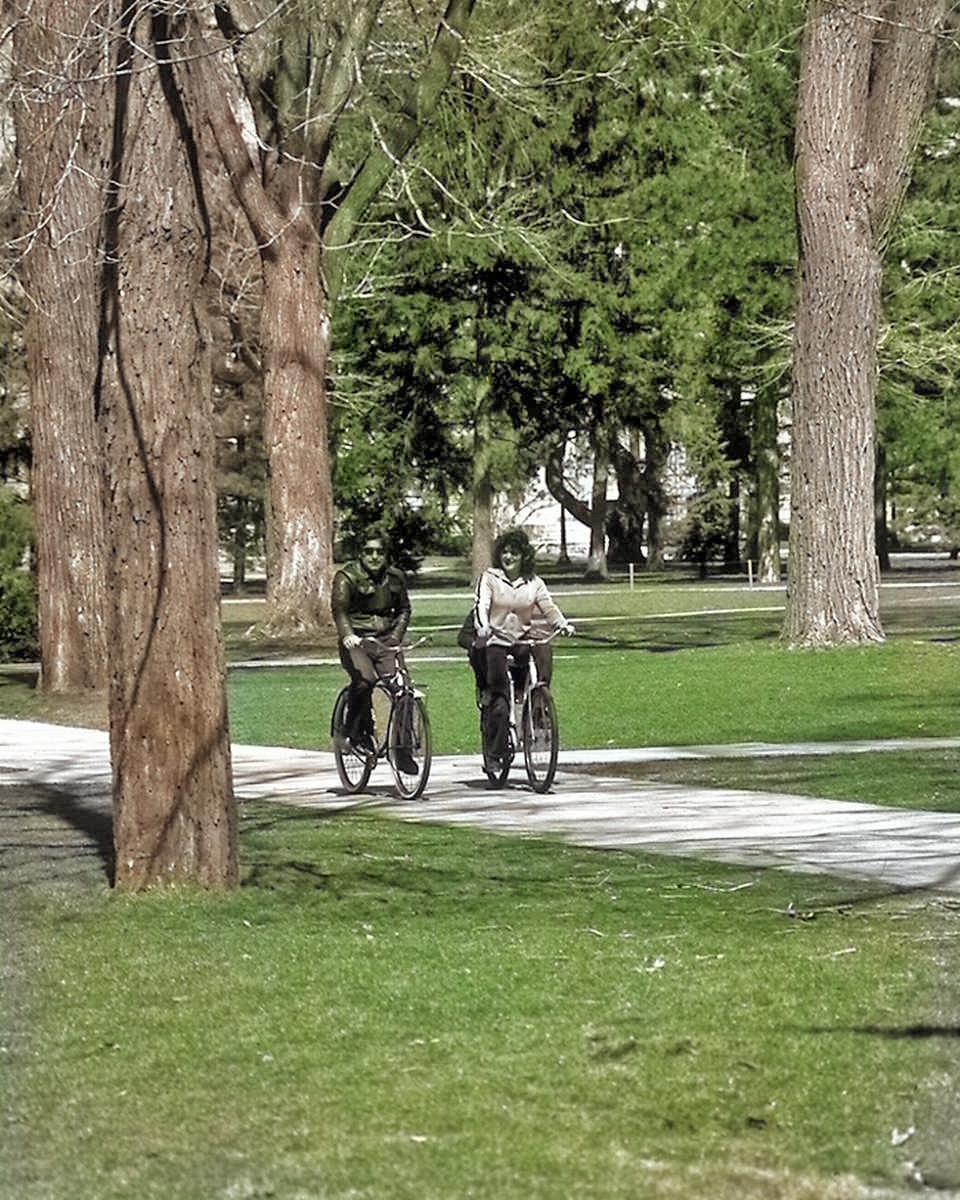
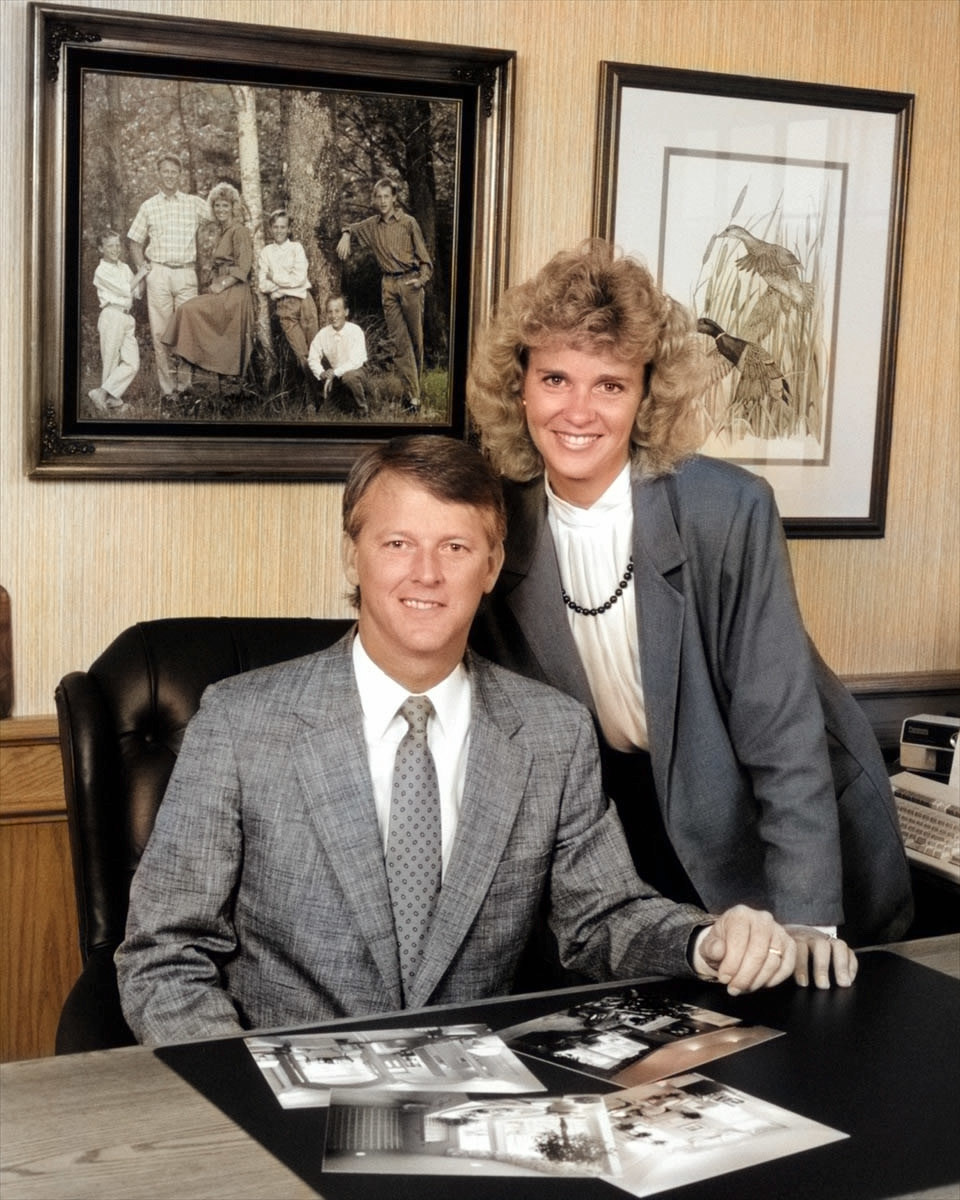
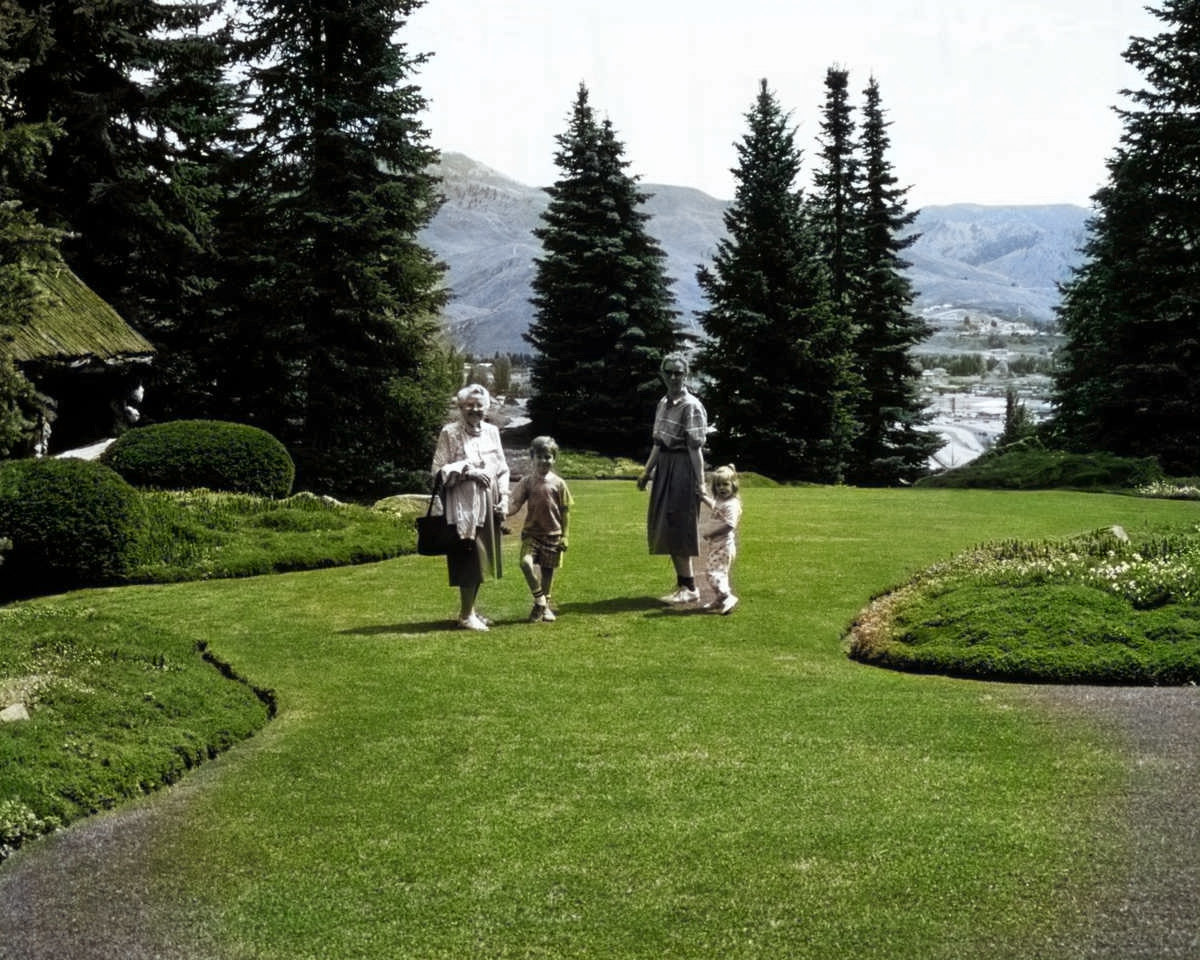
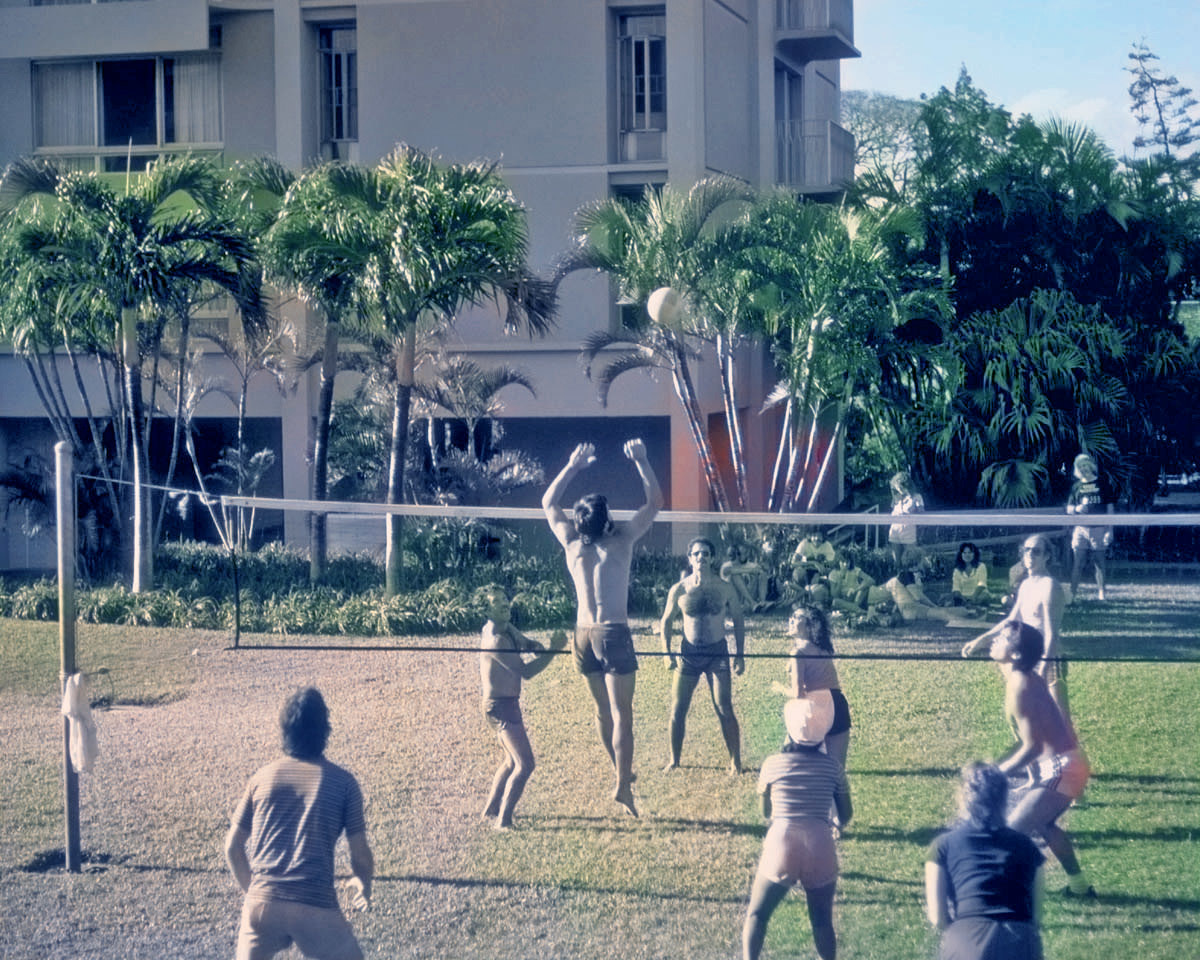
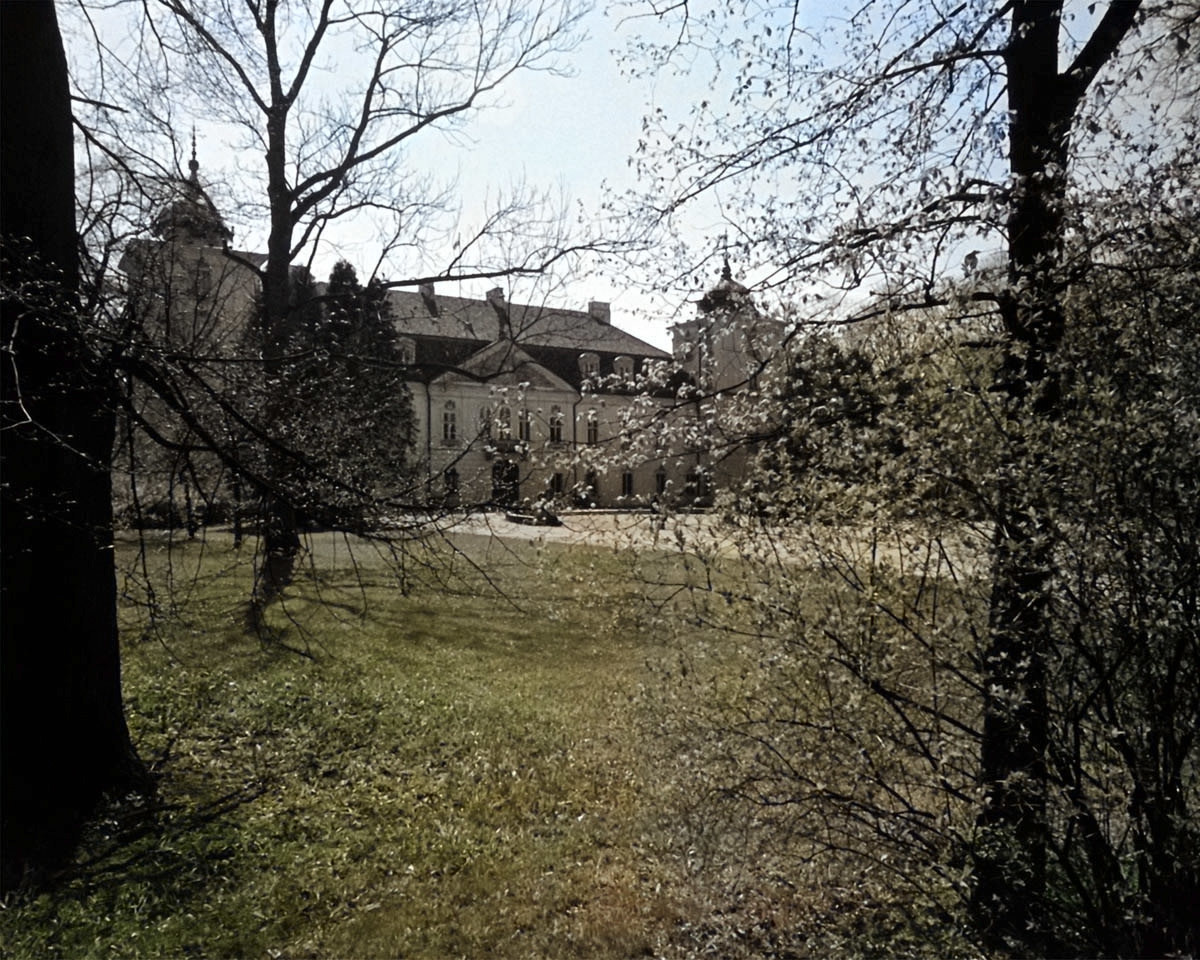
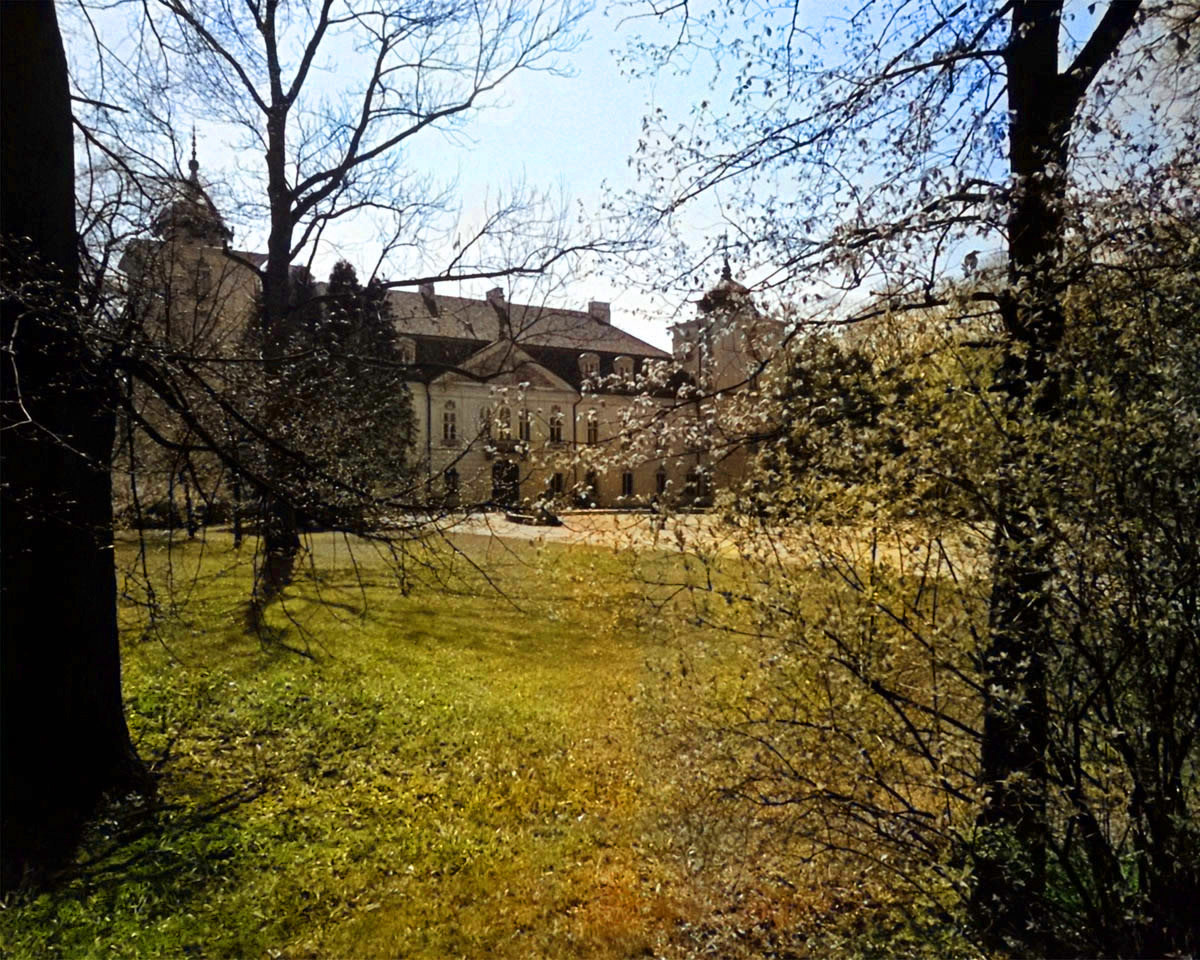
Examples of Pretty Good Results
The above examples are of stellar results from the colorizing artificial intelligence. You can expect results that good only about 10% of the time (with the right subjects). About 25% of the time you can expect pretty good results. Below are some examples.
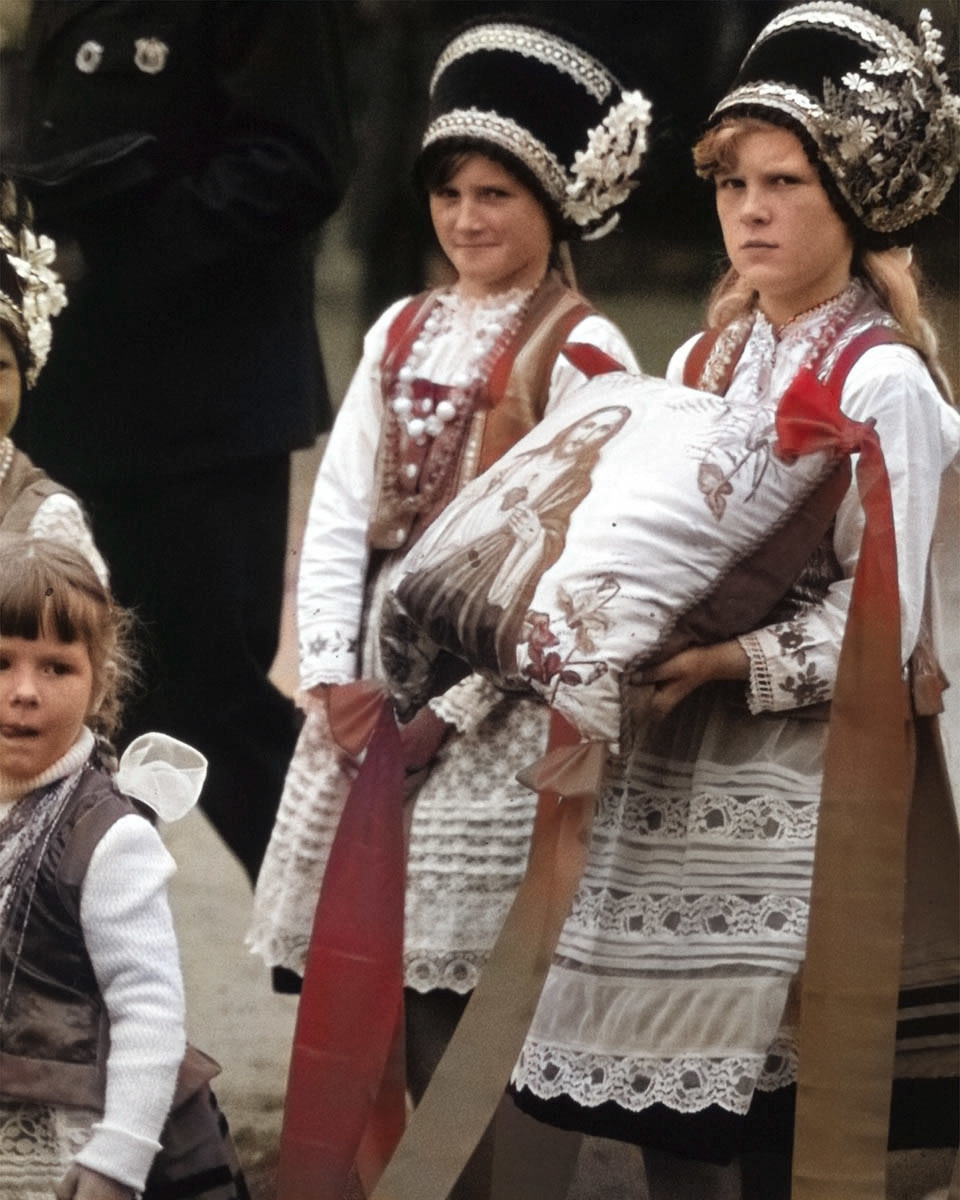
Examples of Okay Results
About 35% to 40% of the time, Colorize Photos will generate results that can only be considered “fair,” or acceptable as a starting point for your own colorization efforts. Usually, when Colorize Photos fails, it is because it fails to recognize the object or part of the object being colored. Because Colorize Photos applies a form of facial recognition, it often effectively colorizes faces but misses. limbs or parts of them such as arms, legs and hands. For some odd reason, while it may effectively colorize a face, it will often miss the ears! Colorize Photos also tends to do a better job with outdoor and natural scenes then with indoor and man-made objects. This is because it has no way of knowing what color a car, a wall, a telephone or an item of clothing was originally. Here are examples of such results.
Examples of Disappointing Results
It’s important to approach Colorize Photos with realistic expectations. Sometimes (at least 30% of the time) the results of the algorithm are simply mediocre. However, even in such cases, it is often possible to use its results as a starting point for your own hand-colorization efforts. So that you don’t get the idea that Colorize Photos always produces brilliant results, let’s look at some disappointing efforts.
Using Colorize Photos
To use Colorize Photos, make sure you are running the current version of Photoshop or Photoshop Elements, such as Photoshop Elements 2020. Open a black-and-white photo and choose Colorize Photo from the Enhance menu. The algorithm will take a moment to generate four previews. Click on any of these previews to see the effect applied to your whole photo. The first preview is the standard colorization. You will probably prefer this 90-95% of the time. The second choice makes the photo lighter and more saturated (usually, a little too saturated). The third option makes the whole photo more blue and the fourth option makes the photo more green. Note: When you save your colorized photo, be sure to save it as a copy so as not to overwrite your original family photo.
Easy Ways to Fix Colorized Photos
Even when Colorize Photos does an imperfect job of adding color to your photos, you can use these photos as a starting point for your own coloration efforts. In this section, I will describe some easy fixes you can make to your colorized photos. Of course, you are limited only to the degree of your skill in Photoshop and the amount of time you want to put into colorizing your photos, but it’s a good idea to try the easy fixes first. Sometimes these can make a dramatic difference in the quality of your photos.
Increase the Saturation
Sometimes, the Colorize Photos algorithm is timid in the amount of color that it adds to your photos, perhaps deciding to err on the side of caution. Just because the color it adds is sometimes weak, this does not mean that the color is not there! You can often bring out this hidden color by increasing the saturation (intensity or vividness) of the colorized photo. In Photoshop, you do this by choosing Adjust Color > Adjust Hue/Saturation from the Enhance menu in the main menubar. In the resulting dialog box, adjust the middle slider (saturation) over to the right. Play with this until you get the best result. Below are some examples of the difference this can make.
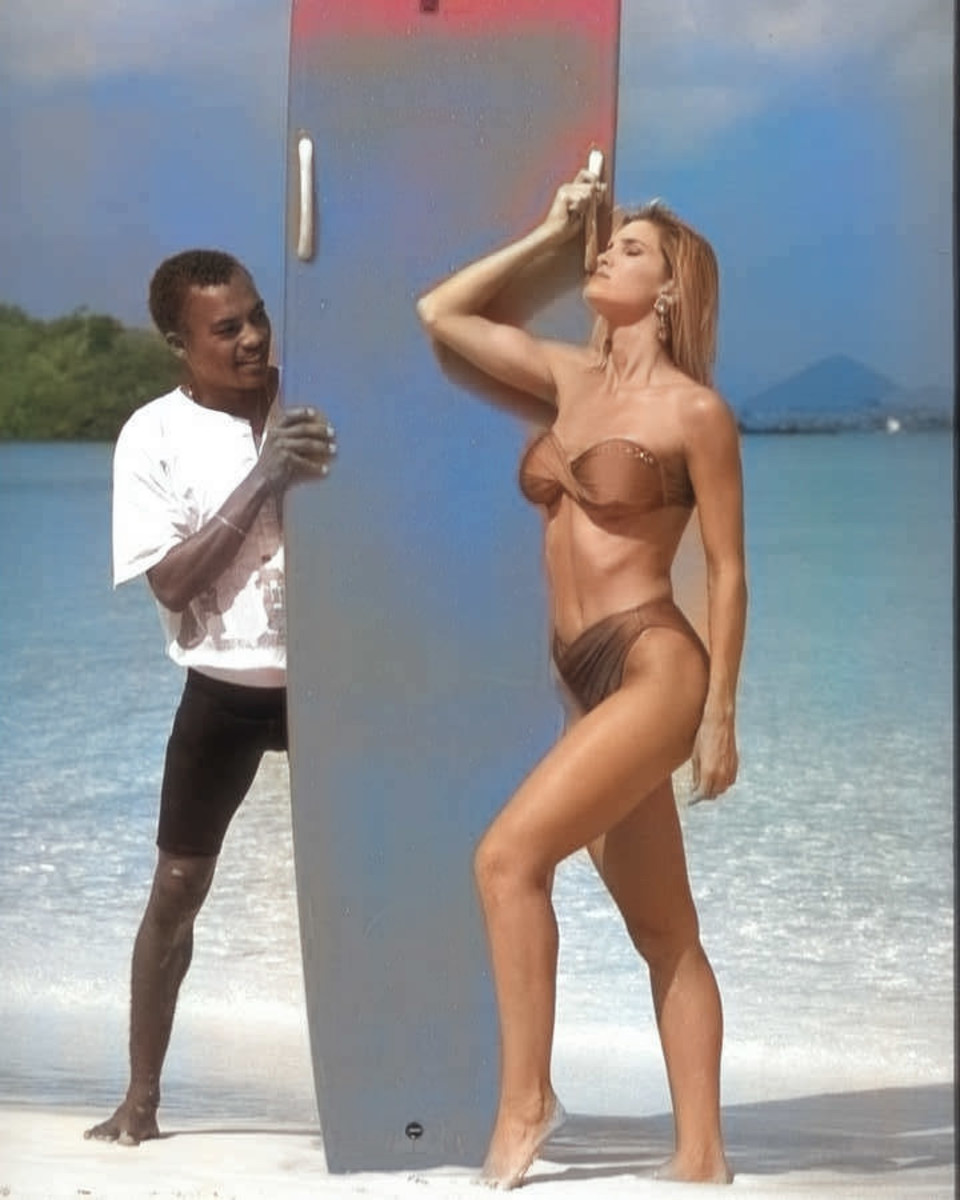
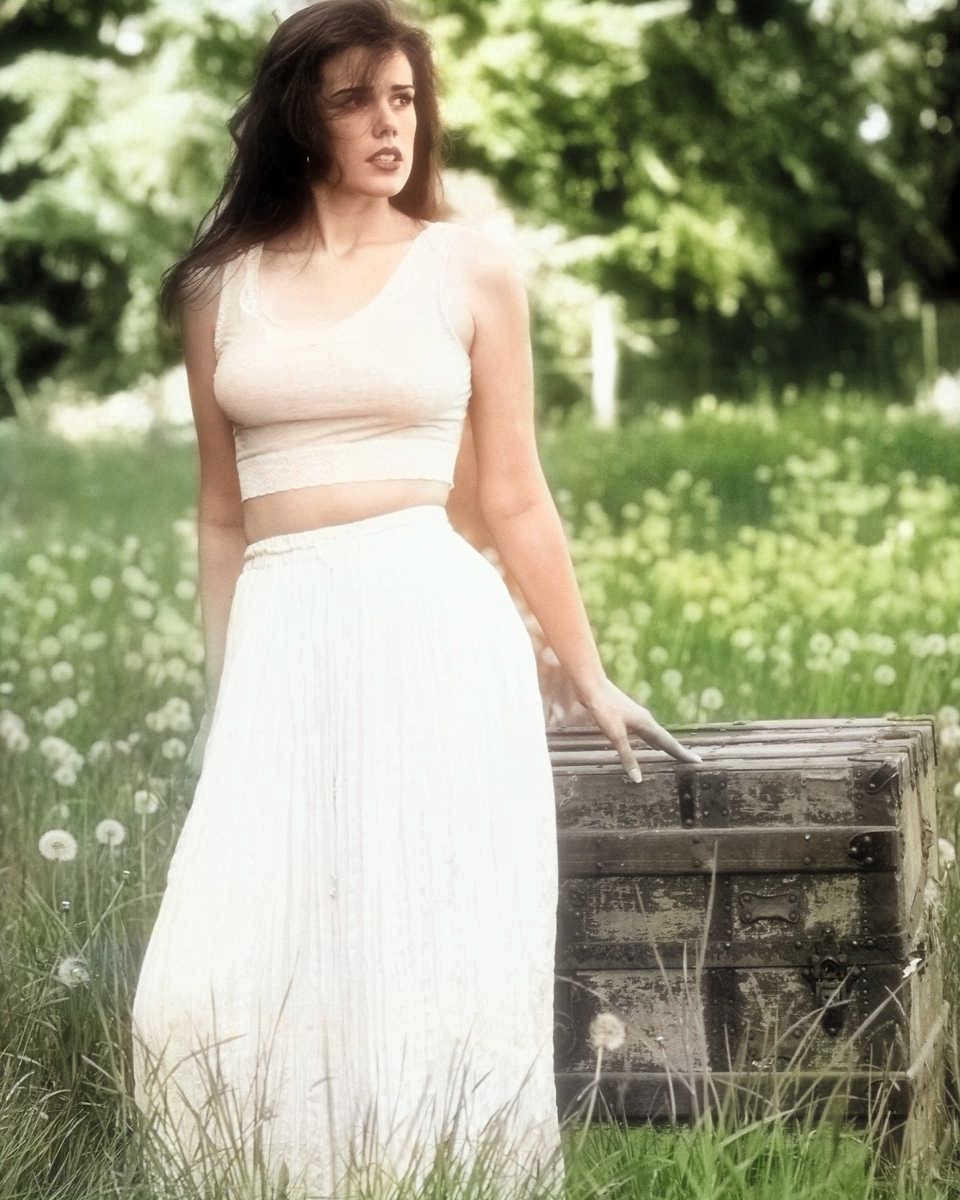
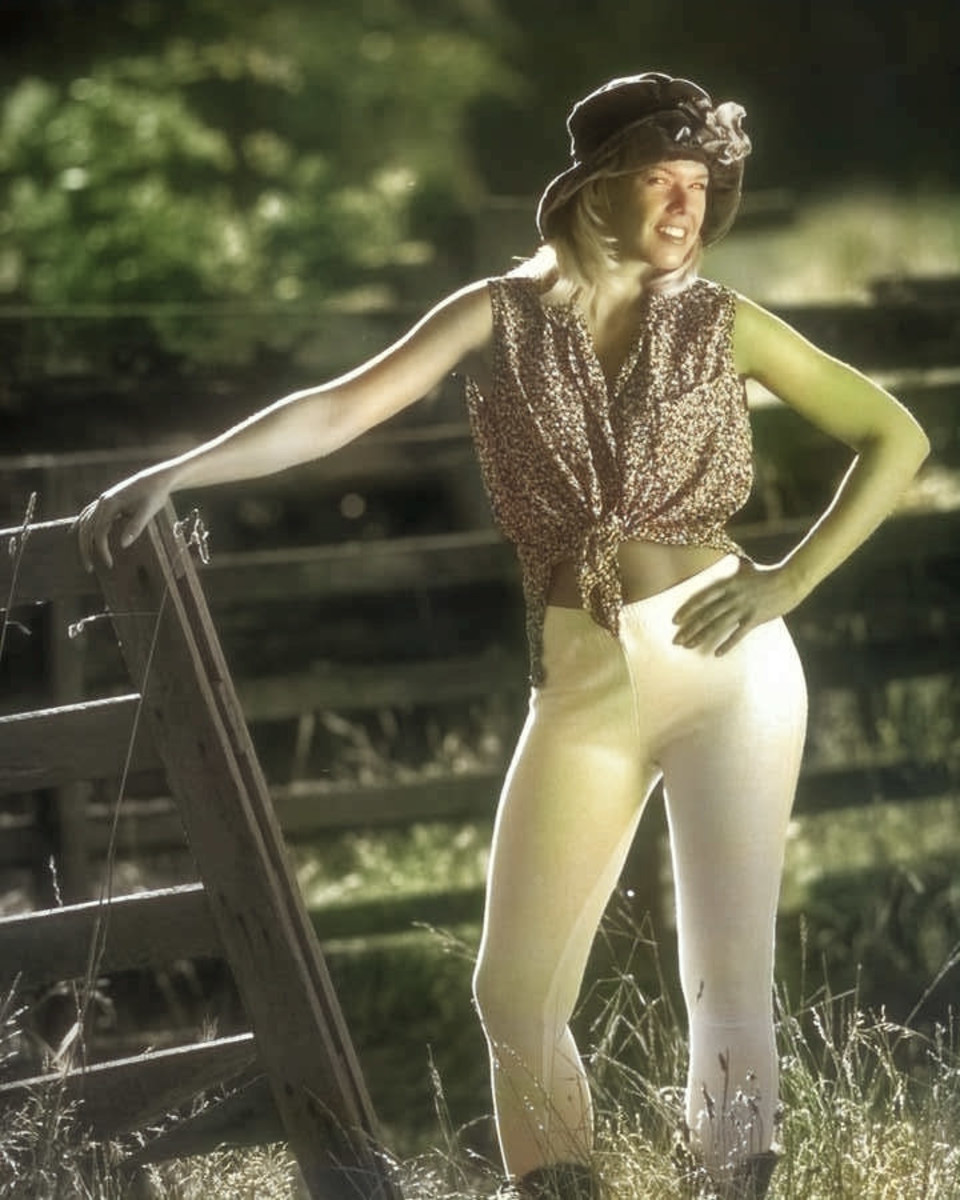
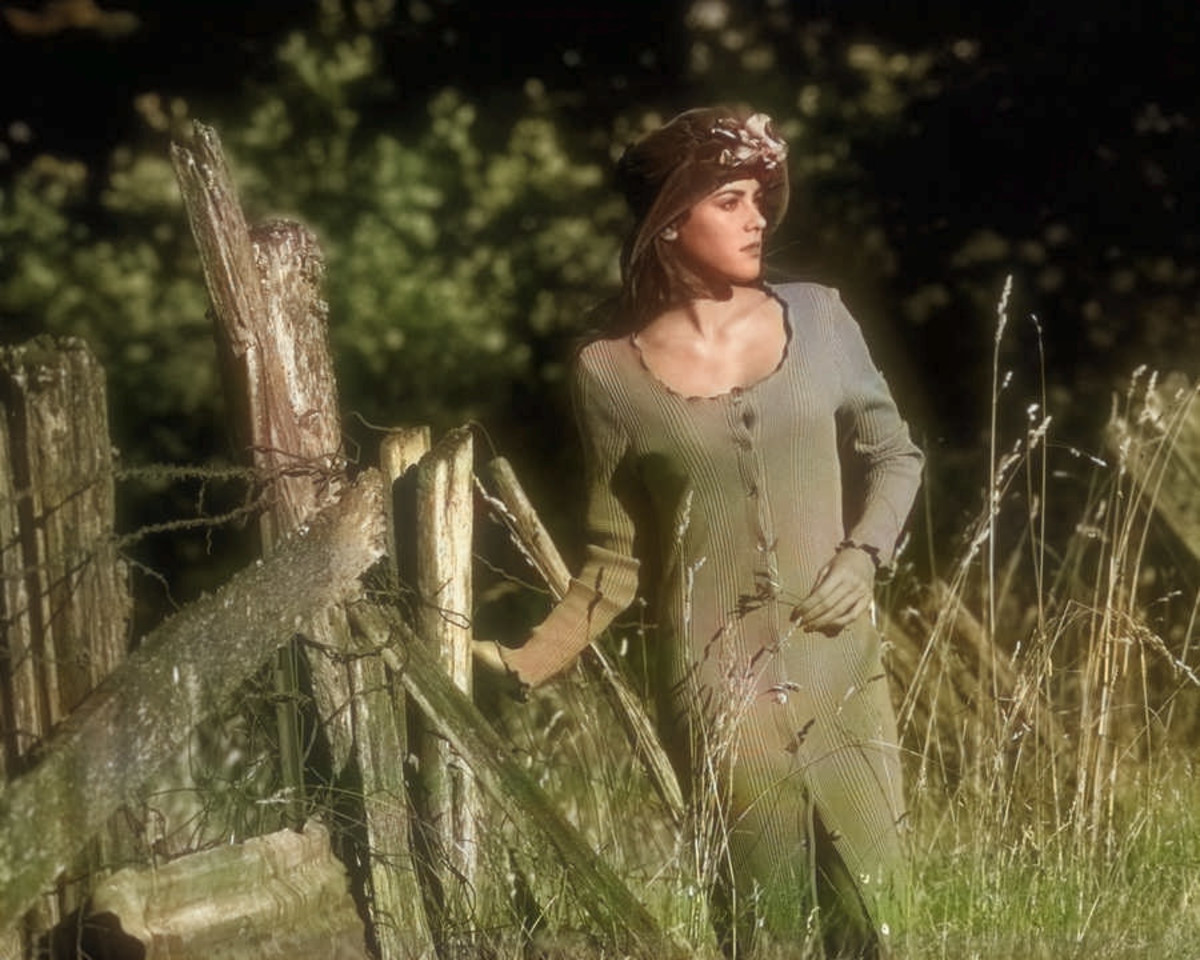
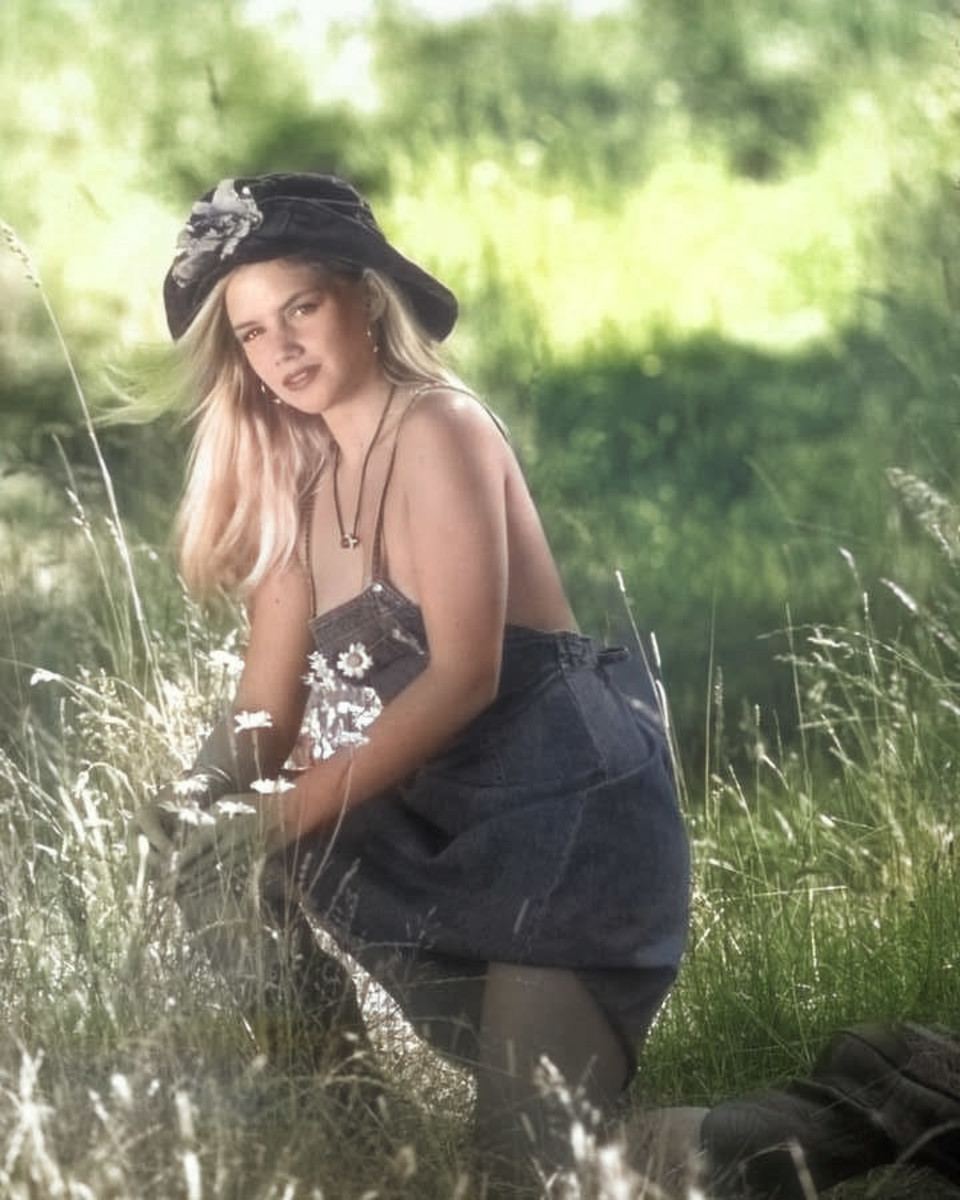
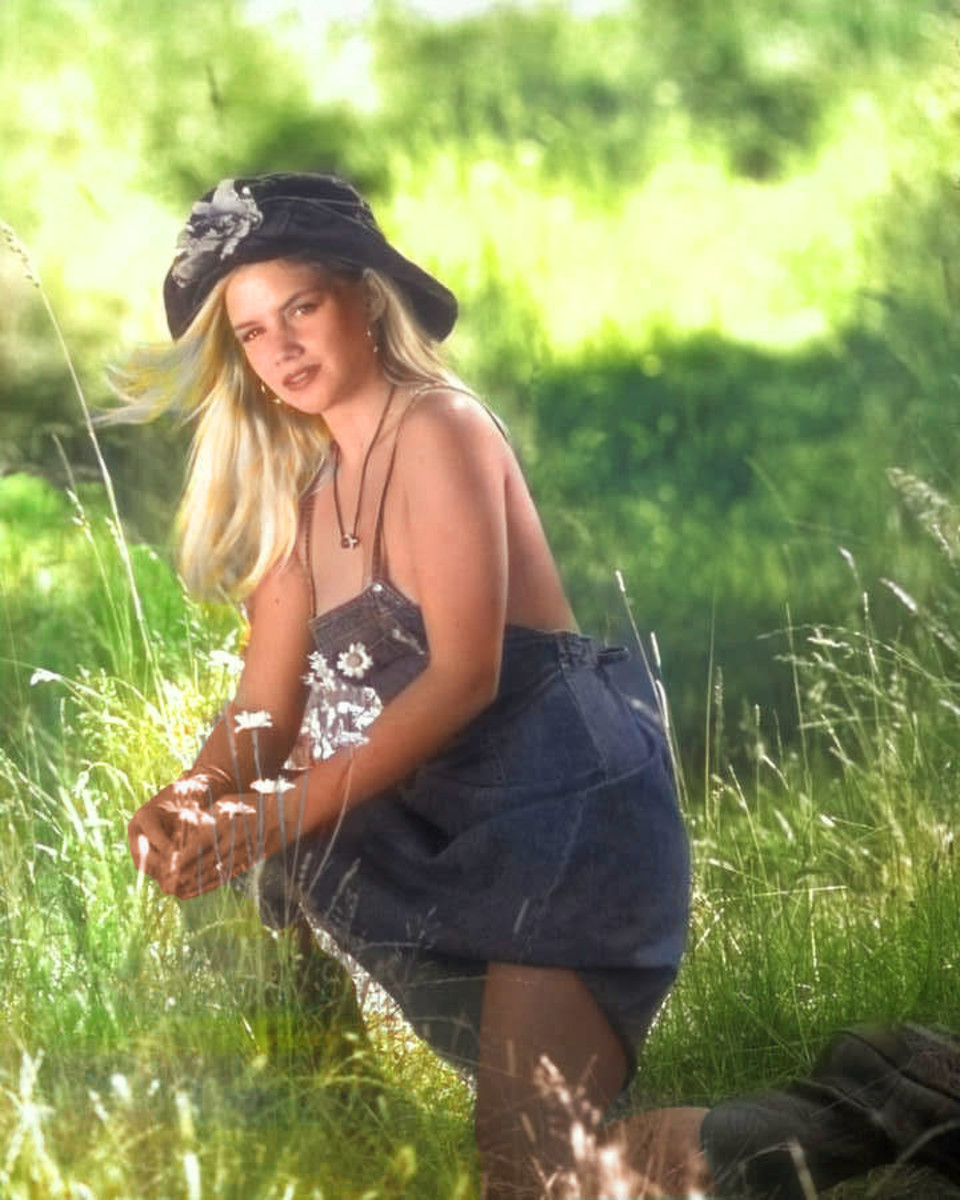
Do a Little Manual Colorizing
Below is a photo on which I boosted the saturation of and did a little manual hand correcting. Notice in the original auto colorized photo, the algorithm missed the model’s hands, wrists and legs. Using Photoshop’s selection tools, I was able to manually add color to these areas, resulting in a much more pleasing photo.
Fixing the Model’s Hands, Wrists and Leg
Fixing the Painter’s Hand
Photoshop’s Selection Tools
One of the keys to editing any photo in an image editing program is selecting. This is a way of telling the software what part of the image you want to work on next. For this reason, Photoshop gives you several tools for making precise selections. Photoshop’s Colorize Photos interface unfortunately gives you only two selection tools. It also uses a non-standard interface for making color tweaks to areas of the photo.Therefore, I do most of my manual colorizing outside of the Colorize Photos interface. To do this, run Colorize Photos on a photo, click the preview you like best and then click OK. Photoshop will leave Colorize Photos and bring your newly-colorized photo back into the main interface. Here, you can use Photoshop’s standard and familiar tools to edit the photo. It doesn’t have to be an either-or thing; you can make some tweaks inside Colorize Photos and others in the Photoshop main interface. So let’s see how to do this.
Automatic vs. Manual Selection Tools
I like to break down Photoshop’s selection tools into two main categories: automatic selection tools such as the Magic Wand and Quick Selection tool, and manual selection tools, such as the Polygon tool. Automatic selection tools attempt to select an area of a photo based on contrast. They work best on parts of the photo that have high contrast. A dark tree silhouetted against a bright sky is an example of this. Sometimes, the automatic selection tools work great on a part of a photo you want to select. Other times, in cases where there is low contrast, they work less well. In such cases, I use the manual selection tools. It does not hurt to try the automatic selection tools first. When they work well, they are a terrific timesaver. You can adjust their options so that they work better under varying circumstances. In instances where you simply cannot get automatic selection tools to select what you want in a photo, it’s time to use the manual selection tools.
Using Selection Tools
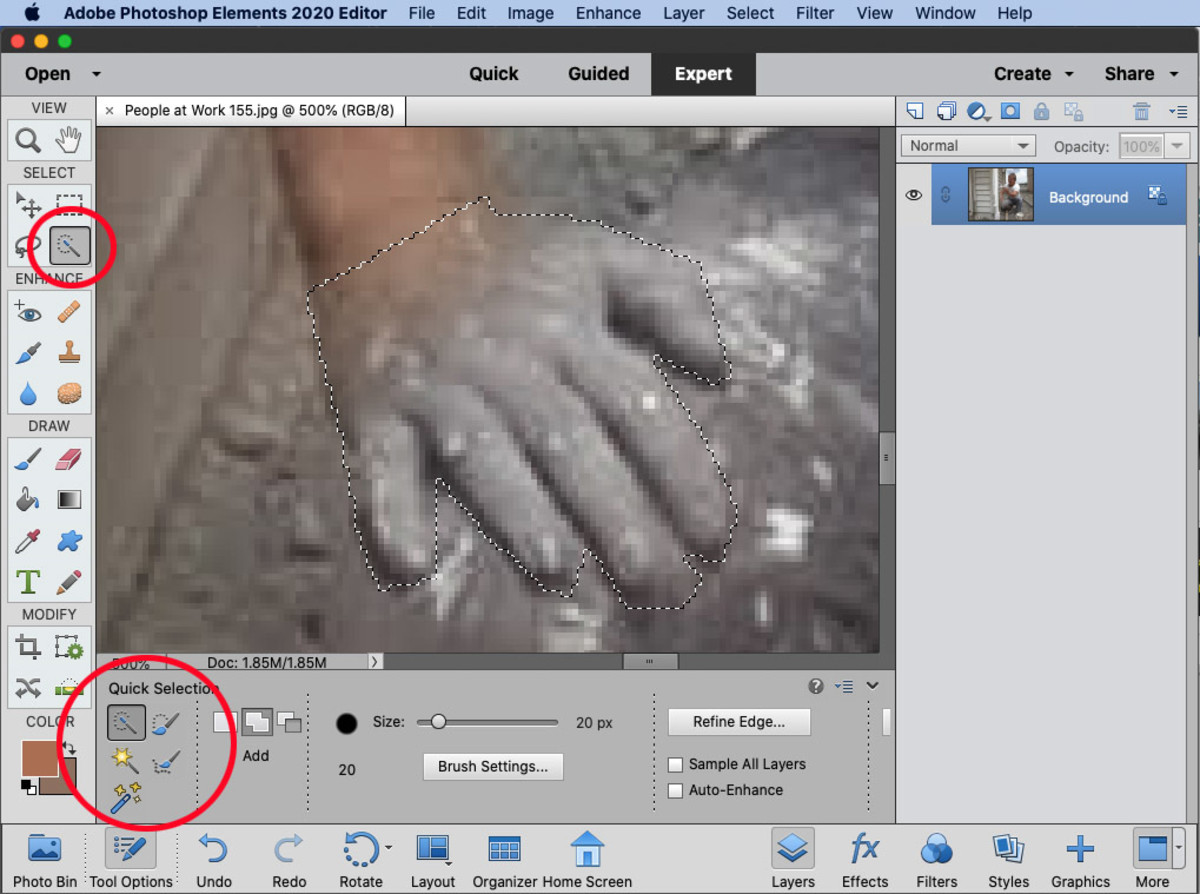
To select any of the automatic selection tools, you must first click the selection tool icon in the vertical tool palette on the left side of the screen. This may be confusing to beginners, because the tool palette icon changes to show whatever tool was last selected, so when you look at the palette, it may not show the tool that you are expecting to see. Remember, the auto selection tools are the third icon down on the right side of the palette (circled in the screenshot). After you choose the selection tool in the tool palette, you will see that you have all of your auto-selection tool choices at the bottom of the screen under the image area (circled).
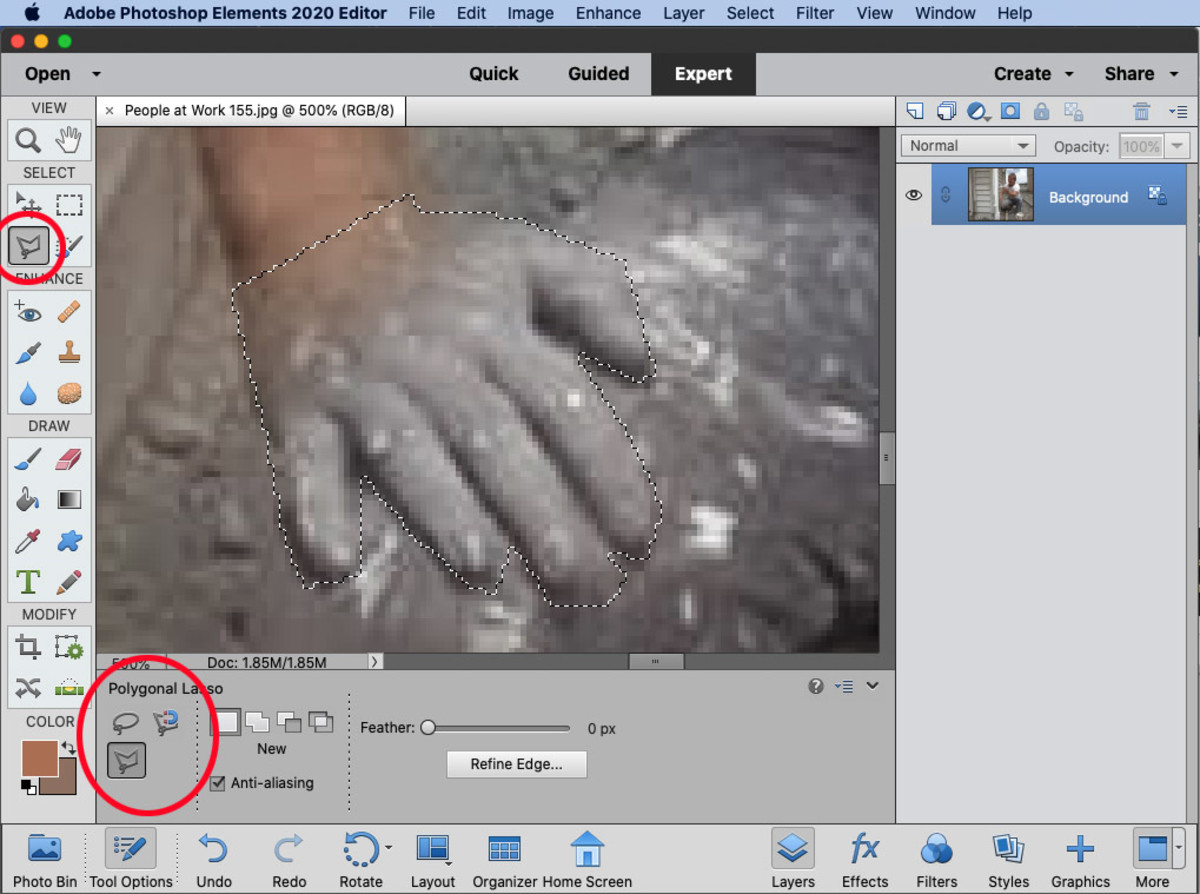
Polygonal Lasso Tool
To select any of the Lasso tools, click the Lasso tool icon in the vertical Tool Palette on the left side of the screen. It is third down on the left side of the palette (circled in red). After doing so, you will see your lasso choices below the image area (circled in red). The manual selection tool I like the best is the Polygonal Selection Lasso. This is similar to the regular Lasso tool, but it uses only straight lines. The regular Lasso tool requires a steadier hand, and it is easier to make mistakes with. You may ask, how do you select a rounded or curved area with a tool that makes only straight lines? The answer is that if you make short enough lines, it is virtually impossible to see that your selection was made with only straight lines. Because Colorize Photos forgot the painter’s hand, I have selected his hand in the above screenshot using the Polygonal Lasso tool.
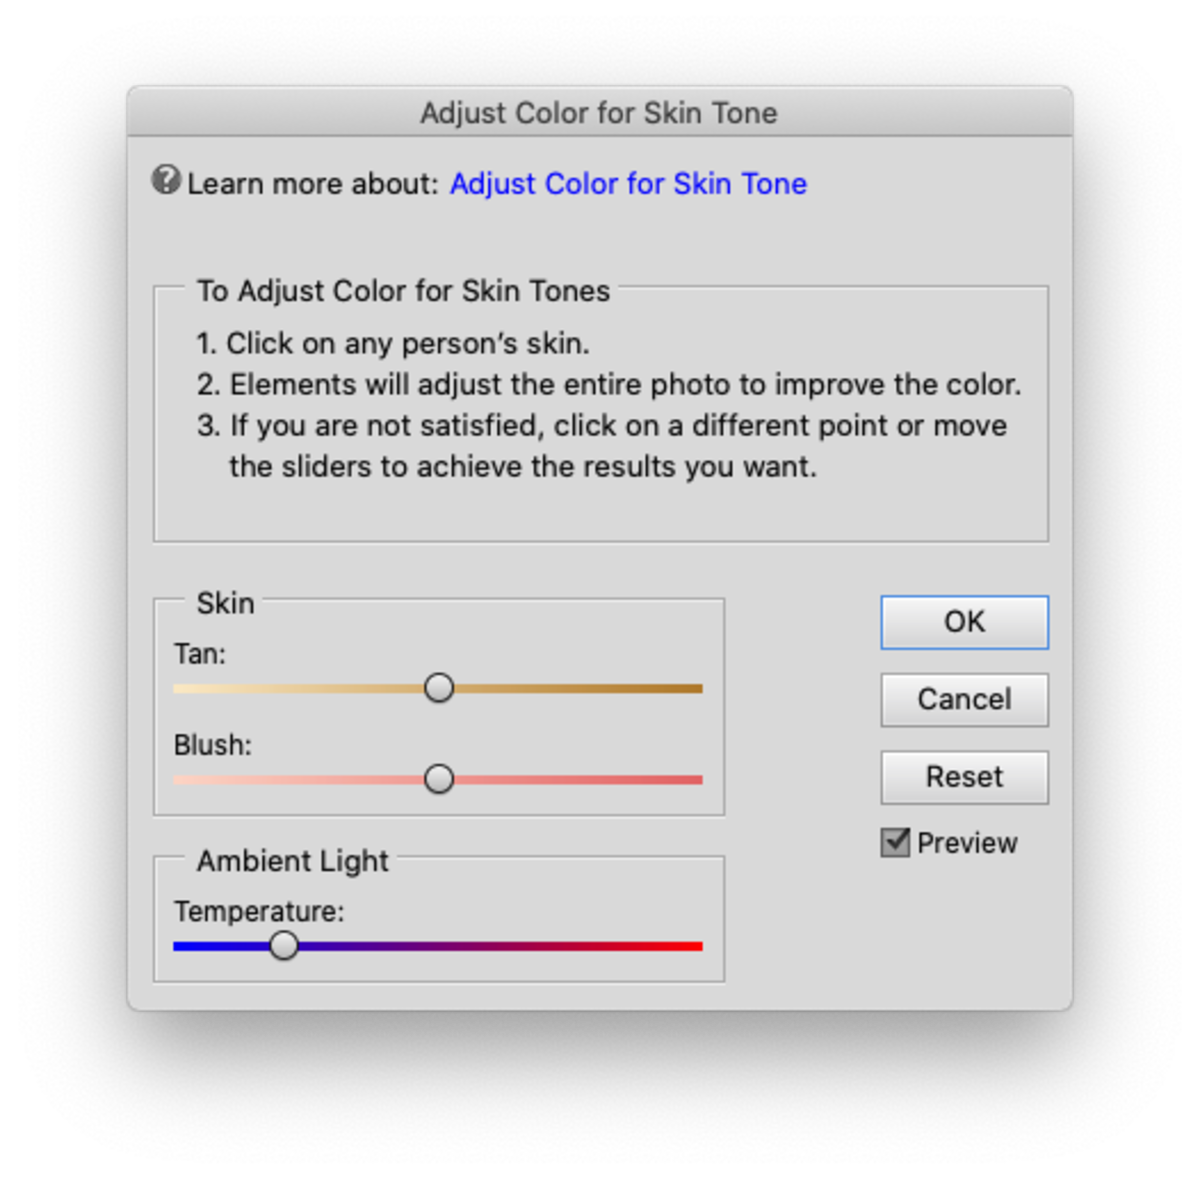
Adjusting an Area for Skin Tone
After selecting an area of skin that needs adjustment, here is a trick I use to quickly and easily set the area to the right skin tone. From the Enhance menu, I simply choose Adjust Color > Adjust Color for Skin Tone (above). The cursor turns into an eyedropper. Then, I simply click the eyedropper in any gray area of the photo. The software automatically colors the area I have selected into a natural-looking skin tone! You can adjust the level of tan or redness (blush) by moving the sliders so as to match the rest of the skin tone. It works like magic!
In Conclusion…
Perhaps ten years from now, Colorize Photos will be so good that its results will be impossible to tell apart from photos originally shot in color, but that is not the case today. Still, the software is a remarkable technology that can serve as a worthwhile starting point in colorizing your own treasured family photos. I hope this essay helps you to realistically understand the capabilities and shortcomings of Colorize Photos, and that the software helps you to re-experience your family photos in a whole new way! This article is accurate and true to the best of the author’s knowledge. Content is for informational or entertainment purposes only and does not substitute for personal counsel or professional advice in business, financial, legal, or technical matters. © 2020 Timothy Arends