Below are the system requirements for the Magento installation.
Apache 2.2 or 2.4 with mod_rewrite module (or) Nginx >= 1.8. PHP 5.5 or later version. PHP 7.0 also supported. Required PHP-Modules – PDO/MySQL, mbstring, mcrypt, mhash, SimpleXML, curl, xsl, gd, ImageMagick 6.3.7 (or later) or both, soap, intl, openssl. Composer and Git
1. Install Requirements
You can use following commands to install all requirements from default repositories. Also install PHP composer on your system.
2. Setup Magento2
Magento2 code is available under the Github repository. Use the following command to clone the Magento2 repository on your system using git. Now install all required modules for Magento2 using composer. Wait for the installation process completed. Now set the permissions on files and directories.
3. Create Database
Now login to your MySQL server with admin privileges and create a database and user for new magento2 installation.
4. Configure Apache VirtualHost
Create Apache configuration file for your Magento website like /etc/apache2/sites-available/magento2.example.com.conf and add following content. Now enable virtualhost using following command. Also make sure to enable the Apache rewrite module, which is recommended by Magento. After doing all the above changes, make sure to restart the Apache server.
5. Start Web Installer
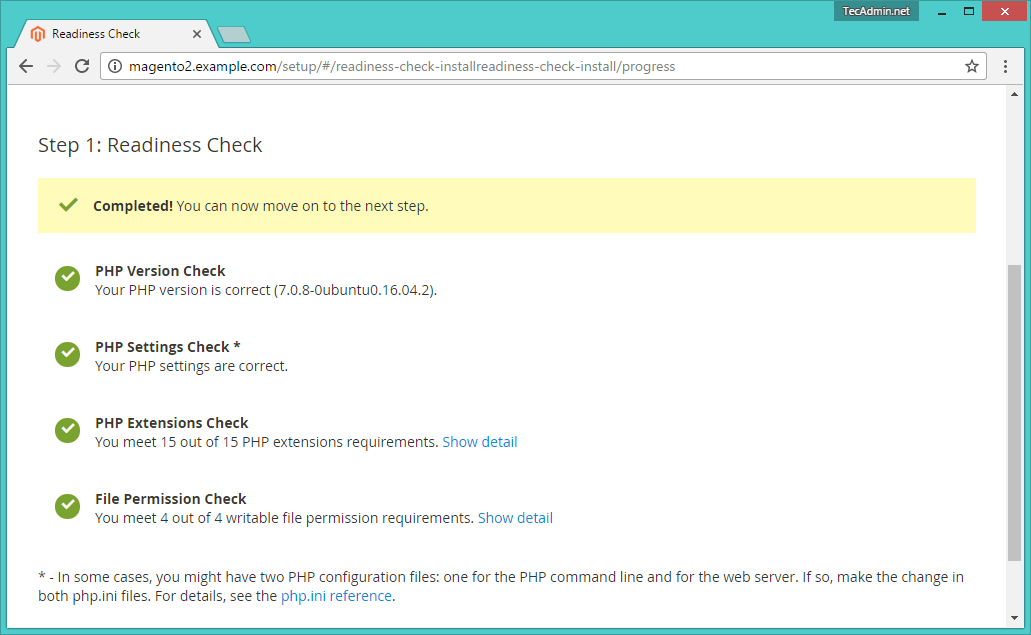
Let’s begin the installation of Magento2 using a web installer. Access your magento2 directory on a web browser like below. It will redirect you to the installation page. On the first step agree with the License agreement and click on “Agree and Setup Magento”. On Step 1 click on “Start Readiness Test”. Magento will check for system requirements here. On successful completion, you will see a screen like below then Just click Next. Fix issues if shows on this screen and click Try again.
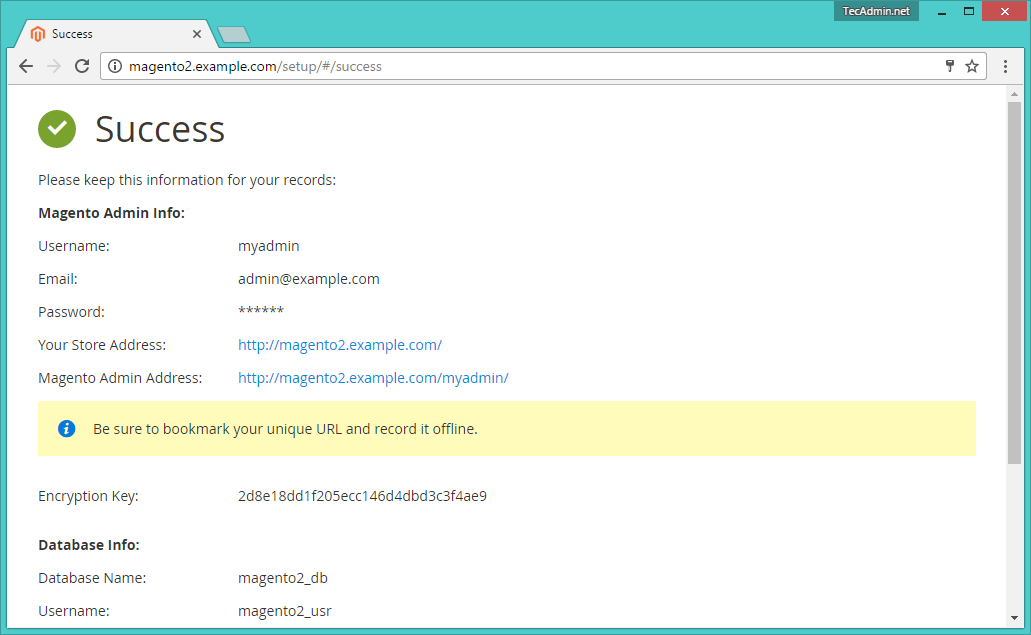
Now follow the wizard steps 2, 3, 4, 5, 6 and on successful installation, you will get a screen like below.
Now login to your admin panel using created admin credentials in the above steps.
Congratulation! You have successfully deployed Magento2 on your system.
6. Schedule Magento2 Cronjobs
Finally schedule the backgound cronjobs for your magento2 installation. These cronjobs does some activities like, re-indexing, Newsletters, Update of currency rates, sending automatic emails and generating sitemaps etc. To schedule these jobs edit crontab file and add following cronjobs at the end of file and save it. Here www-data is the user under which Apache is running and /var/www/html/magento2/ is the location of your Magento2 applications.