This tutorial will help you to install the LightDM display manager on the Ubuntu Desktop system.
Installing Lightdm on Ubuntu
LightDM packages are available under default apt repositories. You can install lightdm on Ubuntu by running the following commands.
Configure Lightdm as Default Display Manager
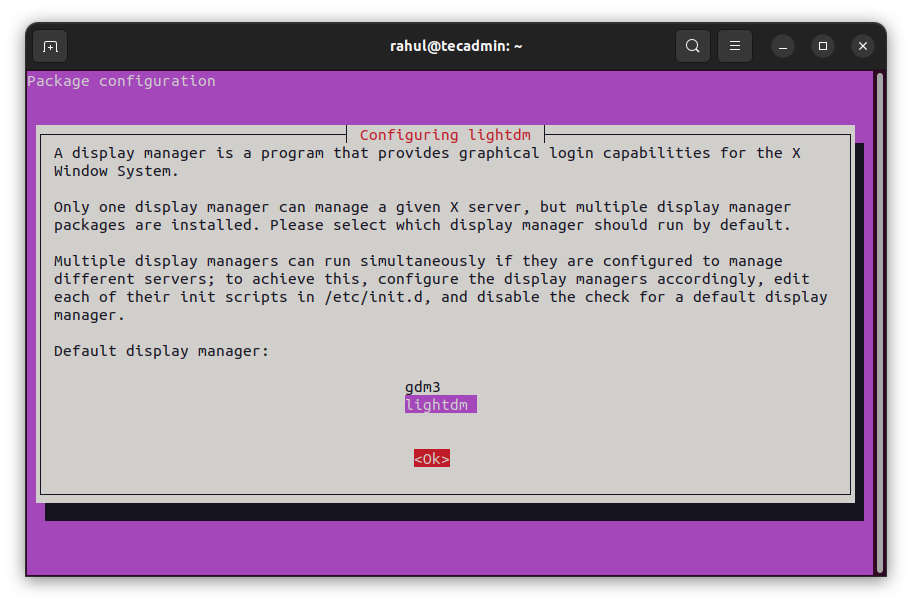
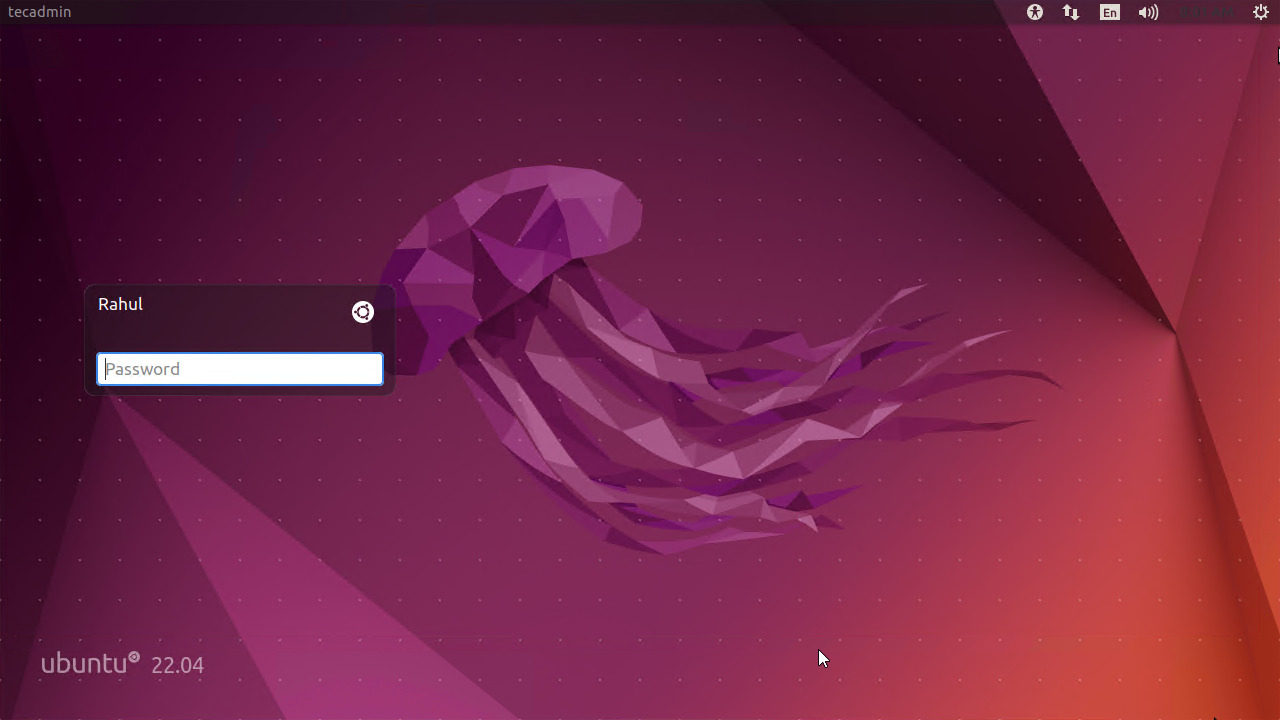
Once the lightdm is installed on your system. You need to run the following command to set lightdm as the default display manager on your Ubuntu system. You will get a list of installed display managers below: Use the keyboard UP+DOWN buttons to select lightdm and then press TAB to select the Ok button and hit Enter. Lightdm is now the default display manager on your Ubuntu desktop. Next time you will see the Lightdm login screen as shown below screenshot: In case, you still do not see the above screen reboot your system once.
Uninstall Lightdm
Before uninstalling the lightdm, switch back to gdm3 display manager Select the gdm3 and hit Ok button. Now, uninstall the lightdm package from the system.
Conclusion
This how-to guide helps you with the installation of the Lightdm display manager on a Ubuntu desktop system. That loads the login screen faster than other display managers.