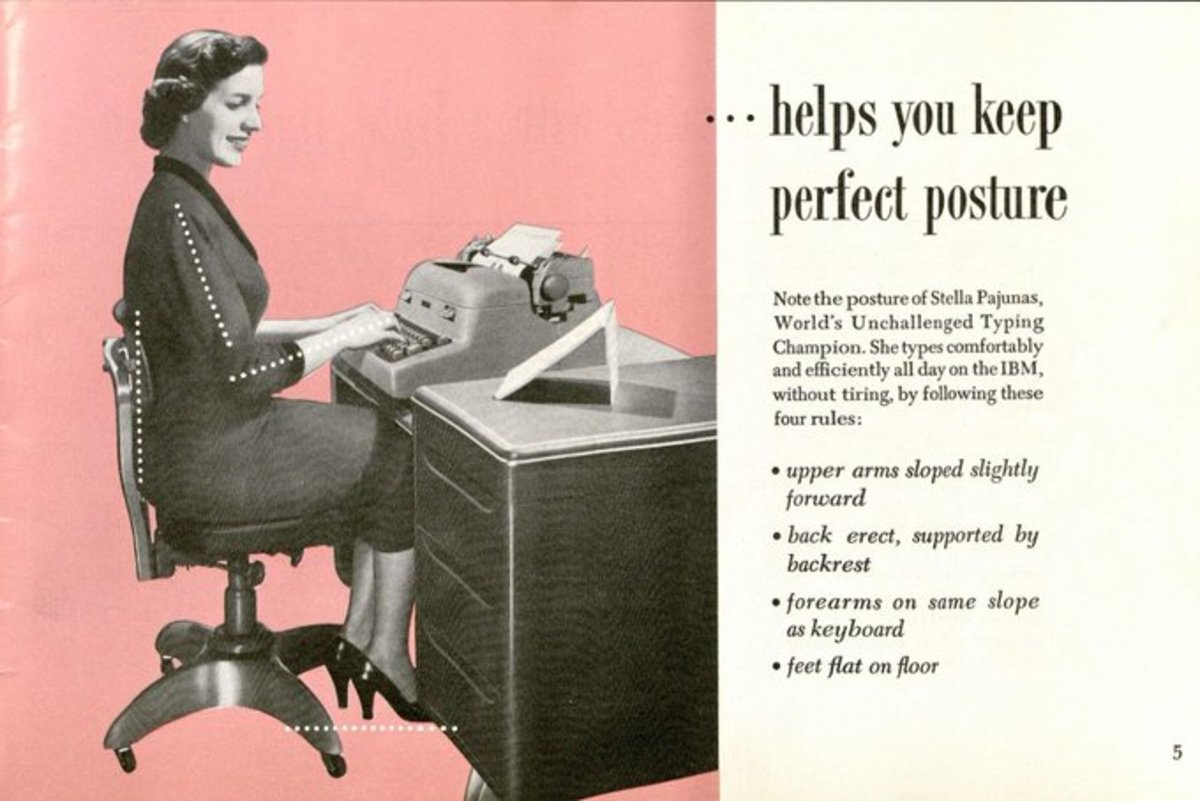
An average touch typist will be spitting that same document out at around 60 to 80 wpm, so at least twice to three times your speed, and an above-average typist at around 120 wpm. So what takes you sixty minutes to type at present, will be done by a very good touch typist in fifteen minutes. Then you’ve got to spend time fixing all your errors. In the meantime, the good typist has had a lengthy catch-up chat with her mother and onto her second cup of coffee, and you’re still fixing your spelling mistakes. But also if like a lot of people you enjoy writing and want to crack into your first novel, you’ll find it flows a lot easier if you can write the words almost as fast as they’re coming out of your head. And a third reason, if you learn to speed type, you’ve just got yourself a nice little skill on the side that you could make some secondary, or, even primary income out of.
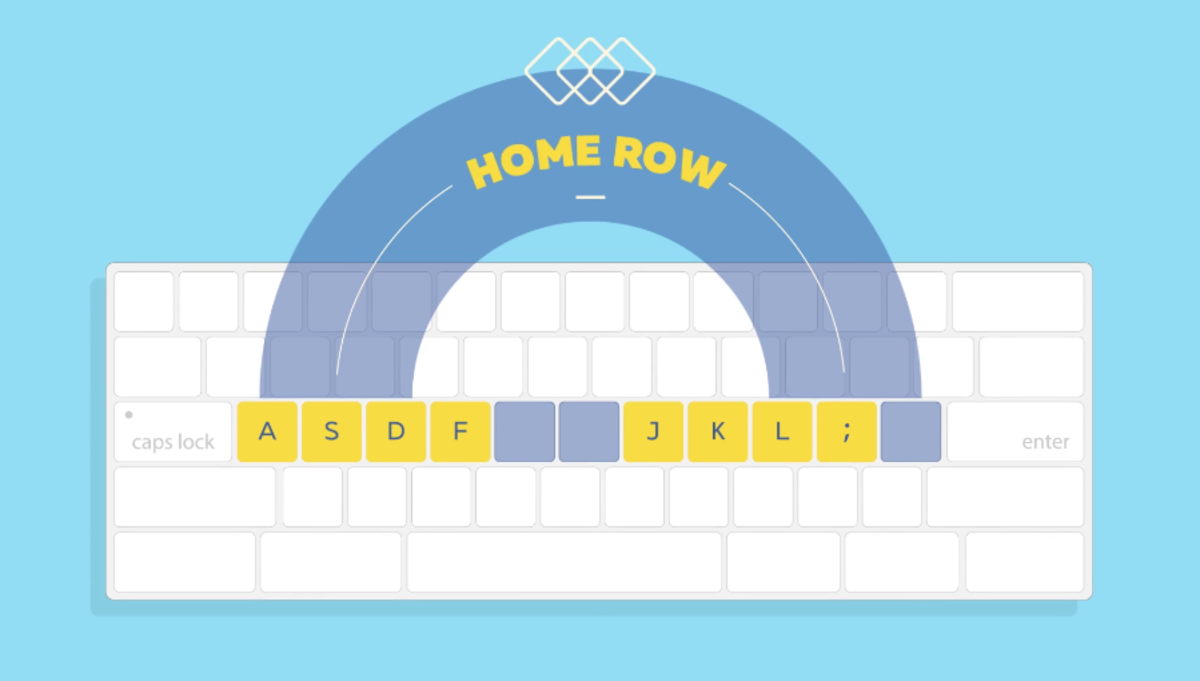
Where to Begin: The Home Row
First, take a look at your keyboard and if you look and feel the F and J keys, you’ll see they each have a little raised bump. This is where the index finger of each hand goes and becomes the guide for your other fingers. Next, rest the three fingers to the left of your index finger on your left hand on the three keys to the left of the F key. So, your little finger should be resting on the A key, next finger on the S key, and your third finger on the D key. Then on your right hand, your small finger should be resting on the semicolon key, next finger on the L key, and your third finger on your right hand the K key. This whole eight-finger position is known as the ‘home row.’ From here, once you get used to your fingers resting in the home row position, your fingers will get used to finding positions above and below them and returning to base on the home row. Big Lesson: Never look at the keyboard.
First Lesson: F, J and Space Keys
You’re going to start with just f and j. So this is to get used to where those keys are. Take your eyes off the keyboard and then like brail, find the bumps on the keys representing f and j. Now do this lesson. Open say a Word document on your computer and to get used to just these two keys, type the following while only watching word on your screen, never looking once at your keyboard:
f j f f f f j f j f j j f j f j f f f j j f j j f j f f j f j f j
Okay now, your two thumbs should be at rest over the space bar. Now try this:
f space j space f space j space f space f space f space j space j space j space f space j space f space j space j space f space f space j space
Now do this:
f f j j space j space f space j j f f space f space j space f f j j space j space f space f space j space f f space j space j space j j f f space
Second Lesson: D and K Keys
Okay now with the d and k keys so third finger resting on the d and k keys of each hand.
d k d k d k dd kk d k k d kk d d k k d k k d d k d k d d k d k k d
Now with the space bar
d d space k k space d k space k d space k d d k space k d d k space d k d k space f g d space j f k d space f f j j space k d f j space k f j d space f j d j f k space
Okay keep practising, but we’ll have a break to show you a few tricks to make touch typing easier.
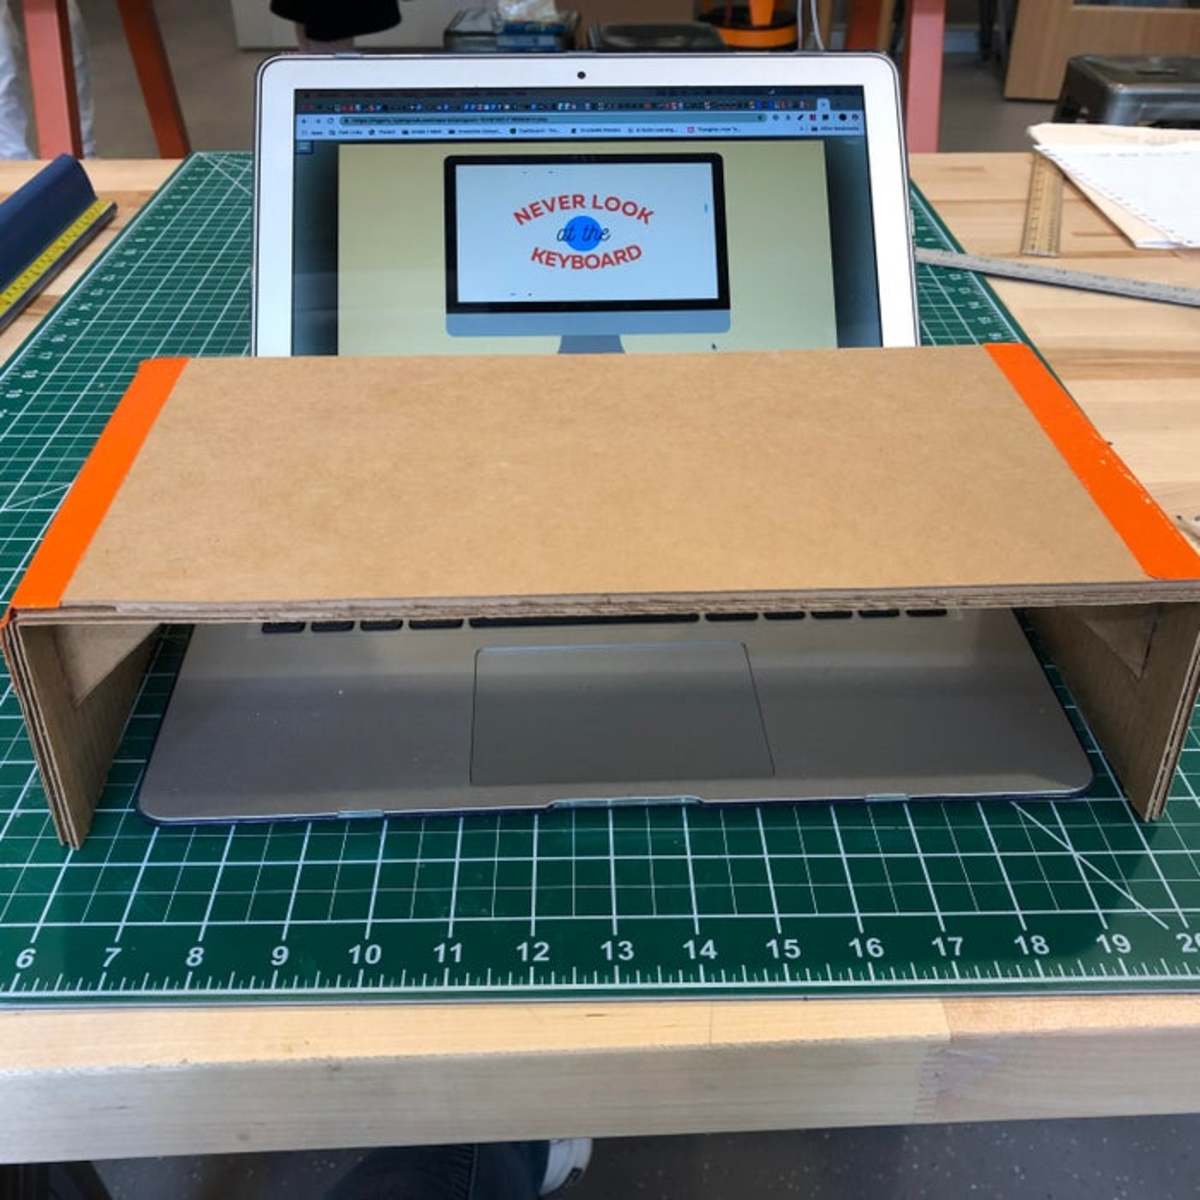
Cardboard Keyboard Cover
To Learn Touch Typing, You Cannot Have Any Keyboard Visibility
Here are some tips to keep you from looking down at the keyboard:
As with the photo above, build a cardboard box to cover the keyboard and your hands. A shoebox is generally the right size for a smaller keyboard like a Mac one or laptop. Just cut the sides off. Work at night in the dark and keep your eyes glued to the screen. Place your hands on the keyboard and then place a tea towel or similar over your hands.
Third Lesson: S and L Keys
Your hands should be resting on the home keys. This lesson will be discovering the s and l keys, located under the fingertip of the second finger of each hand: So start with this practice:
s s s l l l l s l s l s l l s l s l s s s s l l l l s l s l s l l s l s l s s l s l l s s space s s l l space s l s l space l s s s l space s l l s space l s l l space s s l space l l s s space s s l l space s l s l space l l s s l s l l space s s l space s s l l space s l s l space l s l l space l l space j j space f f space k k space d d space l l space s s s s d space d f space f j space j k space k l space s d f s k space d l space k s space j f space k d space l s l f l space k l space j s space k d space j f space s d f l l f space k k j space j j f space
Practise! Practise! Practise
Fourth Lesson: A Key Under Your Left Pinky Finger, Punctuation Mark ; Under Your Right Pinky
a a a a ; ; ; ; a a space ; ; space ; ; a a space ; a ; a space a ; ; ; a space a ; a a space ; ; a a a ; ; space ; ; a a space ; a ; a space a a ; ; space a a ; ; a ; a a space ; ; a space ; ; a a space ; a ; a space a s k space d a d space a l l space s a l a d s space f a l l; space l a s s space a s space a l l space a d s space a d d space s a l s a space j a f f space k a d space; f l a s k space l a s s space s a d space f a l l space a l f a space j a k space k a j space d a d space a s k space
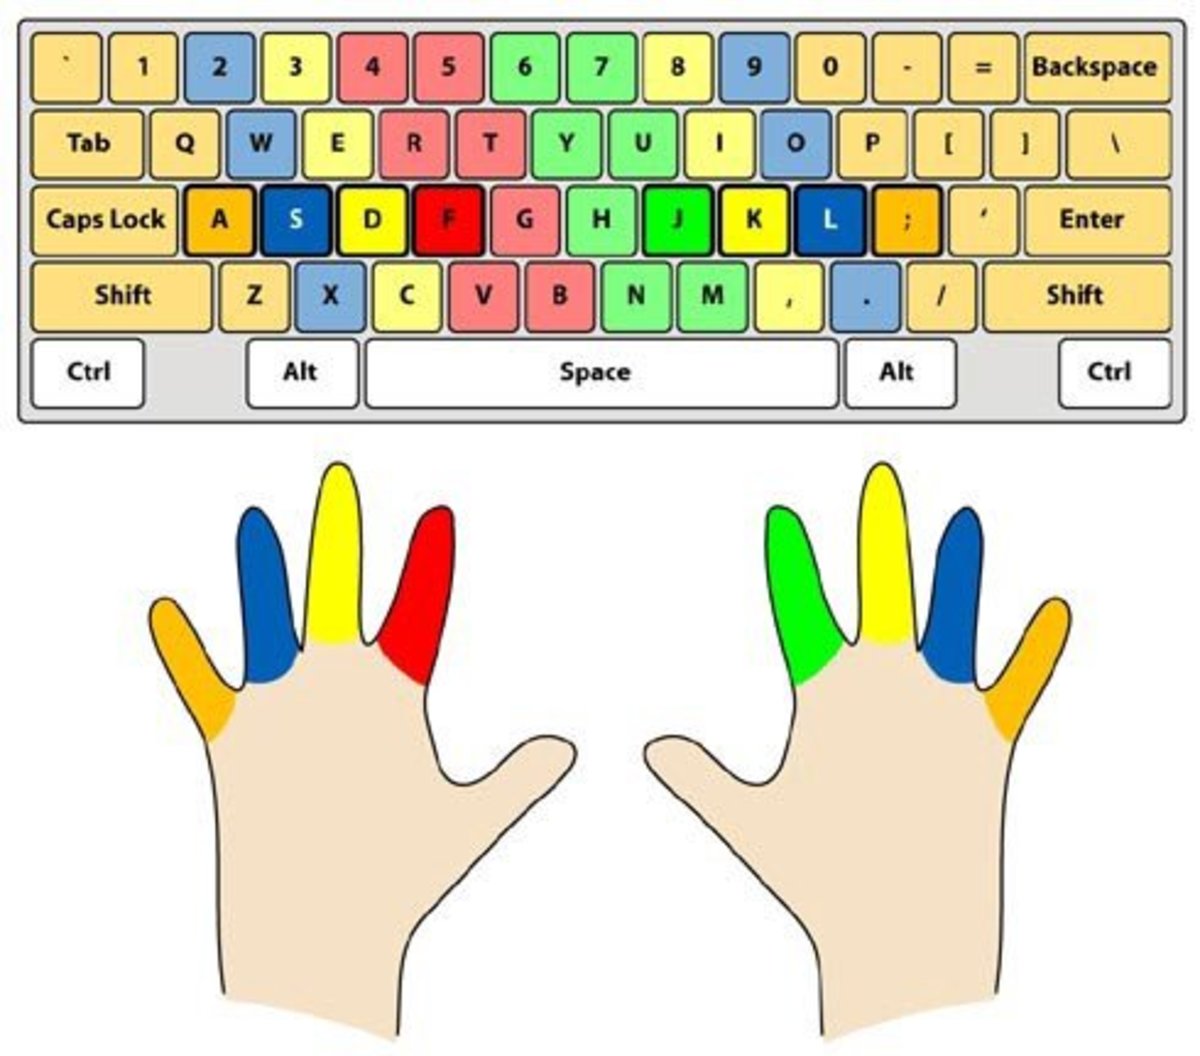
Eight-Finger Keyboard Control
The Keyboard in Full
Now that you have the basic finger function for the touch keyboard, you can see by the above diagram, what finger controls what keys. Now it’s a matter of a lot of practise ( months) to slowly build your word sped up. In a nutshell, you’re doing exactly what a pianist does, learning scales. Pianists, of course, never look at the keys either (neither does a guitarist, as another example). So, it’s a matter of finger muscle memory. However, give it two to three months and you’ll be up to 60 to 70 wpm’s ( that’s the average) and likely around 95% accuracy. In a year, it wouldn’t be surprising, to see 100 wpm’s. After that, you’ll never look back.
The Basics
© 2020 Jerry Fisher