my collection
Like a Voice From Above
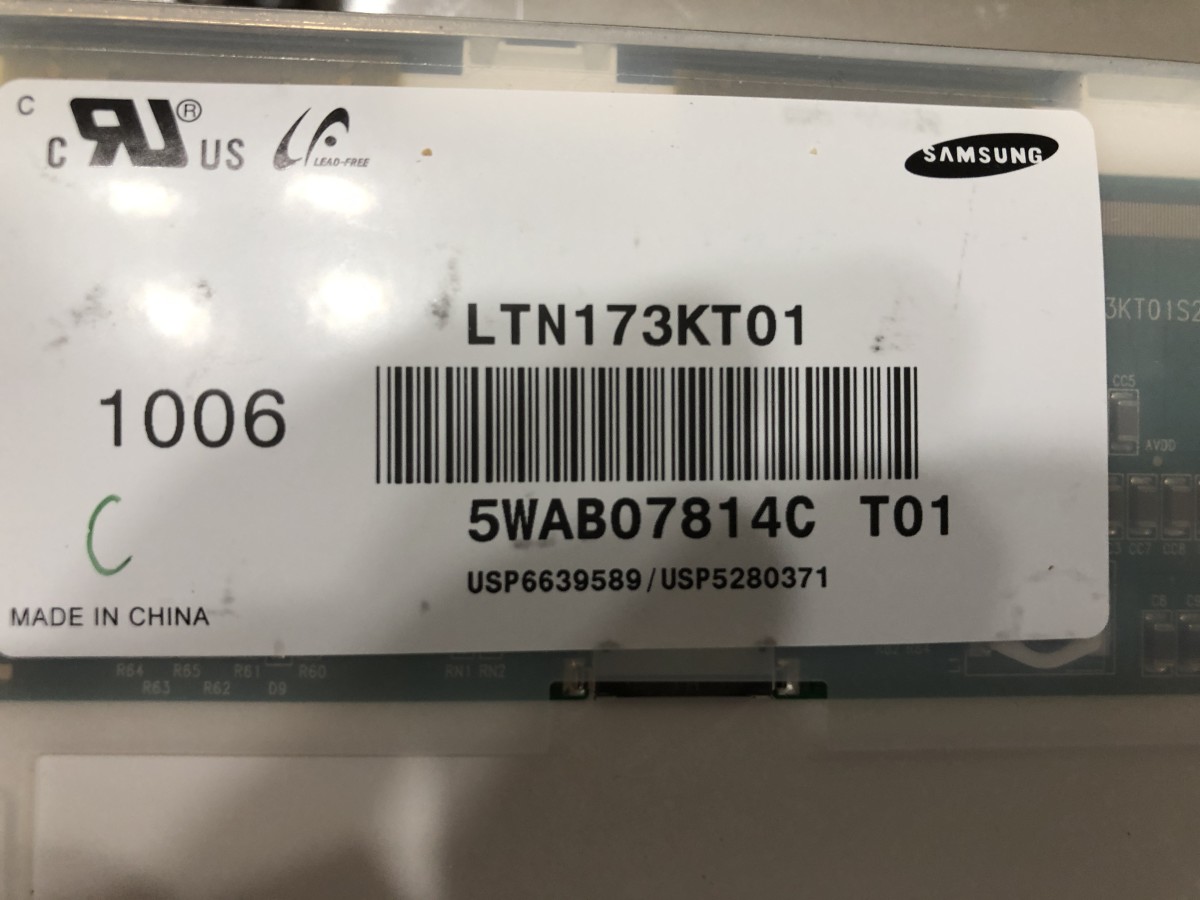
This setup has served me well for the past two years and I still use it. In the meantime, my wife’s Toshiba blew a proverbial gasket and just stopped working. Now I had the carcass of a once valiant computer that had served us for over 15 years. I was loath to part with it. I put my trusty second monitor computer system to good use and realized there was nothing I could do. It was dead. Or was it? Like a voice from above (since I am an ordained minister, I do listen to those voices.) my thoughts turned to how I could reuse that old laptop monitor. And guess what, YouTube responded with dozens of solutions on the topic. However, only one of them worked for me, a LCD Controller board. But for that, I needed the model number on the back of the screen. The process is simple, but delicate. I had to disassemble my dead laptop to gain access to the hinges. These hinges secure the screen to the main laptop chassis. Once these hinges are released the screen will fall free. Next, I had to separate the screen from its confinement. The bezel surrounding my screen is plastic snapped into plastic and secured with six screws. Once the screws are removed, the plastic cover snapped apart. Be careful, it is extremely fragile.
Toshiba Guides
Toshiba Satellite L675 L675D L670 L670D disassemblyHow to dismantle Toshiba Satellite L675D or L670D or L675 or L670
Toshiba Satellite L675D LCD Repair Guide | Installation VideoToshiba, Satellite, L675D, LCD Repair Guide. Install, Fix, Replace or Repair your L675D LCD with our FREE Video Installation Guide.
Searching for the Control Board
my collection
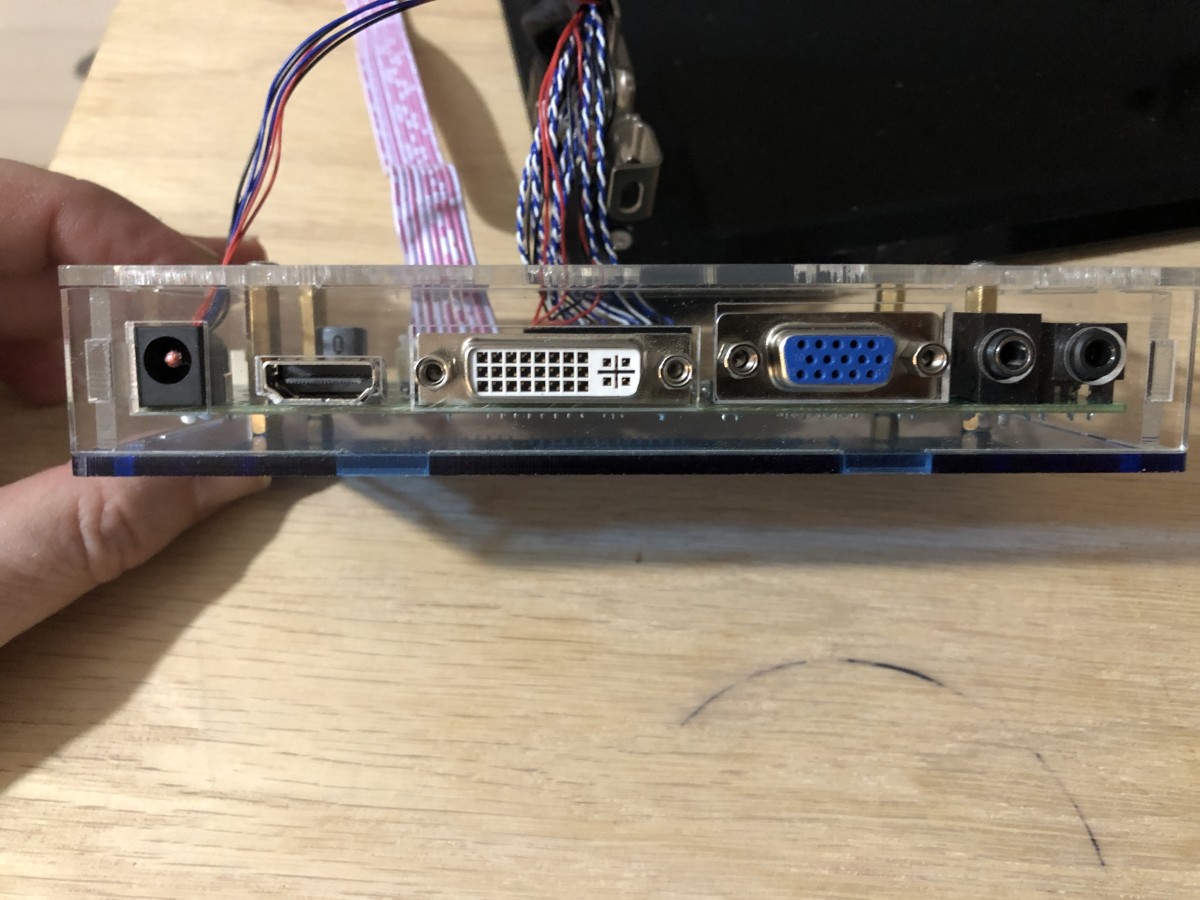
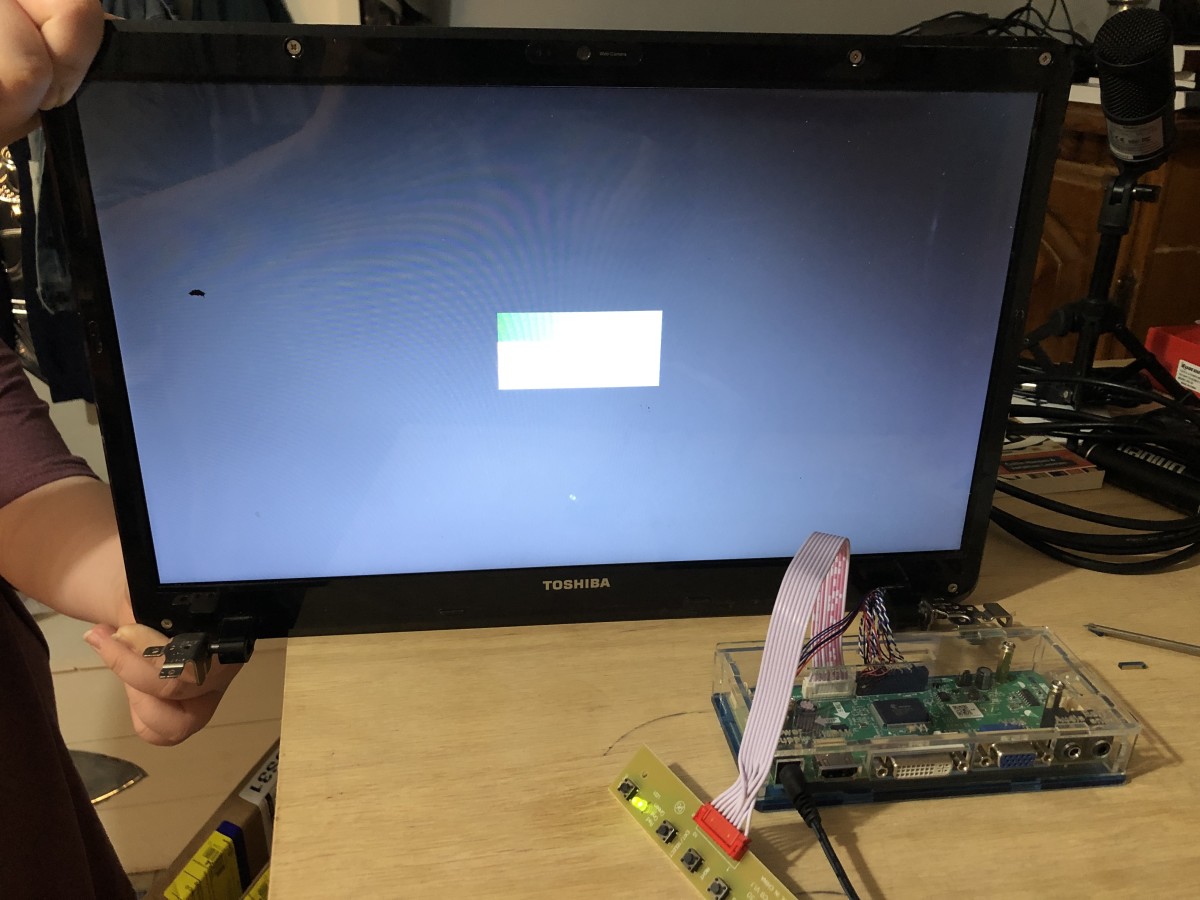
Connecting the Control Board
I didn’t think this far ahead, so I didn’t photograph how I connected the controller board. Simply put, gently unplug the original cable from the screen, and lay it aside. I left mine attached and taped it down to the plastic cover. After connecting a power cord, this may require additional research, but a link is listed below, I had one laying around, the monitor worked perfectly. You will also need a cable of some type (DVI, HDMI, or VGA) from the control board to your laptop or PC. I chose an HDMI cable.
Hooking It All Together
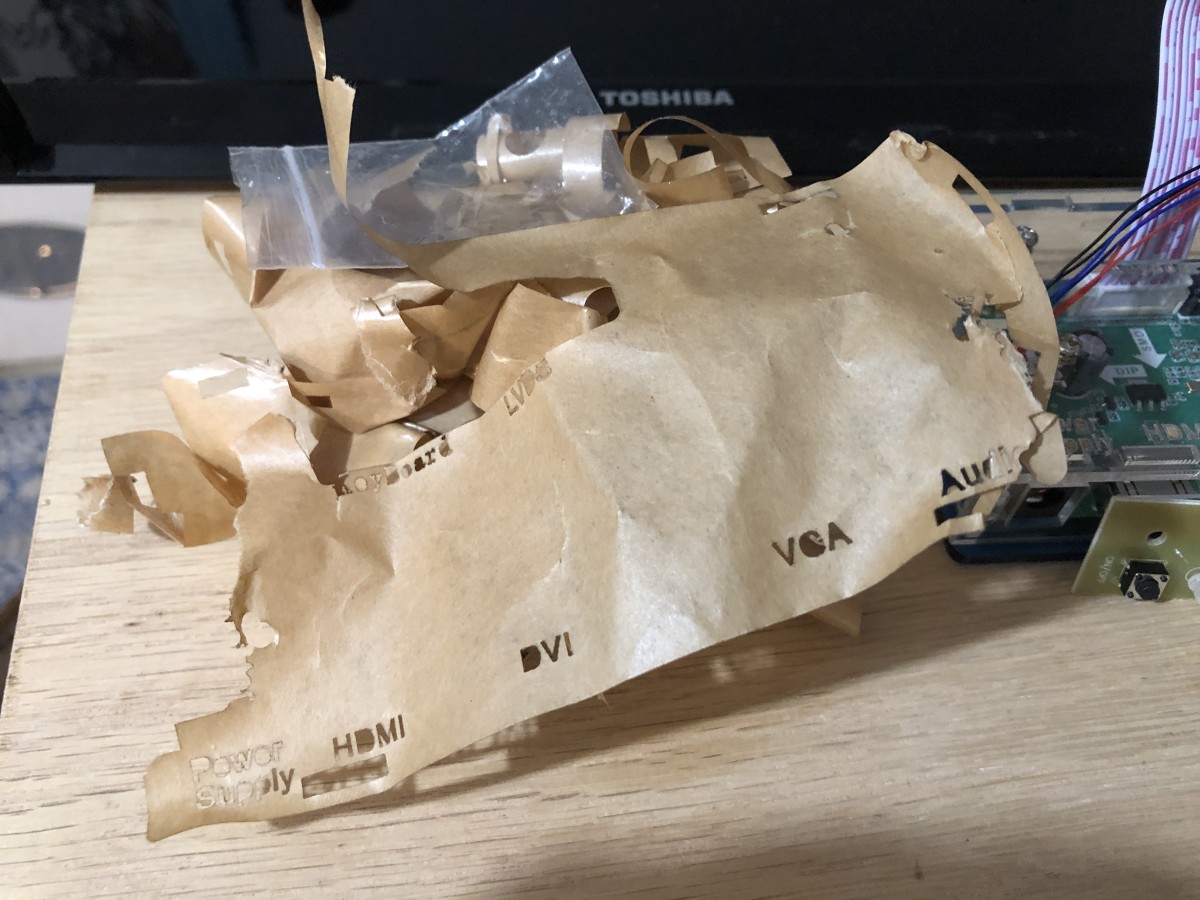
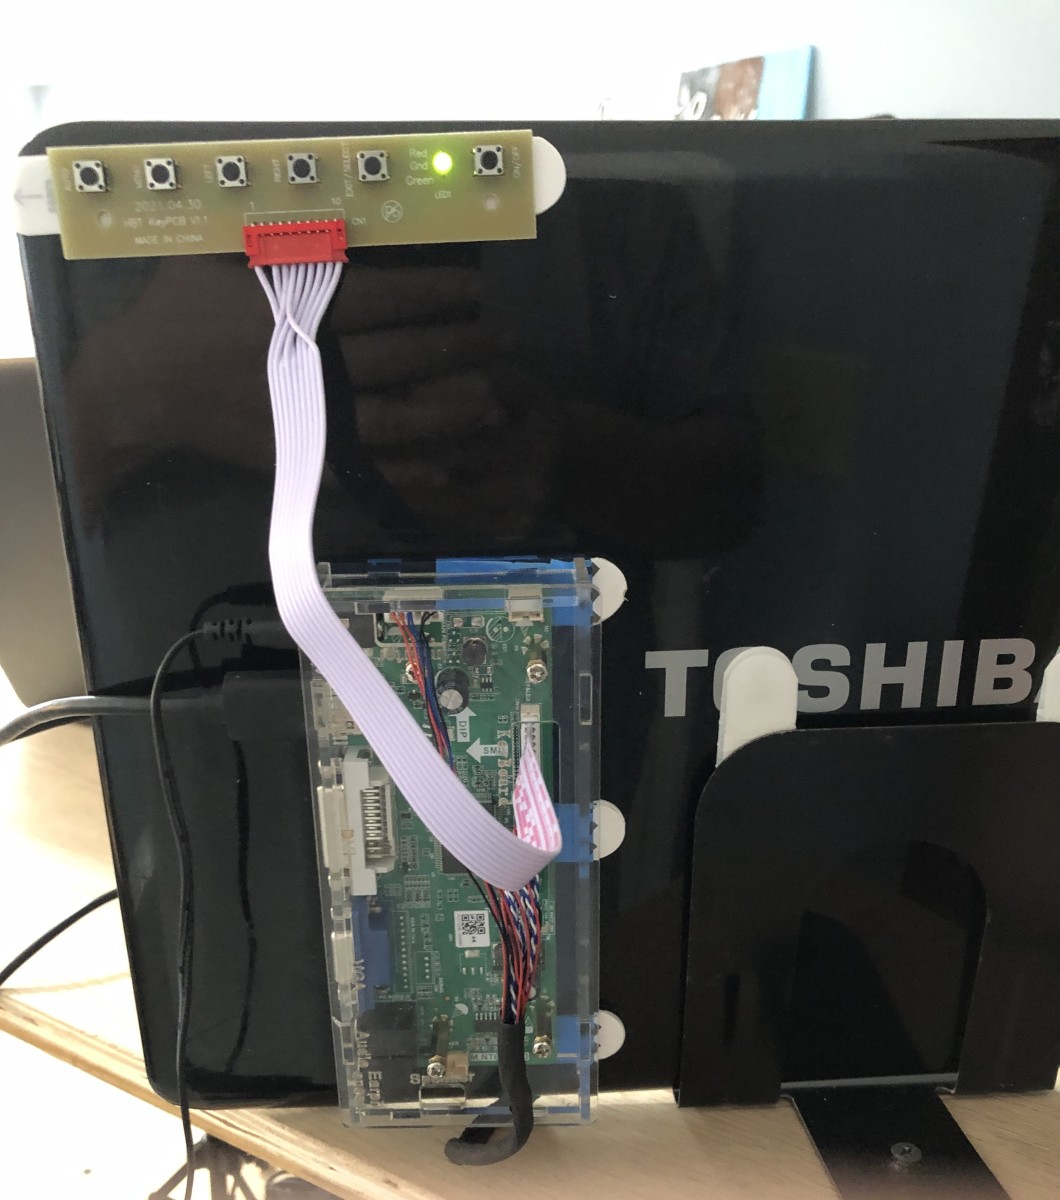
Once I connected the cables together, I placed the board inside of a pre-cut acrylic case. It was a bit of trial and error to attach the control board. Again, these are delicate cables, no more than 6-inches long, and I didn’t want to rip them loose, even by accident. Circumstances forced my decision to mount it as shown. But I’m warming to its current location until I make room on my desk for this second monitor! Then, I will have three monitors running side-by-side, and I will get even less done because I can watch three YouTube videos at the same time! All joking aside, be careful with your new build. An older PC might not be able to able the additional screen sucking ram. With the included HMDI connection, I can use other devices such as DVD player, photo viewer, or even a security camera monitor. How can I listen to a DVD player you might ask? Well, that’s a good question, but the answer is, external speakers! There is an external speaker jack soldered right onto the control board. I haven’t tested these other options, but the day is still young.
A Working Solution
Before I began writing this article, I wanted to make sure this set up worked. Lo and behold, I was quite pleased when it worked on my first attempt. So, it truly is plug and play. I had wondered what was wrong with the old Toshiba and obviously it wasn’t the screen. Oh well, after all I’ve done to the old girl, it’s more like Humpty Dumpty than a laptop computer. As a result, this Frankenstein of a work station will suffice until it, too, dies. my collection my collection
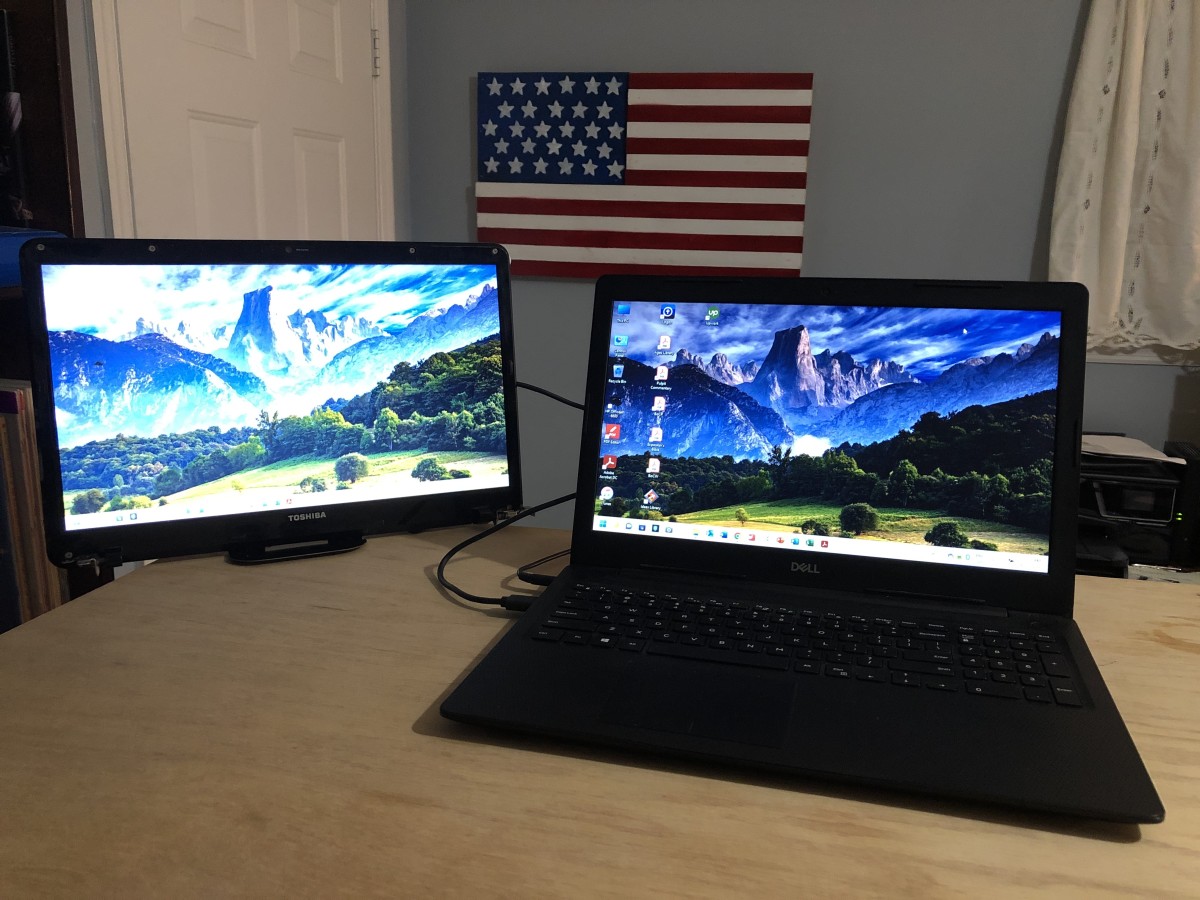
Final Setup
As for mounting the screen to my standing desk, I used one of those old metal bookends that I screwed to the desk. I stuck the bookend and acrylic case to the back of the monitor with command strips. It isn’t ascetically pleasing, but it is functional, and where I can see it. my collection
Final Thoughts
If you’ve made it this far, I hope you’ve been inspired. Now that you know what’s useful that you can build, look around your home, your friends’ homes, and the local thrift shop for components. my collection Speaking of which, I have another laptop in my office. I haven’t given up on it, yet. If it has outlived its usefulness, maybe I can put it to good use and build one for my wife? What do you think? This content is accurate and true to the best of the author’s knowledge and is not meant to substitute for formal and individualized advice from a qualified professional. © 2022 Mark Lewis