Step 1 – Create Account
First of all, create a user account to use for sftp access. Below command will create user named sftpuser with no shell access.
Step 2 – Create Directory
Now, create the directory structure to be accessible by sftp user. Change the ownership of the files directory to sftp user. So that the sftpuser can read and write on this directory. And set the owner and group owner of the /var/sftp to root. The root user has read/write access on this access. Group members and other accounts have only read and execute permissions.
Step 3 – Configure SSH for SFTP
Now edit the SSH configuration file in a text editor and add the following settings at end of file. Save the configuration and restart SSH service to apply changes.
Step 4 – Test SFTP Connection
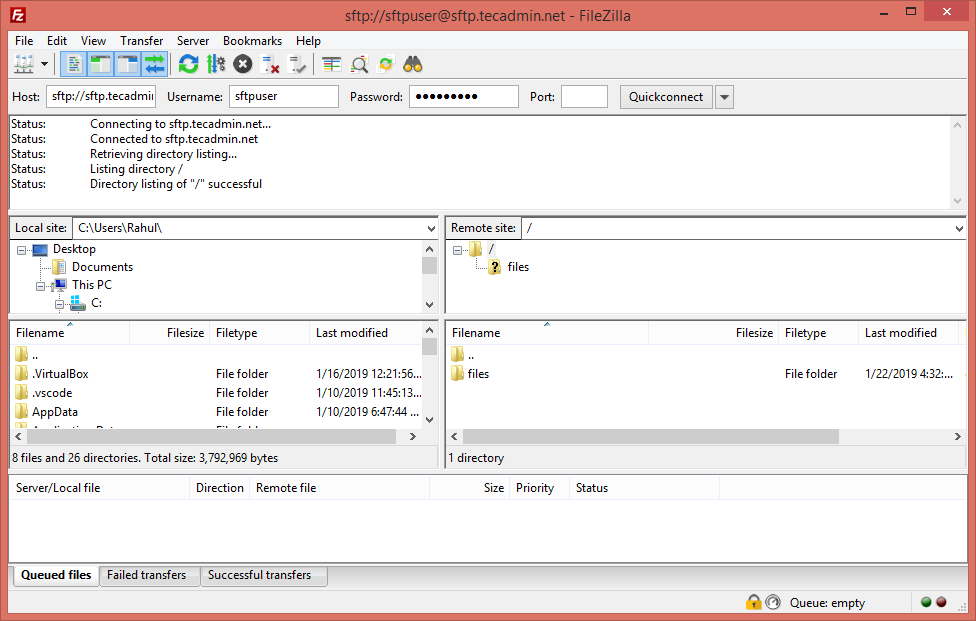
I am using FileZilla for the connection to the SFTP instance from my Windows systems. Linux desktop users can also use Filezilla for connection. For the Linux server, users can use sftp command-line utility to connect to remote sftp instance. Connect with FileZilla:
As this account is configured for SFTP only connection. So if any user tried to connect via SSH will be disconnected immediately after successful authentication. User will get below message: