Joshua Hoehne, via Unsplash.com
As a college student with no expendable source of income but an ever-growing passion for photography, I was always on the lookout for cheap or free solutions to the problems I faced. And believe me, there are plenty of free sources for the up-and-coming photographer out there in the world. One of them is obviously, Google. But apart from the many, many everyday tools that we use from the company, it also has a very powerful - and most importantly, free - photo-editing app that is going to be an absolute goldmine for broke artists who simply cannot afford the pricer and inadvertently popular options available on the market. Of course, I’m talking about the app, Snapseed, available on Google Play and the App Store [there is also a Chrome extension and a PC version of the same].
In this article, I’ll be focusing on quickly creating black and white photo-edits for social media posts using only the presets that come with the app. As we all know, presets are an absolute gift for quick photo-editing and simple Snapseed presets are extremely easy to use and give dramatic results with a simple touch [or click if you are using it on your PC].
[Disclaimer: I am an amateur photographer who does photo edits based purely on the feel that I want to create with an image and therefore my technical knowledge is lacking. But I am also a firm believer of the artistic process whereby I treat a photo as a canvas where I am given free rein to create a completely different atmosphere.] So, without further ado, lets dive right in!
Step 1: Take a Cool Picture
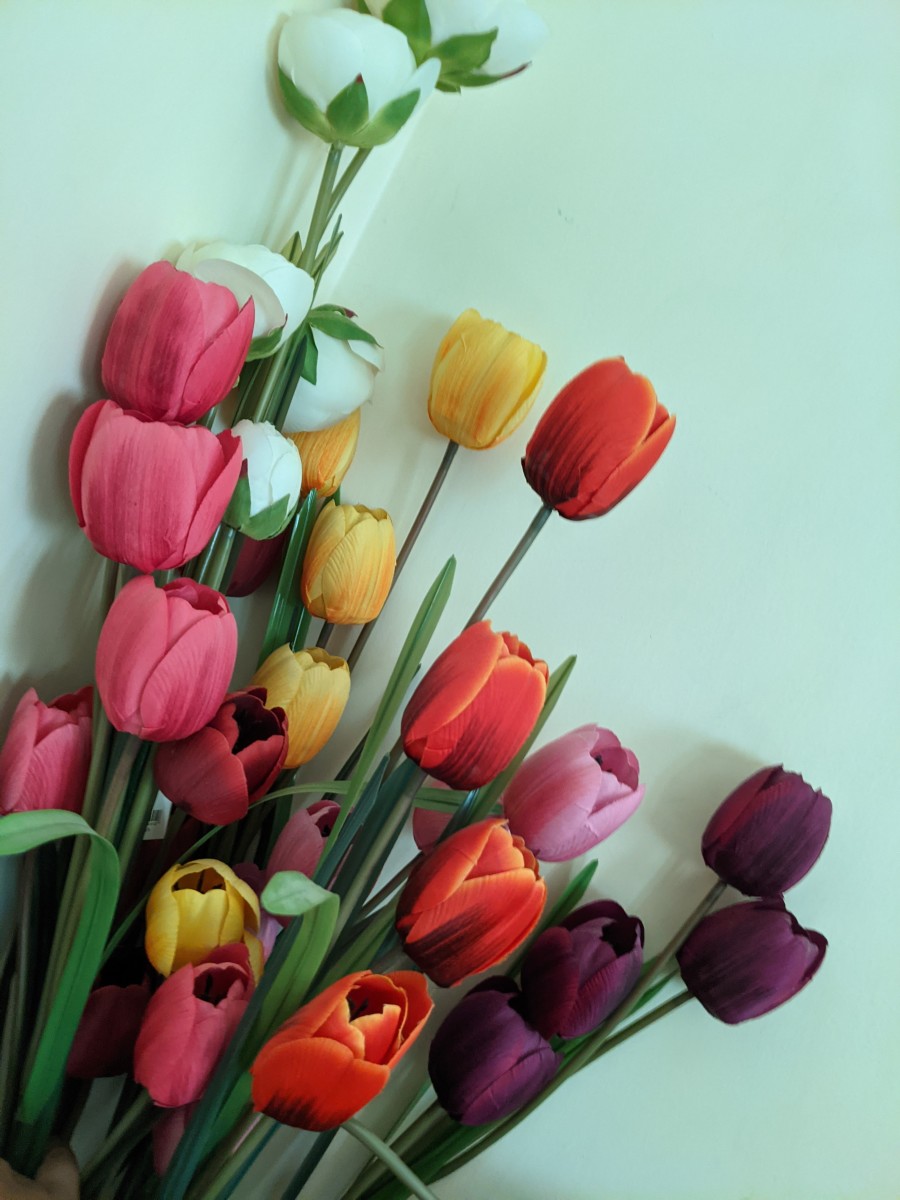
(You can take a Not-So-Cool picture as well, I’m not here to dictate your life choices.) For the purpose of this tutorial, I’ve taken a picture of some artificial flowers that were lying about in my house. Just propped them against a plain wall, found a good enough light and lens angle, and boom! Picture ready!
Learn How to Create Amazing Photos for Free
I would like to stress that the purpose of this tutorial is to make you understand that a few simple button touches can do wonders for any photo taken by any device. You really DO NOT need expensive and high-end tools to get started. All you need is a bit of patience with technology and a zeal to learn and improve in your art This photo was taken on a Google Pixel 3, which is my regular phone.
Step 2: Open the Photo on Snapseed
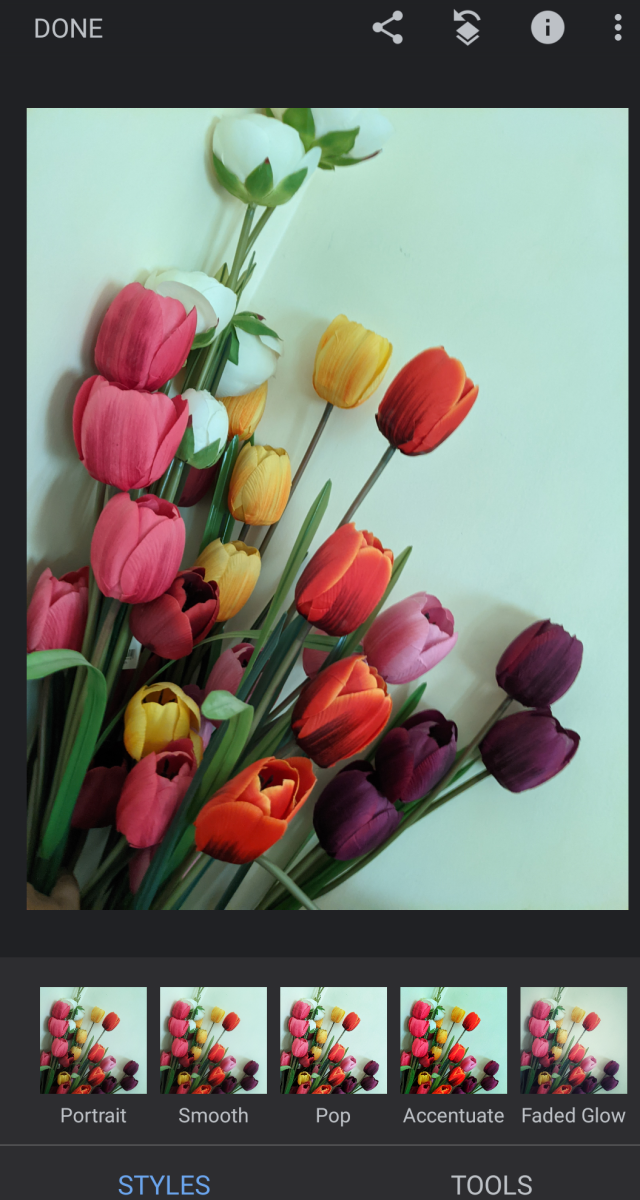
Now, I am going to assume that a few things going forward, namely, that you have downloaded the app and have at least opened it once to learn how you are to open a picture on it. As you can see, the first thing that automatically comes up when you open your picture is the Style tab with its various options. This is the feature that we are going to focus on for the purpose of this tutorial.
Take a Break and Try Different Preset Styles
I would suggest taking a break from this article for a few minutes and apply all the styles one by one on your chosen picture to get a feel of the subtle differences that they each have. As you understand, we are going for a black and white image, but before getting to that step, the lights and shadows of your picture are very important to enhance or subdue as per your choice.
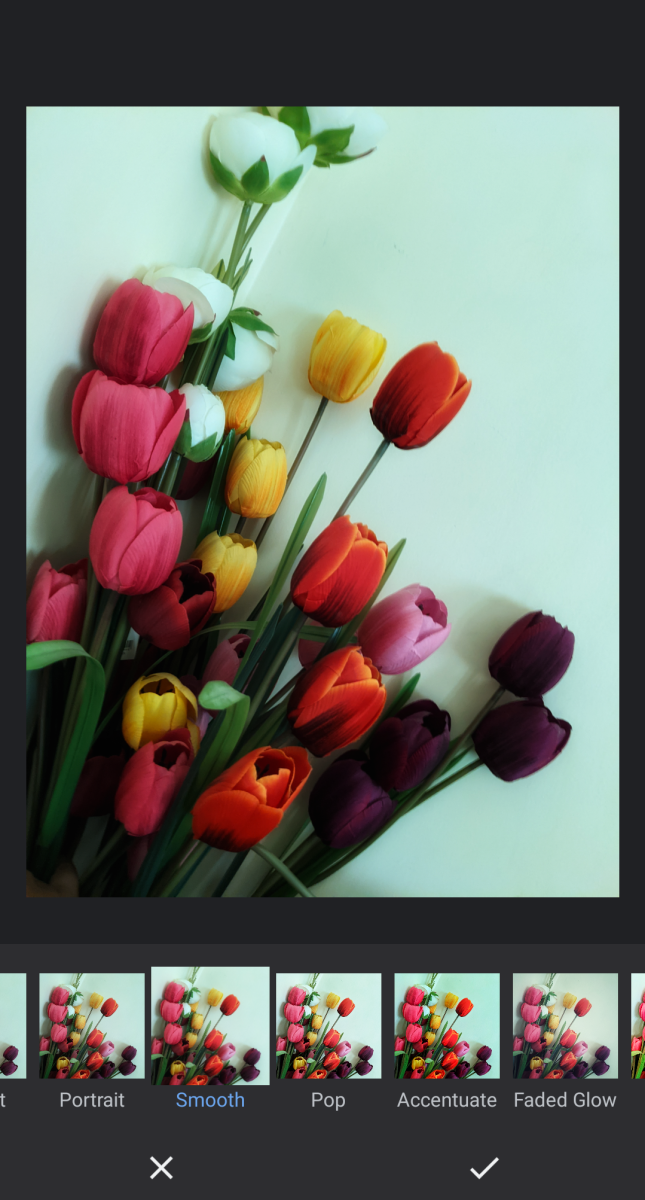
Step 3: Apply the ‘Smooth’ Filter
As you can see, the shadows are deepened and there is more depth to the image. The application of the filter is simple enough: just press the ’tick’ icon on the bottom right. You can also long-press on the photo to see the before and after image instantly.
What I absolutely love about the ‘Smooth’ filter is that I can increase the depth of any plain image instantly, and most of the time, I find myself using this filter for all kinds of edits.
Make Sure Your Screen Is Bright
I would suggest that whenever you do any photo edits, you keep your screen brightness to the maximum and also switch off any blue light filter if you have any. This is especially helpful for black and white images as you need to see the subtle changes in the shadows and highlights that each filter is going to produce.
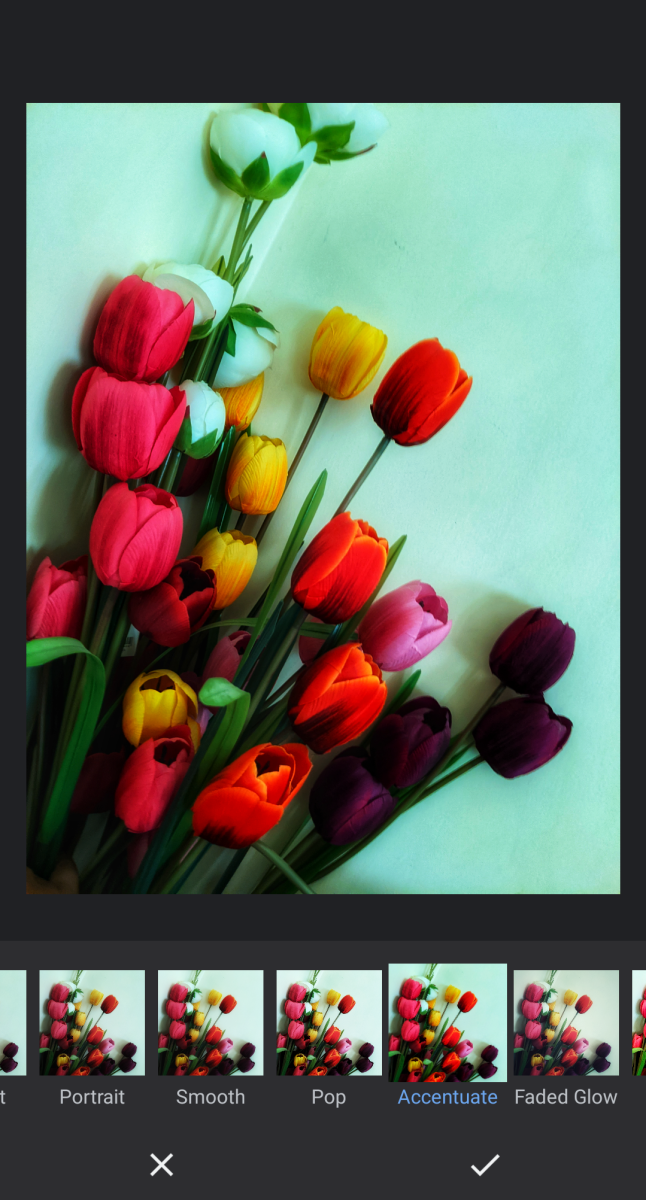
Step 4: Apply the ‘Accentuate’ Filter
In the previous filter, we focused on the shadows, and here we are focusing on the highlights. For black and white images, what I have found works best—at least for me—is to focus more on the Shadows than the Highlights, but at the same time, we need to tweak them a bit so that we can get a good contrast going and thus increase the overall depth of the image.
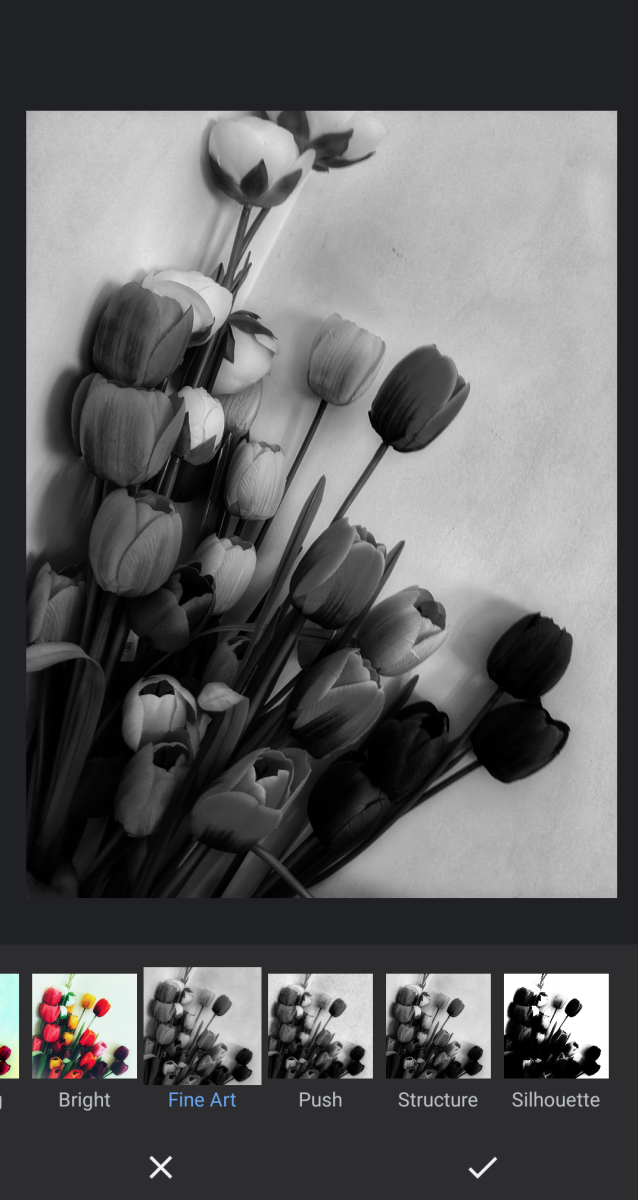
Step 5: Apply the ‘Fine Art’ filter Three Times
We are now going to the in-built black and white filters in the Snapseed app. What I absolutely adore about this particular filter is that it does a lot of major tweaking at the same time. There is, of course, the desaturation (pulling the colours to essentially make it greyscale), it also deepens the shadows further and at the same time adds a bit of grain to the image as well. For this photo, I have applied this filter three times, because it wanted to increase the grain and deepen the shadows in small increments so that if I did not like anything, it would be relatively easy for me to change them to my liking. You can obviously try the other filters as well depending on the feel that you are going for with your picture.
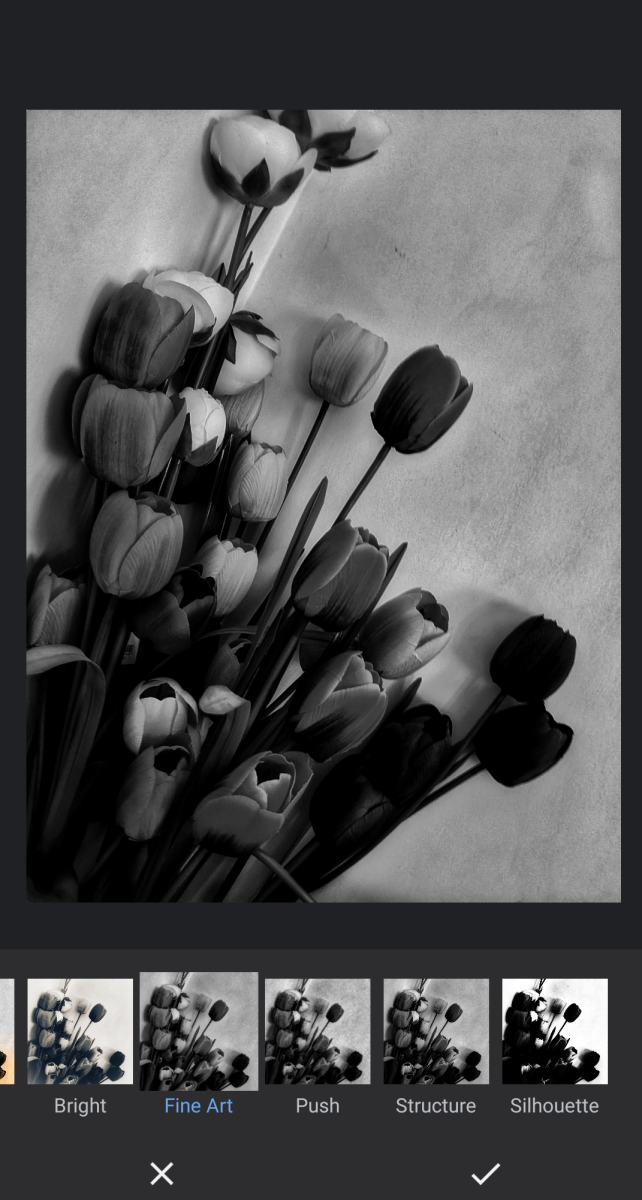
Turn Everyday Household Items Into Something Magical
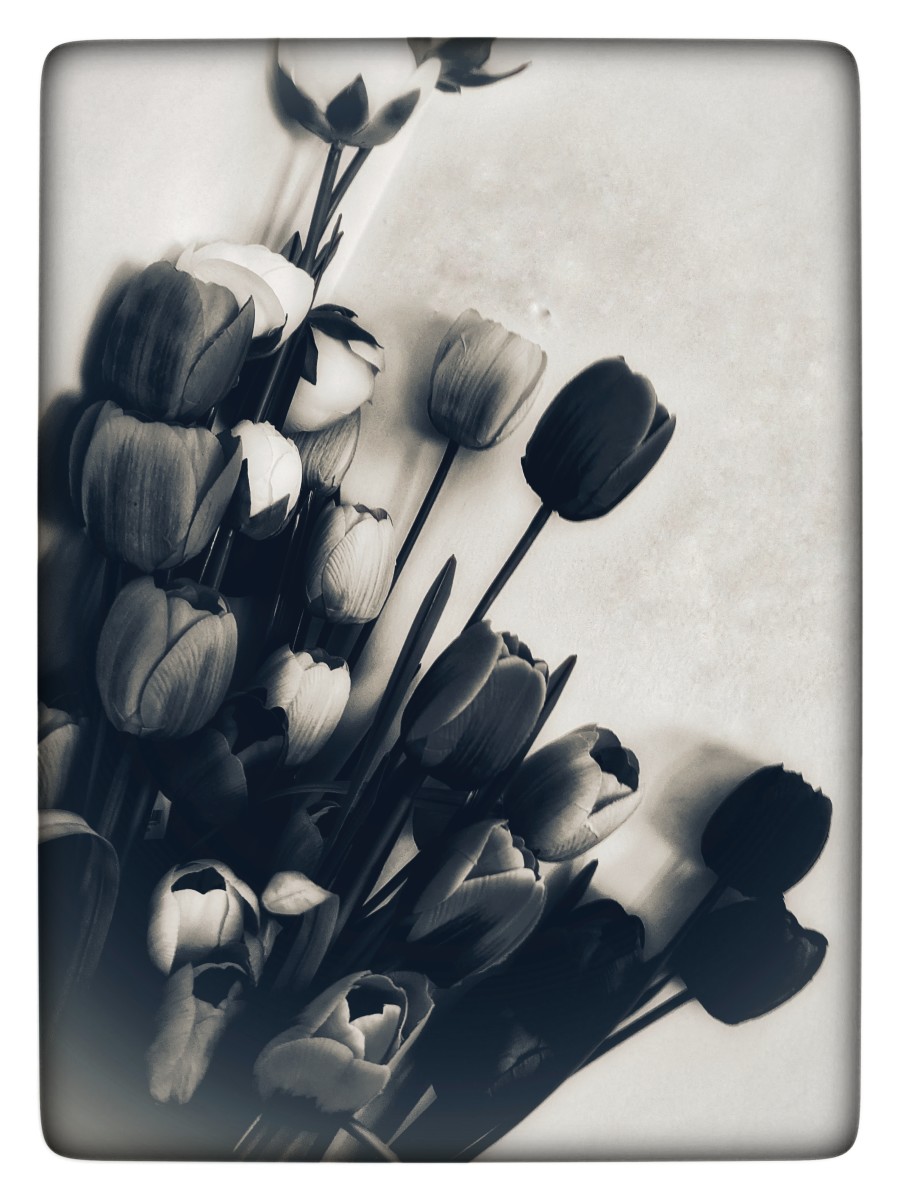
Grain is not for every image, but when your base image is a random photo from your camera of household items, I have found that this feature allows me to get a more gritty quality to it, which in turn allows me to later edit it to look more like old photos for the nostalgia, or to a fantasy setting without a lot of technology. This is a personal opinion, but a lot of pictures of household items hold great potential to be turned into otherworldly images especially if you try to go for ’the ancient texts’ vibe. As you can clearly see, the current image has a completely different feel from the original image. In fact, go back and check the original photo to understand the changes.
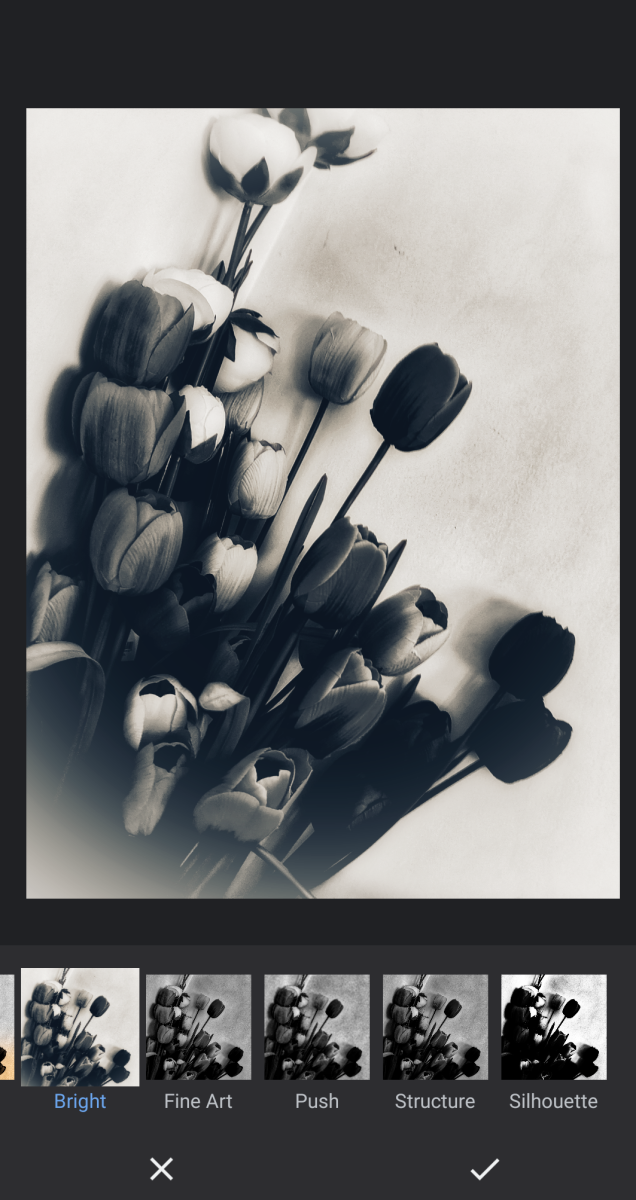
Step 6: Apply the ‘Bright’ Filter
I like this filter as it instantly gives an ethereal feel to the whole image. This effect can also be enhanced by increasing the vignette size and changing the contrast setting a bit but for this image, I like the end results with just this one filter.
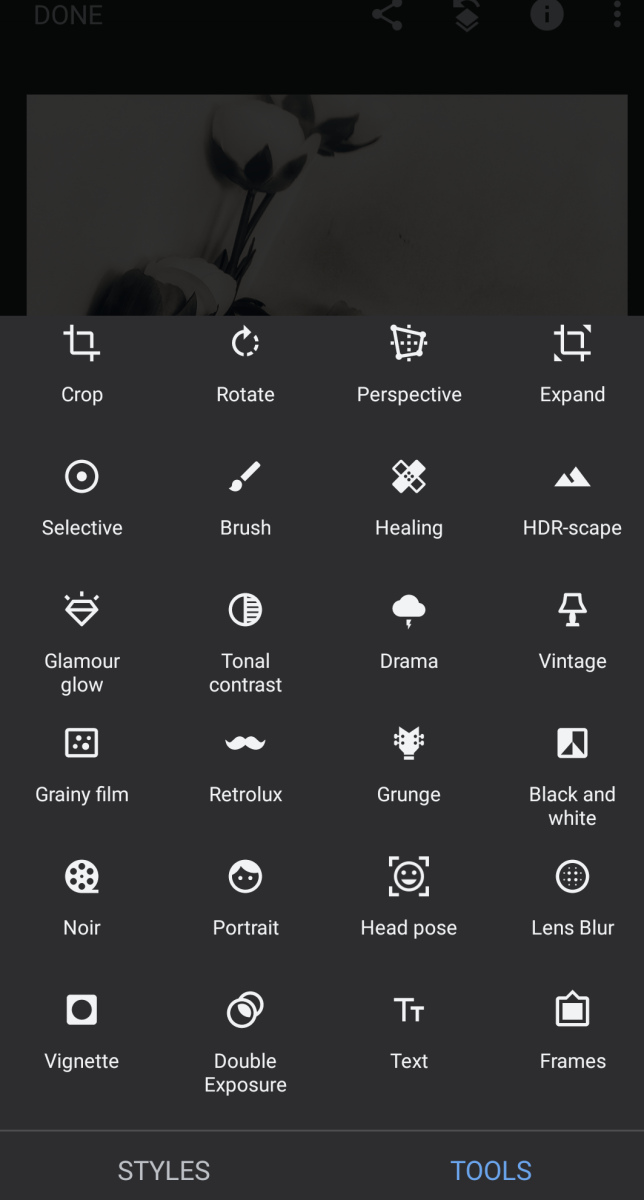
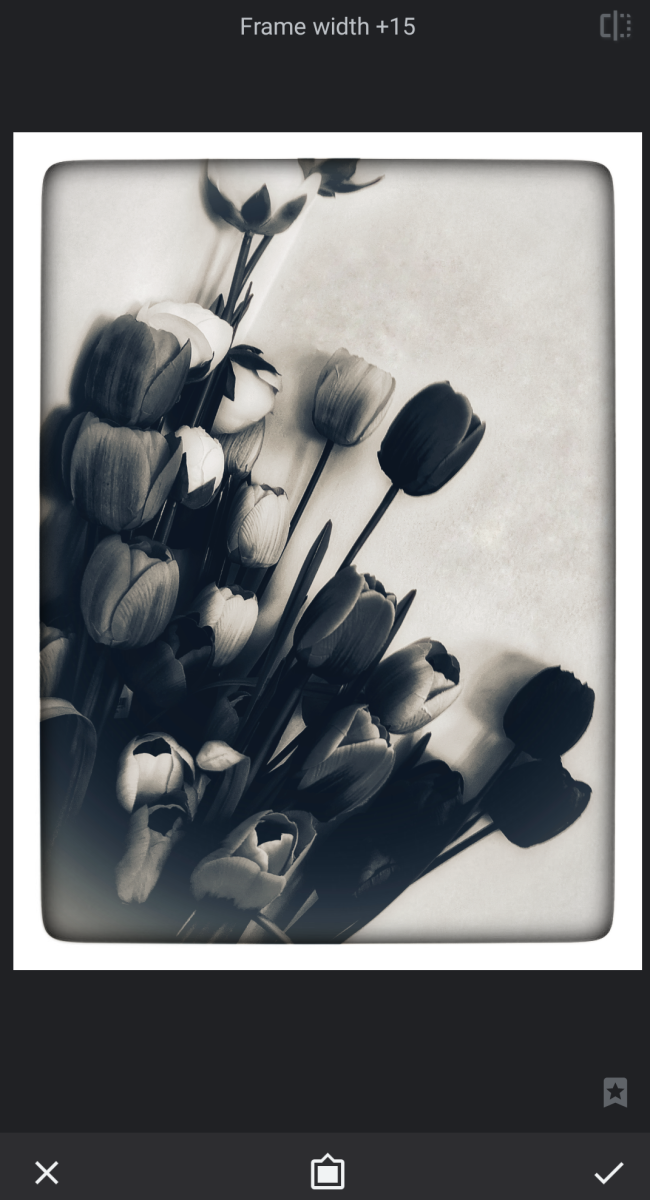
Step 7: Apply a Border Using the ‘Frame’ Tool
You will find the Frame option at the end of the Tools menu. This is essential to create borders for your photos. But they do have a few options of custom borders which I have found are great for different art styles that I sometimes go for. For this photo, I will be choosing frame design number five at a strength of +15. You can try out other frames to better suit your image and play with the strength so that you are satisfied. We are done with the editing! Now, for the most important step!
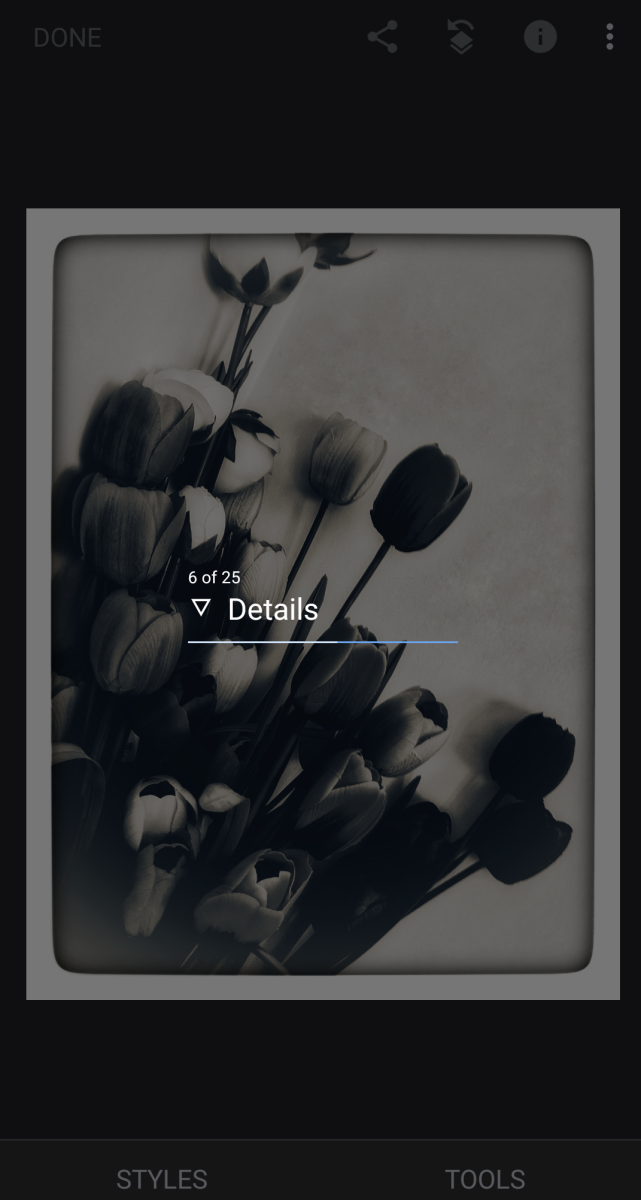
Step 8: Save the Photo
All you have to do is press the ‘Done’ button at the top of the screen. As you can see in the above image, changes were made to 25 different settings to get our final image. But for us, it was simply a matter of applying four filters in a certain order and the AI does the rest of the work for us. And now, you have your final image!
You Can Create Any Kind of Feeling in Your Photos
The beauty of photo editing is that you can create a story or look or feel out of any photo that you have, and you do not even need fancy software to accomplish greatness. The trick I have found is to be consistent and trying different styles so that you can find the one that you can truly identify with. But I would not advise sticking to the style that you like indefinitely, as that can stunt your growth as an artist. You need to dabble with other styles, even check out other photo editors and the various filters and built-in styles that they offer. There are a lot of free resources available on the internet provided to us by great and talented people, and it is our duty to use them and bring attention to them so that no artist is limited in their endeavours by something as fickle as money. This content is accurate and true to the best of the author’s knowledge and is not meant to substitute for formal and individualized advice from a qualified professional.
- What are the different types of free editing software that you love?
- Was this tutorial helpful for you? © 2021 Sanjana Mahanta